The Nikon D5100 was released in the year 2011 and I have had it for years. It’s lasted far longer than all of my relationships — and has provided a lot more fun.
Continue reading “My Favorite Camera is Nearly 13 Years Old”Category: Beginners
How to do Event Photography
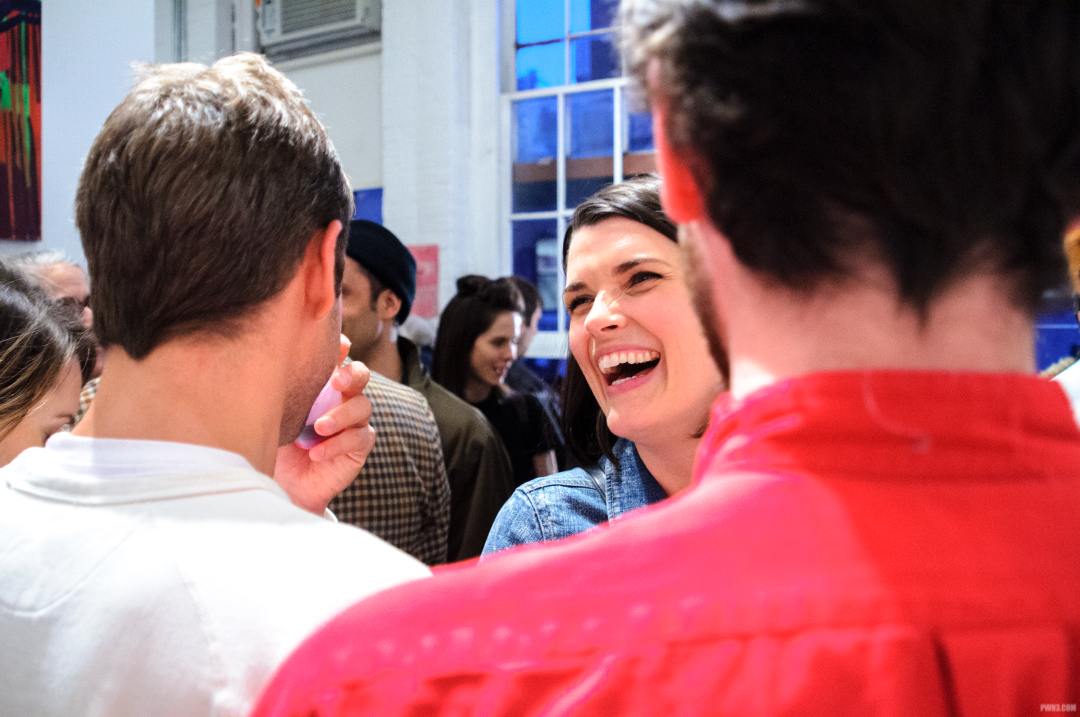
Event photography isn’t easy. Successfully photographing an event will usually involve hours of work. You’ll be standing on your feet for a long time, and carrying heavy camera gear, all while surrounded by a sea of people. You’ll have to compose shots quickly, and if a special or unique moment happens, you will never get a second chance to capture it, so you must be alert at all times.
But event photography can be a lot of fun, and a challenge to your skills and creativity. It’s also extremely rewarding when your photos become beloved and cherished mementos of the client and their guests that they share with everyone.
Here are my personal tips and observations from photographing events for many years. In this article we will be focusing on indoor events.
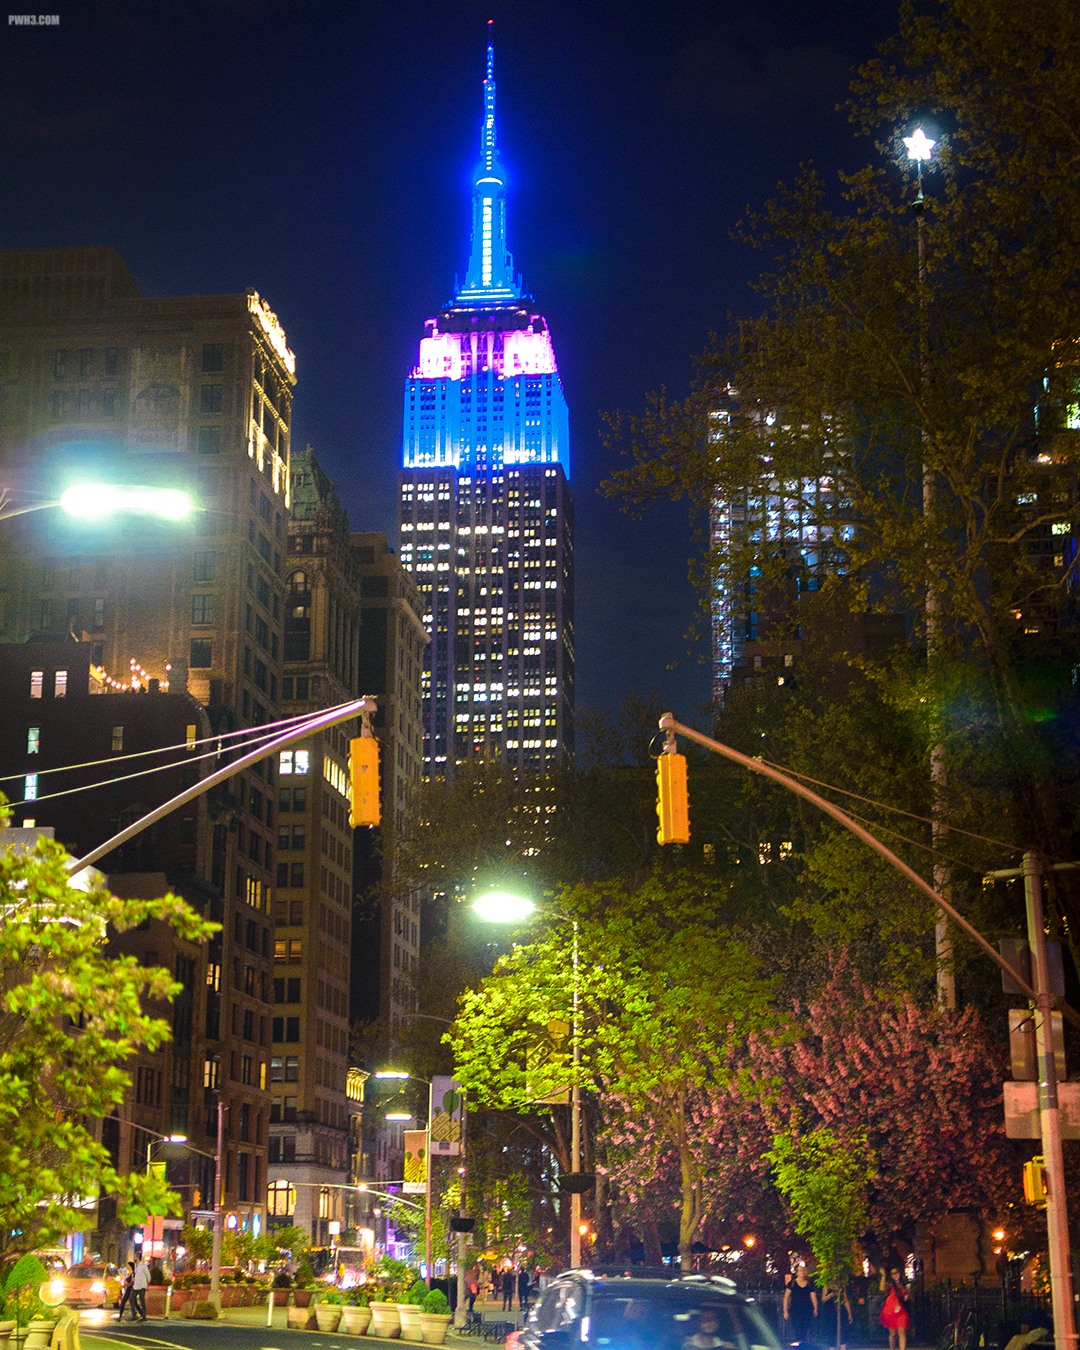
Continue reading “How to do Event Photography”Want to Photograph NYC? Bring Your Wide-Angle Lens
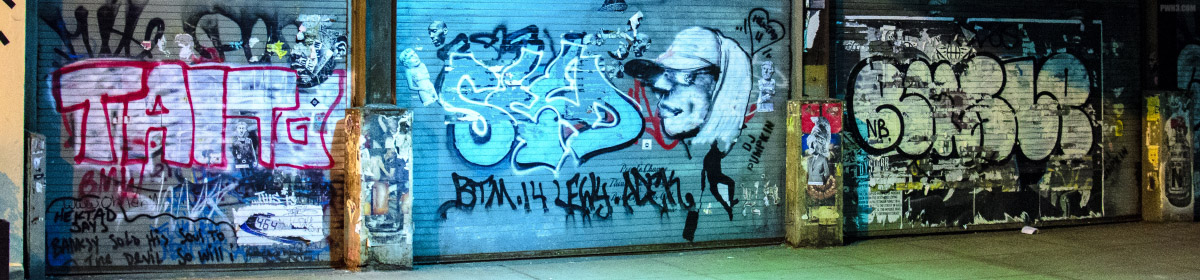
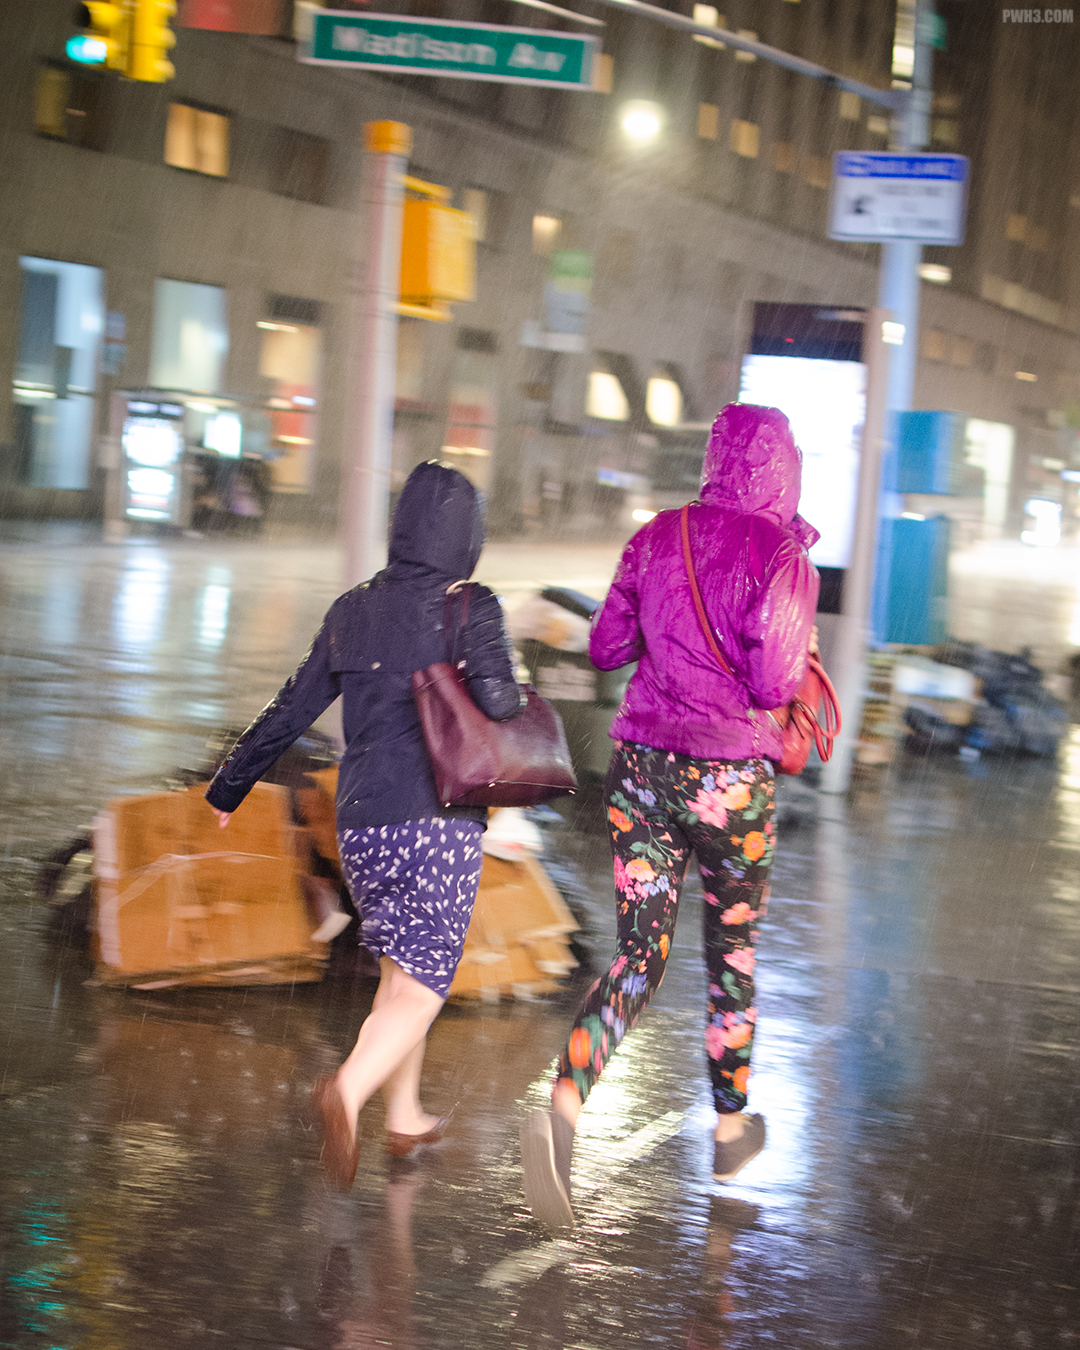
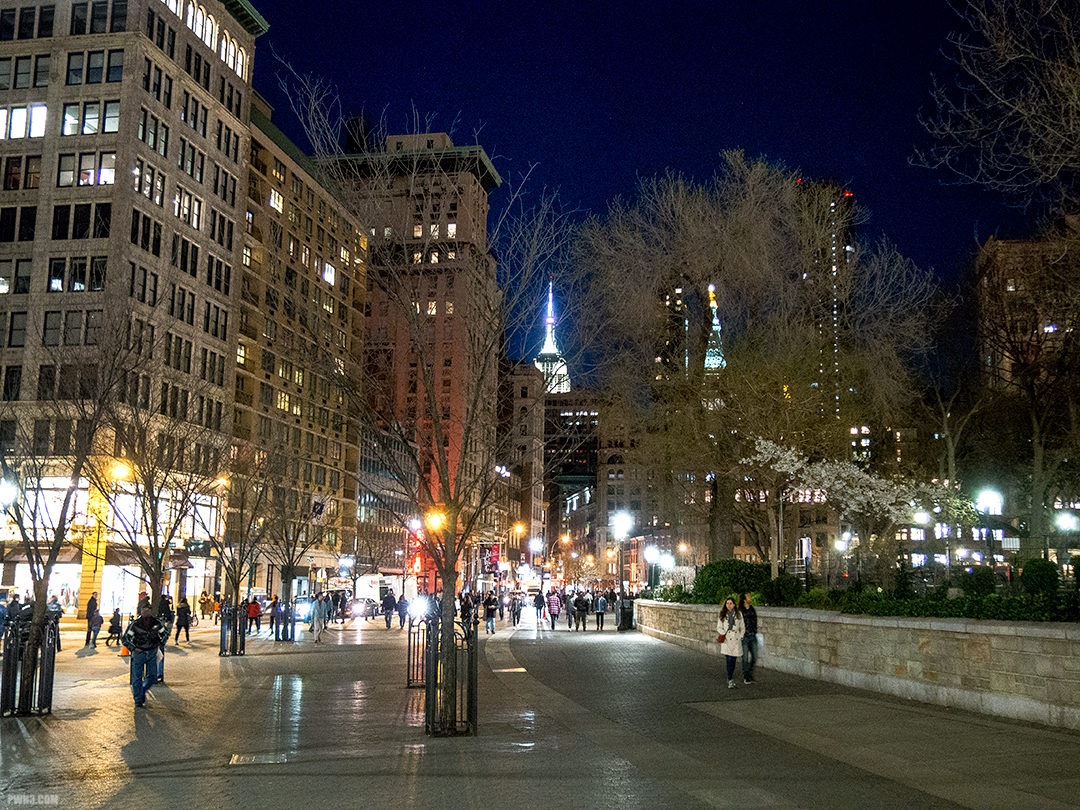
Photographing New York City presents unique challenges. As a photographer, you will have to contend with both cramped spaces indoors (such as inside bars, restaurants and the subway) and incredibly tall buildings outdoors.
The best way to deal with these disparate photographic challenges is to simply use a wide-angle lens all the time.
For our purposes, “wide-angle” means any field of view that is 35mm or wider. The 35mm field of view is great for capturing the city. 24mm is even better. My personal favorite field of view sits in between these two at 28mm.
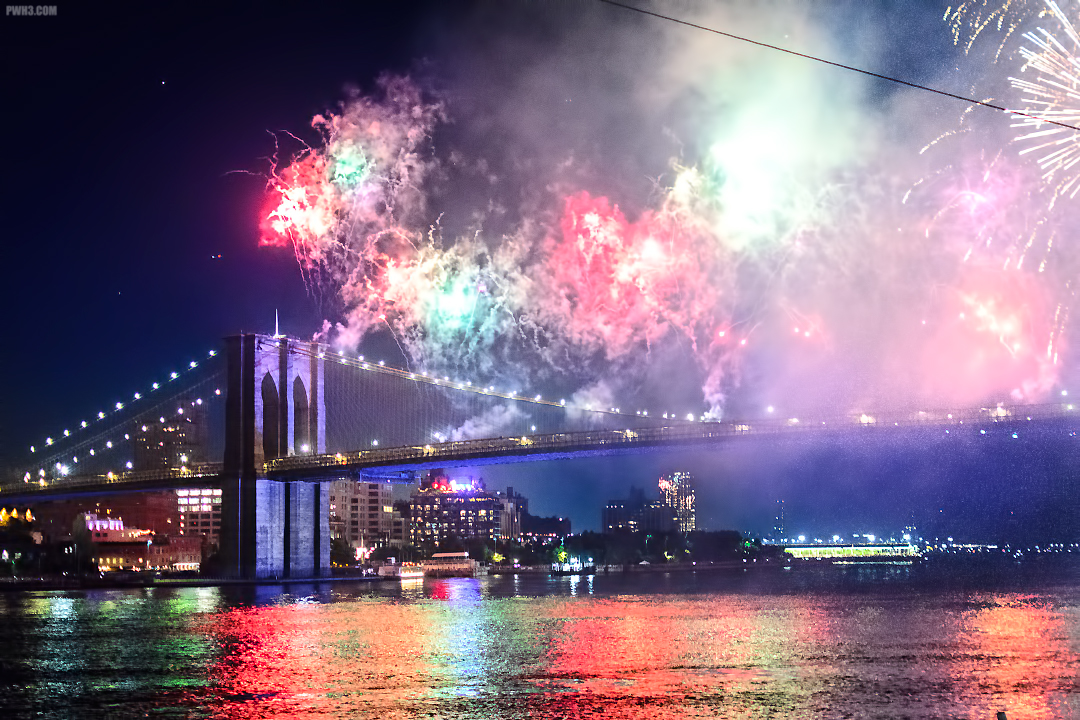
Continue reading “Want to Photograph NYC? Bring Your Wide-Angle Lens”Quick Tip For Photographing Stunning Sunset or Sunrise Skies
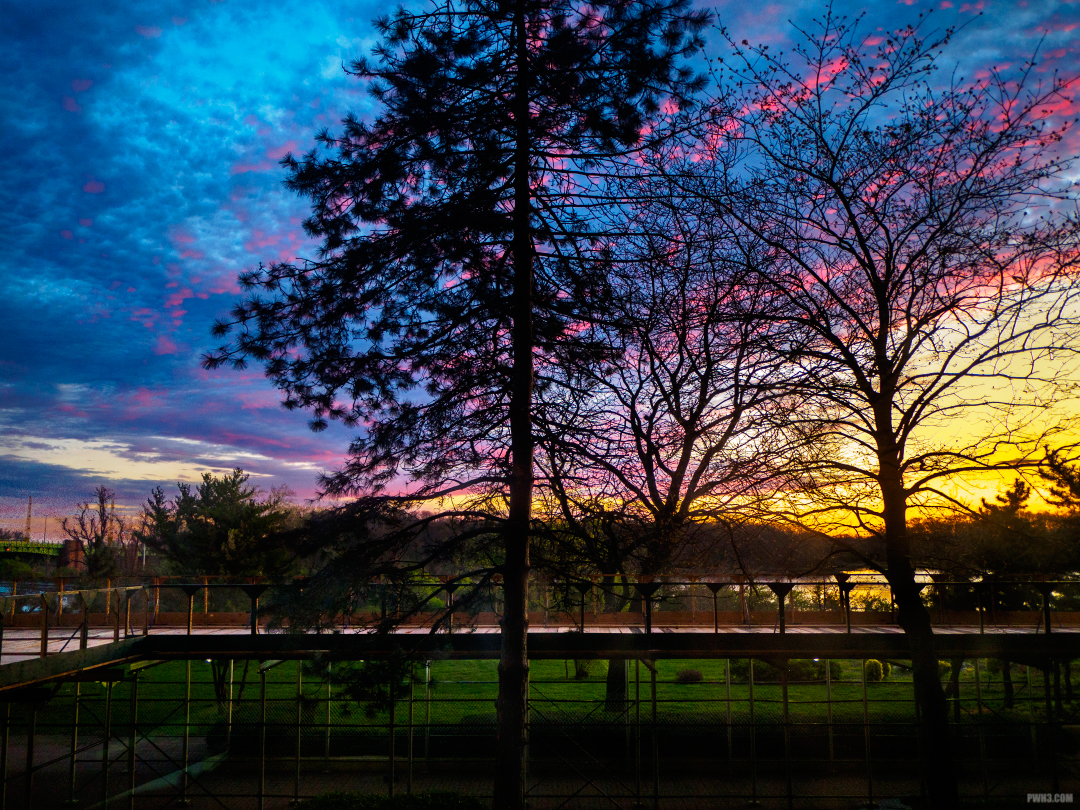
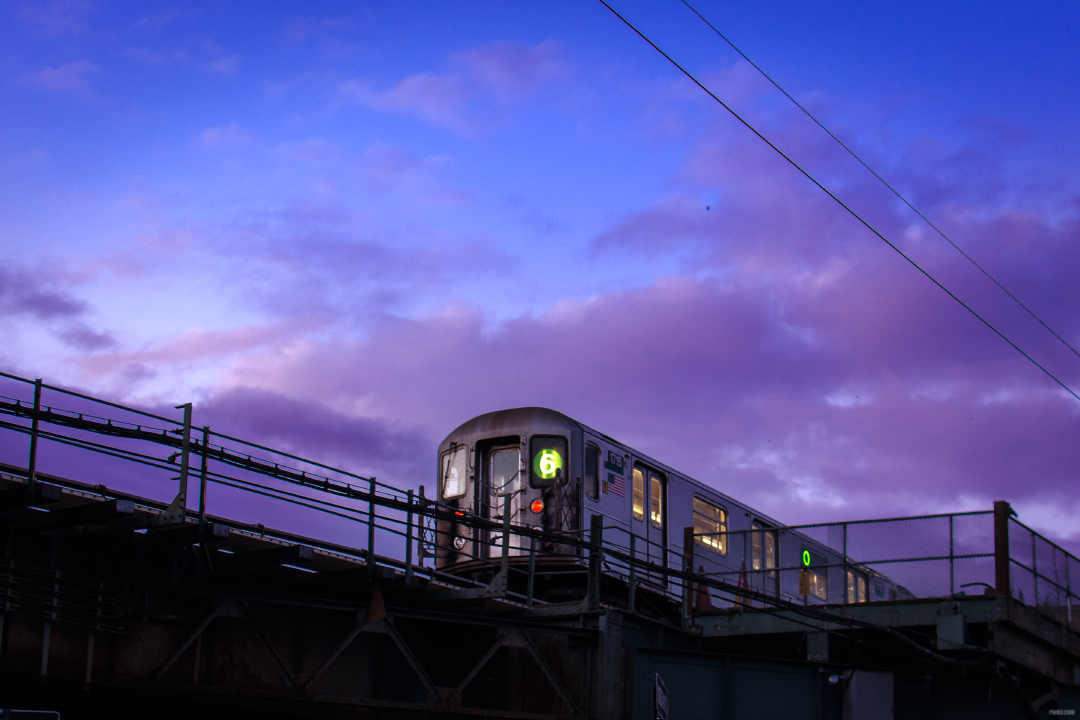
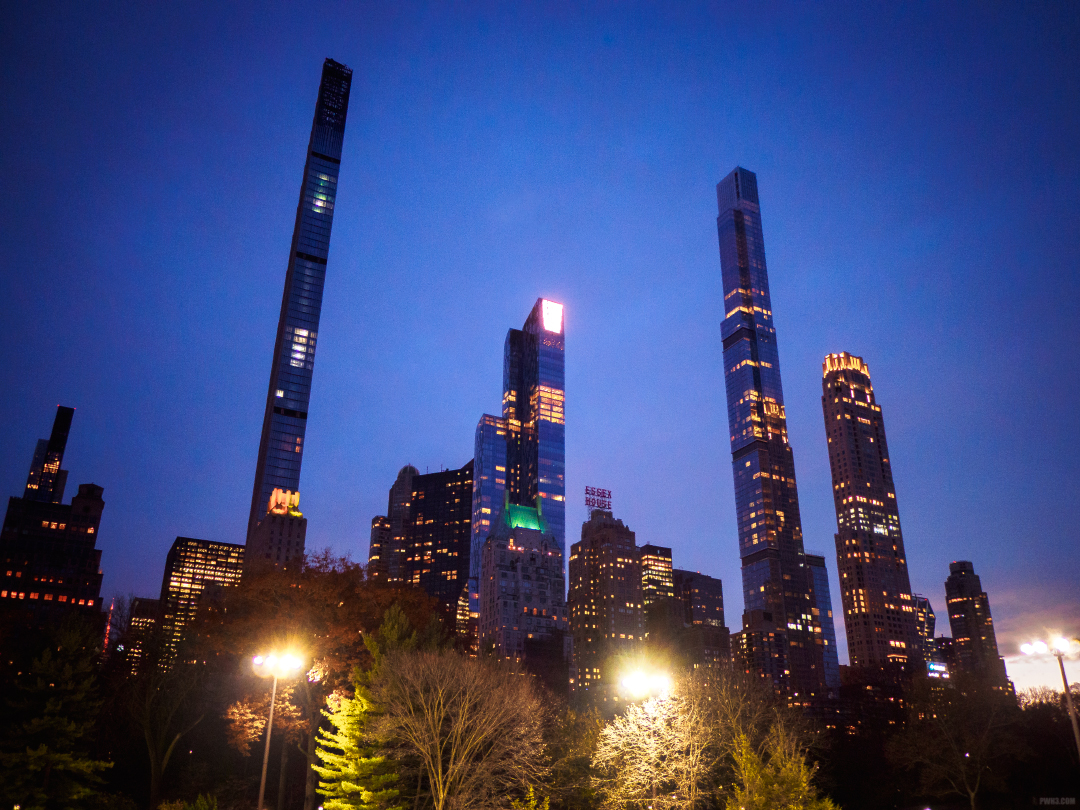
Many beginner photographers struggle with the issue of capturing detail in the sky. Whether it’s a sunrise, a sunset, or just an interesting cloud pattern that you want to capture, many times you will point your camera at the heavens and just end up with a bland, white sky.
The reason this is happening is because your camera is exposing the shot for the whole scene and not just the sky. Your camera wants to give you an evenly exposed photograph where everything is balanced. Usually this means that the camera will try to overexpose your shot to capture detail in the darker parts of your photo such as any ground, trees or buildings that may be included in the frame. Because of this, the sky in your shot will often be overexposed or “blown out”.
To fix this problem, what you need to do is force your camera to expose for the sky and only the sky. You can do that with exposure compensation.
Continue reading “Quick Tip For Photographing Stunning Sunset or Sunrise Skies”Beginner Question – What is “Bokeh”?
Let’s cut to the chase – you wanted a “real camera” (which for most people means a DSLR) because you wanted to take photos with a blurry background. You were tired of your cell phone images where everything was flat and in focus, and you wanted to produce gorgeous images where your subject was sharp but the background was blurred.
You might have heard the term “bokeh” used alongside images with a blurred background. On Instagram, photos with a blurred background often have tags such as #bokeh or #bokehlicious on them.
But what exactly does “bokeh” mean?
Continue reading “Beginner Question – What is “Bokeh”?”RAW Photo Editing For Total Beginners
Many new photographers find the idea of shooting in RAW to be intimidating because RAW files must be edited. Without editing, RAW photos usually look flat and dull since no post-processing has been applied to them by the camera. This is quite different from JPEGs, which always have color correction applied to them.
This guide is aimed at beginners. Follow these tips and you’ll be able to get great results from your RAW files in just a few minutes.
I always recommend shooting in RAW. The RAW files contain much more information than JPEGs, and give you more leeway when editing. You can brighten an image or correct the colors much more easily in RAW, without degrading the quality.
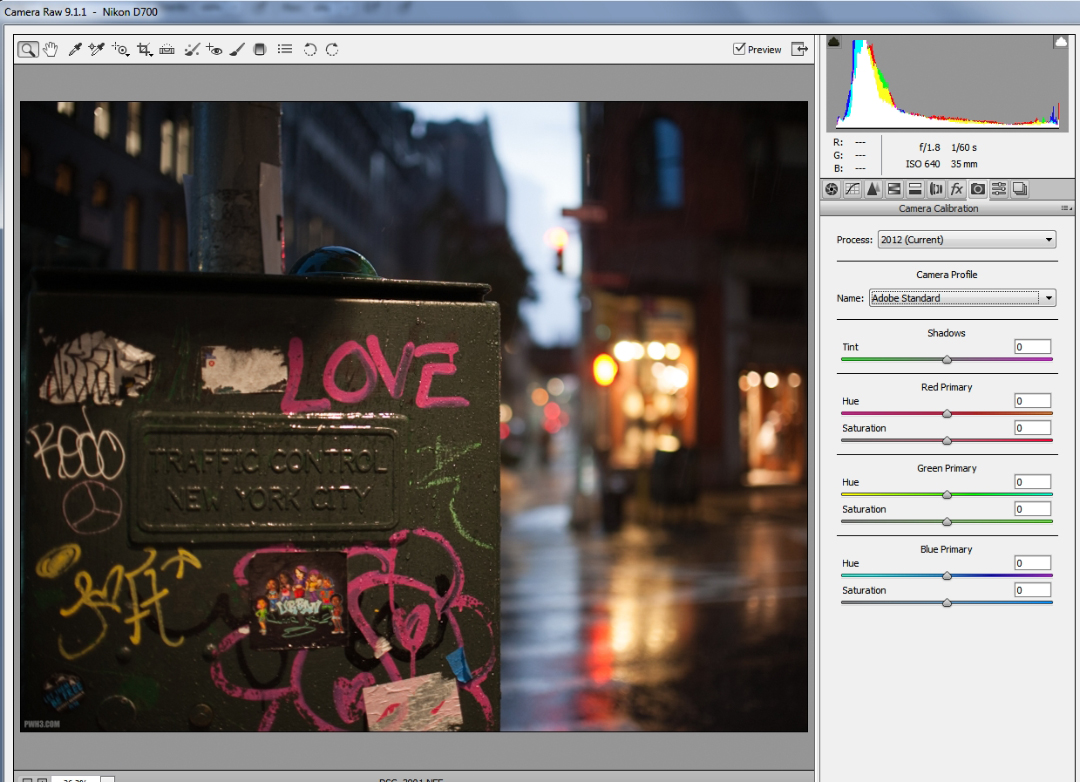
My simple technique here works with any RAW file from any camera. It doesn’t matter if you’re shooting RAW with a Micro Four Thirds camera, an APS-C camera or a full-frame camera. These are the basic steps I use to process all my RAW images, regardless of the camera.
In this example I am using Adobe Camera RAW inside Photoshop, but this will also work with Adobe Lightroom since the menus are basically the same. Any version of Photoshop or Lightroom will do.
Continue reading “RAW Photo Editing For Total Beginners”Tips for Photographing a Political Rally or March

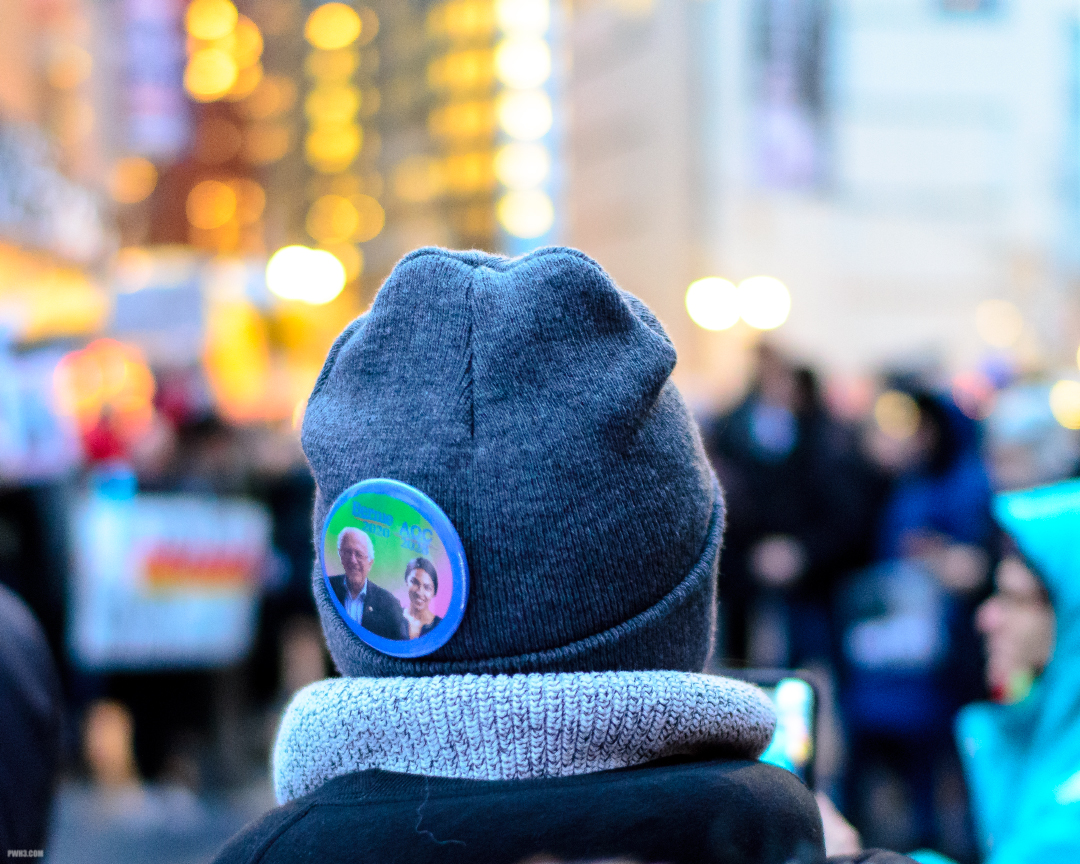
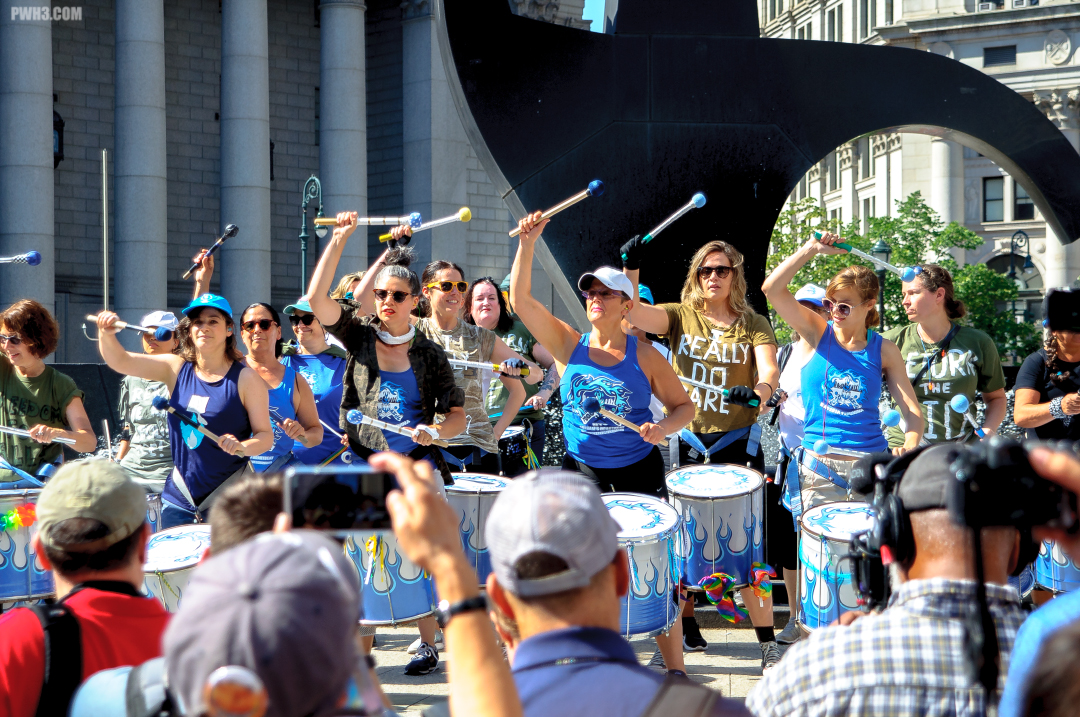
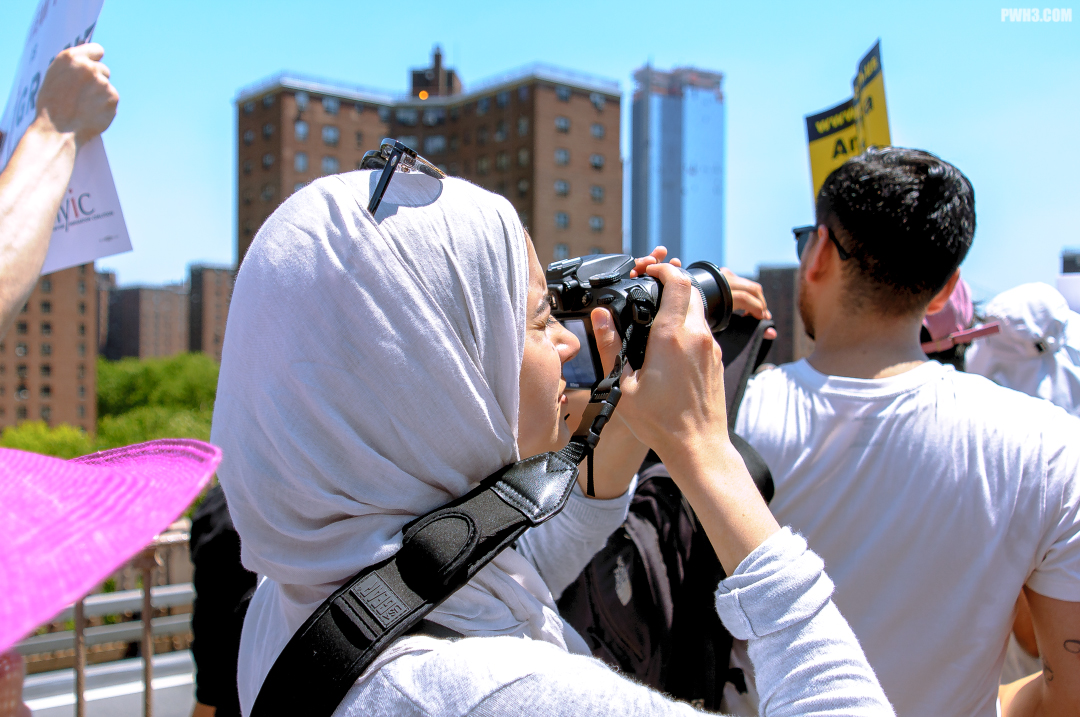
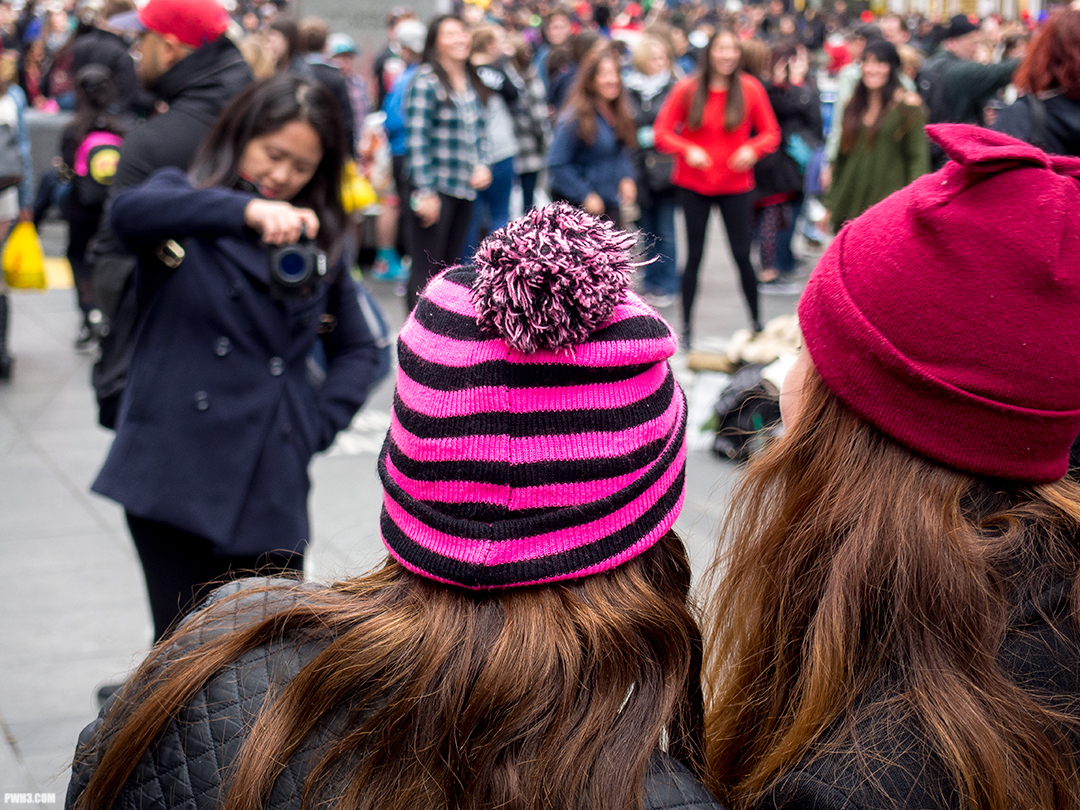
Photographing a political rally or political march can be both exciting and exhausting. In order to properly capture the event, you’ll essentially have to be a participant: you’ll assemble where the protestors assemble, listen to the speakers of the event, and go where the march goes. Here are some of my tips for covering a political march.
Get to the Staging Area Early
Try to show up about an hour before the event begins. There won’t be many people around aside from the organizers and the police setting up barricades. Introduce yourself and talk to the event organizers or event marshals if you can. They are usually helpful and can give you specific information about what is planned, the route, how many people they expect, what happens after the event is over and any last-minute changes to any of the above. They may even offer you a temporary press pass or “behind the scenes” access, depending on how large and serious the event is.
Wear Comfortable Shoes
You will be on your feet all day long. If it’s a march, you’ll have to walk with the protestors in order to capture everything. In almost every case, you’ll be walking on the streets, on concrete and pavement, and you’ll be moving around a lot in order to get the shots you need. Comfortable shoes will keep your feet from getting sore. I actually bought a pair of sneakers just for these types of events.
Be Prepared to Deal With the Weather
If it’s going to be a hot summer day, don’t forget to apply lots of sunblock, wear loose & lightweight clothing, and wear a hat. You will be out in the hot sun for several hours. If the event takes place in the winter, be sure to wear clothing that’s warm enough without being so bulky that you’re physically limited. No matter what the season, always bring water or a sports drink. You may not realize how dehydrated you can become while walking, moving around and shooting for hours, even in cold weather.

Ask People to Pose For You
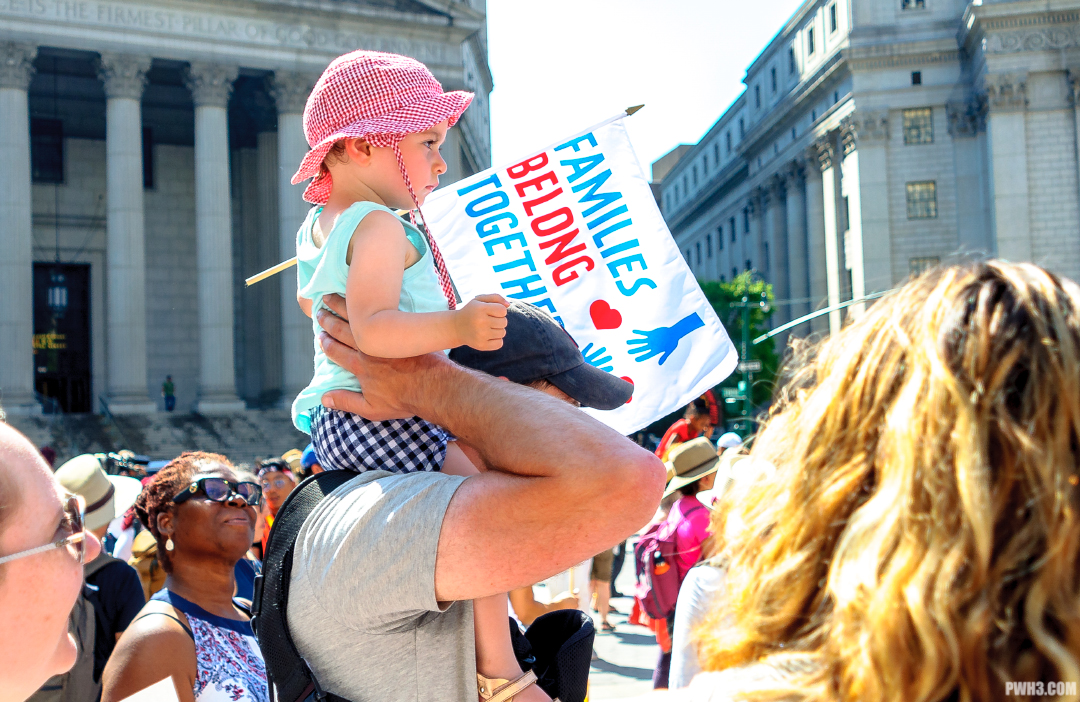
The point of a political march or rally is to be seen and have one’s voice heard. People are usually more than happy to have their photo taken. While candid shots are great and should make up the bulk of your photos, a few posed shots can really help to capture the feel of the event and humanize it.
Look Out For Any Trouble
A political issue that inspires people so much that they assemble to rally and march will probably bring out a lot of emotion in them while they’re on the streets. Sometimes these emotions can get out of control. As a photographer, you’re there to capture what happens, but be sure to keep yourself (and your gear) safe. If someone seems a bit too aggressive for your tastes, quietly move away from them. In addition, some marches tend to bring out opposition protestors, which can lead to open conflict. Be cautious of situations like this, since they can spiral out of control quickly. If anyone is causing real trouble (such as threatening violence or throwing objects) tell an event marshal or a police officer.

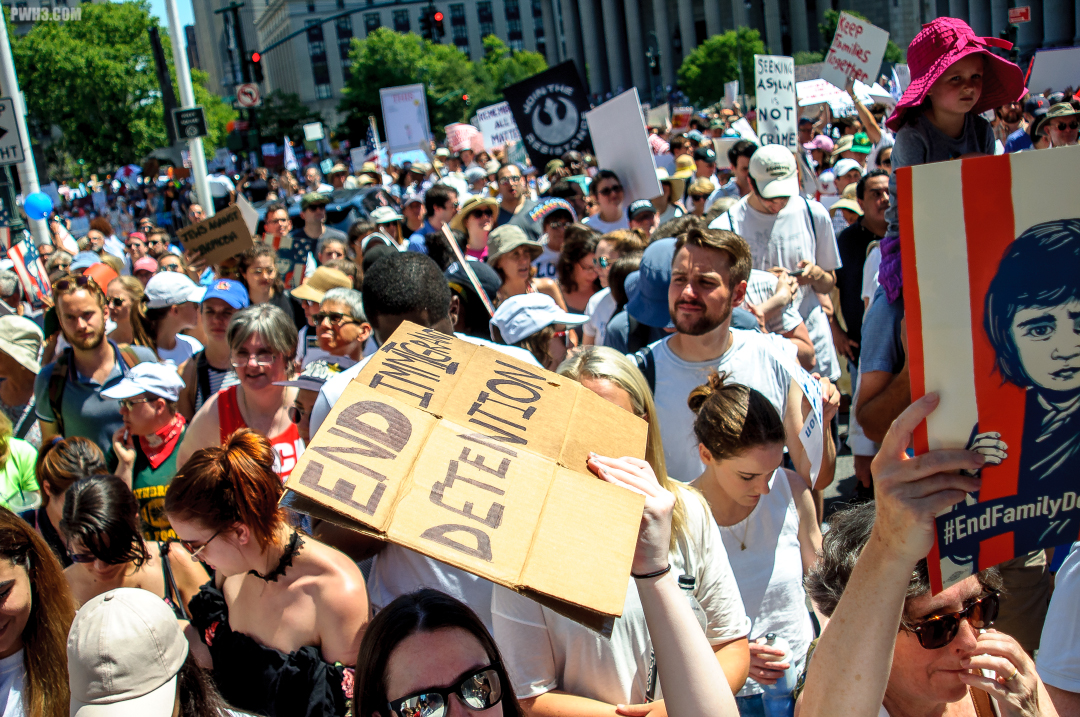
Be Prepared to Be Jostled Around
You’ll be among a large crowd with active and fired up people, so it can’t be helped if people accidentally bump into you, step on your feet, or knock into you from behind (and you might be guilty of accidentally doing it too!) It’s nothing personal and not a big deal. Just be mindful of your photography equipment so it doesn’t get damaged. Keep your camera close to your body and don’t let it swing around.
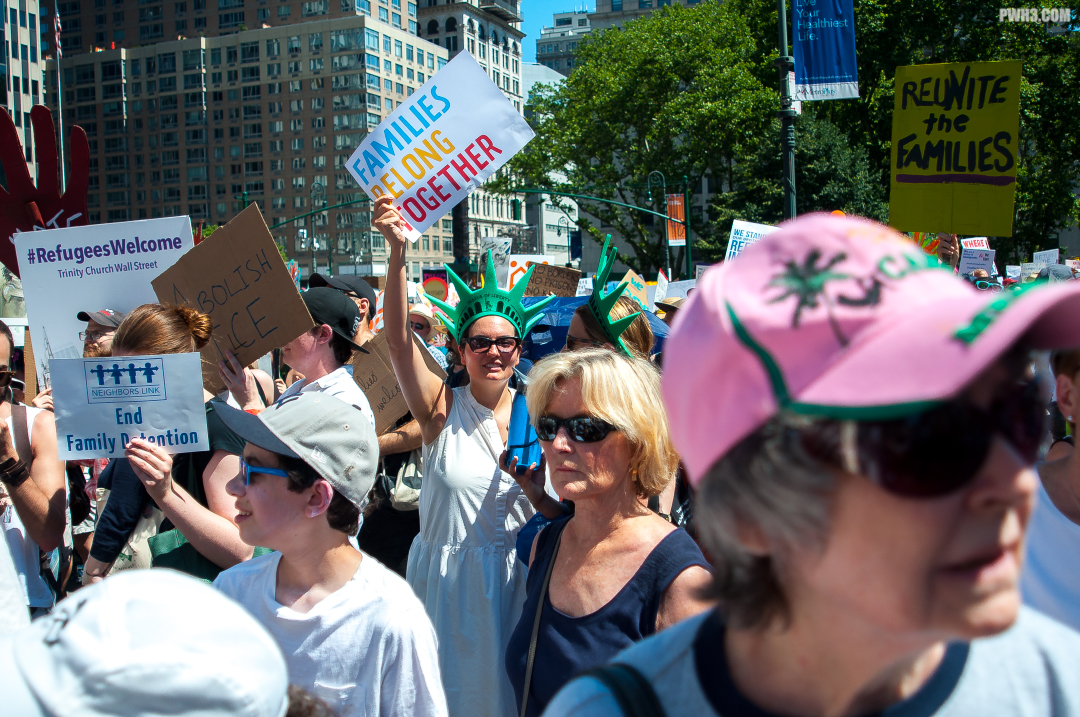
Use a Zoom Lens
This is one of the few times you’ll hear me say not to bother with prime lenses. Instead, use a zoom with a good range (24mm to 120mm is my favorite). You’ll often need to go from wide to close-up very quickly, and because of the crowd you may not always be in the position to get the shot you want. You will often be too far away, and the crowd will make it impossible to “zoom with your feet” with a prime lens. You also won’t need to worry about how bright the aperture is; these events always start in the morning and typically finish by late afternoon.
These are my tips for photographing a political march or a rally. If you have a question or any other tips, feel free to leave a comment below or contact me on Instagram.
All photos in this article were taken with a Nikon D90 and an old Nikkor 24-120mm f3.5-5.6D Streetsweeper lens from the year 1996 (my favorite Nikon lens of all time).
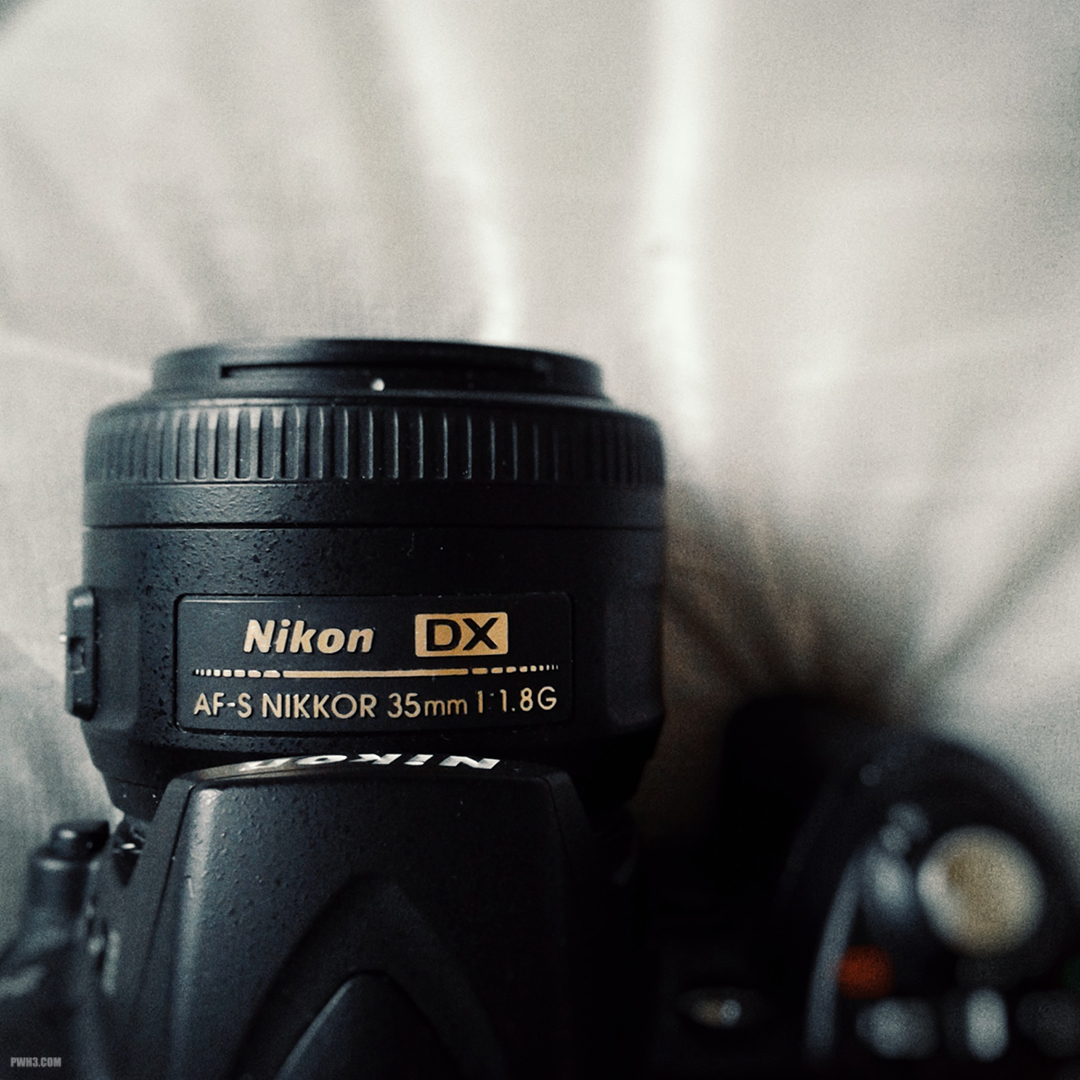
The Nikon 35mm F1.8G DX is a Must-Have Lens for a Beginner
A previous article I wrote talked about how to get started in photography without spending a bunch of money on gear. I’d like to focus on the lens I recommended in that article — the Nikon 35mm f1.8G DX.
Classic Field of View
Most beginning photographers will have a crop-sensor camera, such as the Nikon D3300 that I recommended in the article. Without getting crazy technical here, using a crop-sensor camera always means that the millimeter number on the lens (in this case 35mm) is multiplied by 1.5. That means that this lens will give you the rough equivalent of a classic 50mm field of view.
Sharp, Light and Small
The Nikon 35mm is a lightweight lens. It’s perfect for carrying around all day long and using in a variety of situations. It’s useful for photos of people, close-up shots of objects, and even landscapes. The lens is very sharp and delivers images with quite a bit of detail.
Keep in mind that the lens is a prime lens with a fixed focal length – meaning that you can’t zoom with it. If you need to get closer to your subject, you’ll have to actually walk towards it!
Cheap and Popular
The lens is also inexpensive. Brand new, it shouldn’t cost you more than $200 from any major internet camera retailer.
Even better, this lens is so popular that one of your Nikon-shooting friends probably owns one, and may let you try it out – at least for a few shots.
Good for Low Light and Night Shooting
The f-number of a lens tells you how much light the lens lets in, or how “bright” it is. Once again, I won’t get too technical here, but the lower the f-number, the better a lens will perform in low light situations or at night. This lens has an f-number of 1.8, which is a very low number (for comparison, a typical zoom lens has an f-number of 3.5, which is why most zoom lenses are not so good for low-light shooting).
What this all means is you can finally shoot clear, detailed pictures of your friends drinking in dimly-lit bars, or capture scenes on the streets at night that don’t look dark and grainy.
Blurred Background
Another great aspect of this lens is the ability to shoot photos with that “blurred background” look that everyone loves and craves. This makes the lens useful for casual portraits, or to isolate a subject that’s in front of a distracting background, such as a busy street.
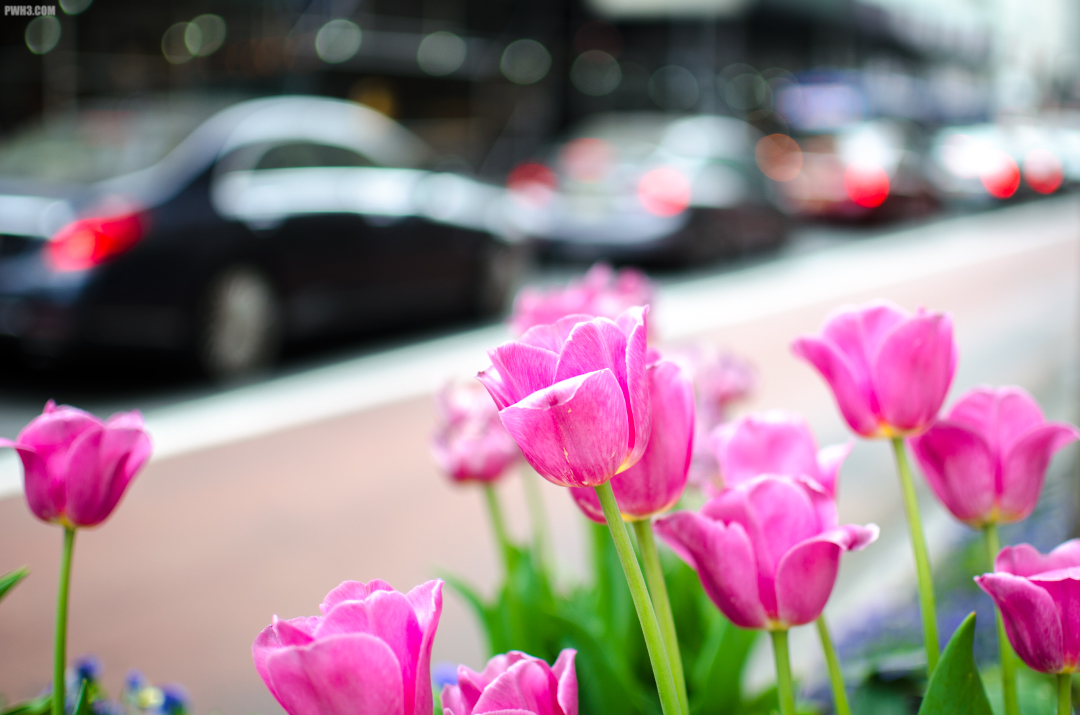
Nikon created a gem with this lens and even more amazing is how inexpensive it is to own. I highly recommend you go buy (or try) the Nikon 35mm f1.8G DX. Do you have this lens and enjoy shooting with it? Or are you a beginner that has more questions about it? Leave a comment below or feel free to message me on Instagram.
All photos in this article were taken with a Nikon D5100 and Nikon 35mm f1.8G DX lens. Except for the photo of the lens itself, which was taken with a Samsung Tablet & Snapseed.
Your Kit Lens Probably Isn’t So Bad After All
The kit lens is the inexpensive zoom lens that comes with a new DSLR or mirrorless camera. Usually it’s made of plastic with a plastic mount. Years ago, kit lenses used to be very badly built and of poor optical quality. I have one old kit lens that was difficult to zoom in and out (it would become hard to turn and even get stuck at certain points). Even worse, it had optical problems, leaving one area of the photo very blurry while the rest of the photo was perfectly sharp. Kit lenses today are both built better and much better optically. Here are more good points about kit lenses:
They Are Cheap
Usually when you buy a new camera, the kit lens is around $100. For that relatively low outlay of cash, you get a lens that probably has very fast autofocus and may even have image stabilization built into it, as is the case with Nikon kit lenses. Due to its low cost, it’s less of a worry bringing it to places where you may not want to risk a more expensive lens.
![]()
They Are Versatile
Because they cover such a big focal range — allowing you to zoom from a wide shot to a close up shot and anything in between — they’re great for a lot of photographic situations. They are especially useful while traveling or at an event.
They Are Lightweight and Small
Since they are small and mostly made from plastic, they are very light compared to more expensive lenses, which will likely be larger and made with metal. Many of the newest kit lenses are also designed to basically retract into themselves, becoming more compact for storage or for stowing in a camera bag.
They Are Sharp & Can Focus Closely
Yes, it’s true. The newer kit lenses are surprisingly sharp with pretty good image quality. I have also found that many can focus very close to the subject, which is useful for photographing objects like toys or food.
Downsides
Sounds great, right? So why would you need any other lens? Well, as good as the kit lens may be, more expensive lenses will still be better optically. There really is a difference there. If you’re a beginner you may not be able to tell, or it may not matter to you right now. Later on in your photographic journey, it might become important.
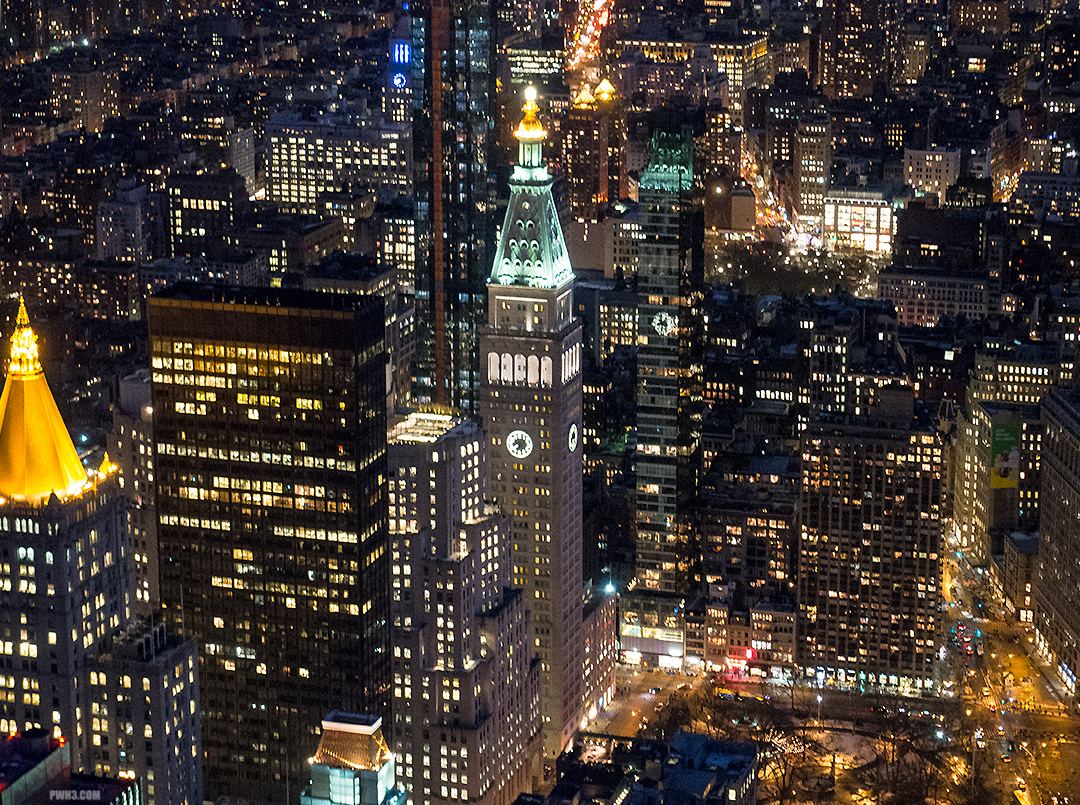
Another downside with kit lenses is that they aren’t the best choice for indoor photography or night photography. However, I have done both of those types of photography with a kit lens — all of the photos in this article were taken with a kit lens, including the night shots.
Finally, every new photographer wants to experiment with that creamy “blurred background” look. While you can achieve it somewhat with a kit lens under the right conditions, it’s not the ideal lens for it.
Don’t worry about any of that right now, though. Go out and shoot with your kit lens. It’s probably a lot better than you think and you will get some great images out of it.
All photos in this story were taken with an Olympus EM-10 and the Olympus 14-42 RII kit lens.
Why You Should Shoot RAW
I always recommend that all photographers, even beginners, shoot RAW instead of JPG. Here are my reasons:
Exposure
It happens: you were in a hurry and underexposed your image. It’s too dark. But RAW files contain so much information when compared to JPG files that you can lift the exposure without degrading the image quality. Depending on the file and camera used, you may be able to increase the exposure by two or three stops without ruining it.
Color Correction
Fixing white balance issues is very simple in RAW, as well as controlling the hue and saturation levels of individual colors. For example, after white balancing the image, if something in your image is still too red or too yellow you can specifically reduce the saturation levels of those colors, without touching the other colors.
Noise Reduction
RAW files have no noise reduction applied, so you can apply your own. We all hate noise, but sometimes when shooting in JPG, the camera will apply too much noise reduction and make fine details like hair or architectural lines look “mushy”. RAW lets you add just the right amount.
Sharpening
As with being able to control the amount of noise reduction applied to the image, you can also control the amount of sharpening. Some JPG settings cause certain images to look oversharpened. In certain situations, such as portrait photography, you may not want any sharpening at all.
Luminance Channels
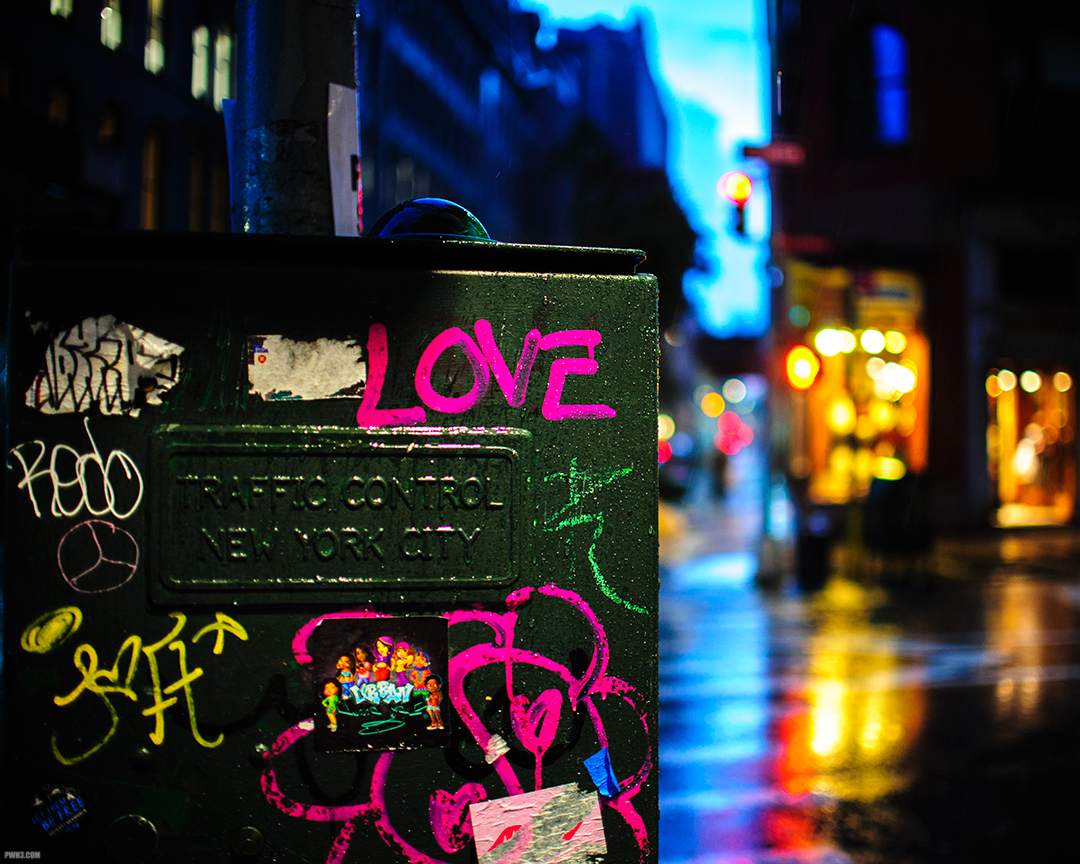
My favorite aspect of working with RAW files, since I shoot a lot of scenes with city lights. You can boost or lower the brightness of certain colors of light. For example, if you want to make the red traffic lights in a street scene stronger while reducing the strength of the headlights of cars, you can do that specifically, without brightening or darkening the other light sources in the image.
Future Software
One last interesting thing about RAW is that the software used to edit RAW photos is often being improved upon by software developers. This means that you can go back to your old RAW files months or even years later and extract even more detail. Try loading that old, underexposed file that doesn’t look so good through a new RAW converter and play around with it. You may be able to pull out something amazing from it. I certainly have been able to. A JPG on the other hand is basically frozen in time.
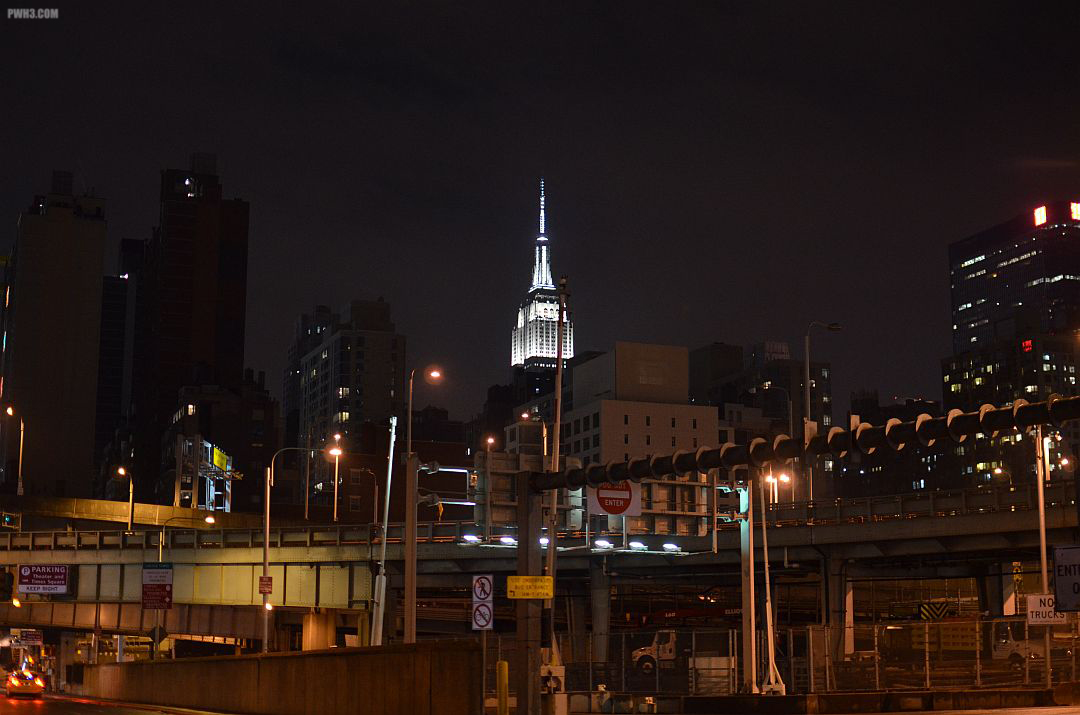
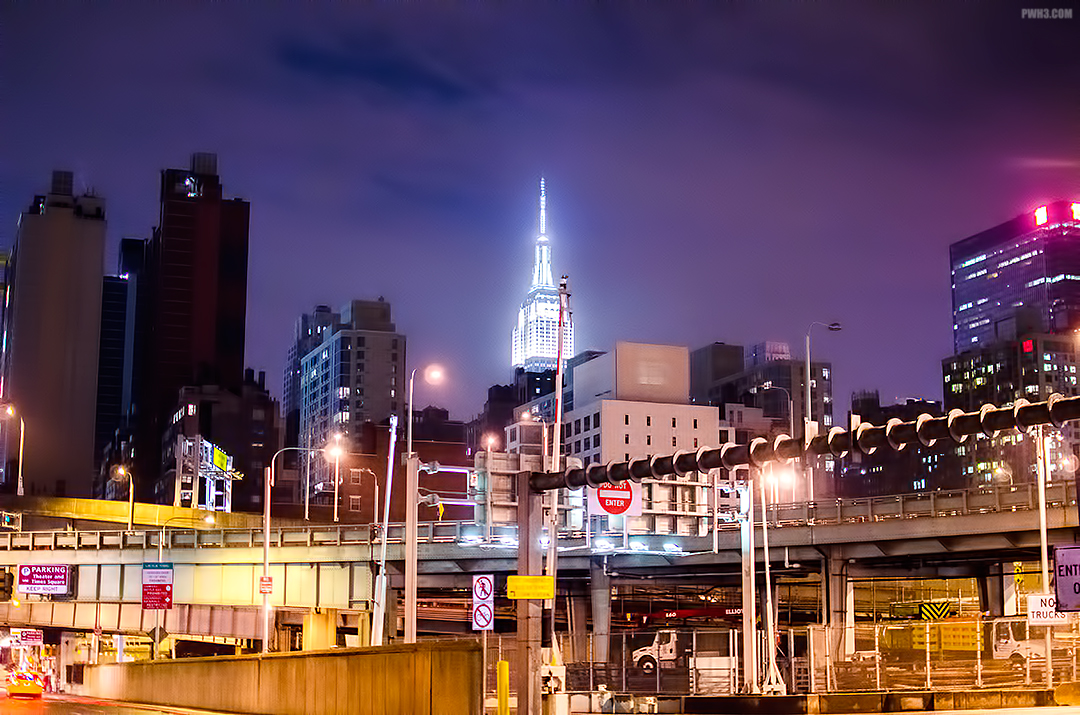
This is the original file of the image at the beginning of this article — the JPG image that is automatically made alongside the RAW file. It’s not bad out of the camera, but editing the RAW version of this image really helped me bring it to a whole new level. RAW is particularly useful when using a camera with a smaller sensor such as APS-C or Four Thirds or when using an older camera — you can really get the most of out of your images with a little editing.
If you have any questions about RAW or editing, feel free to comment below or e-mail me.