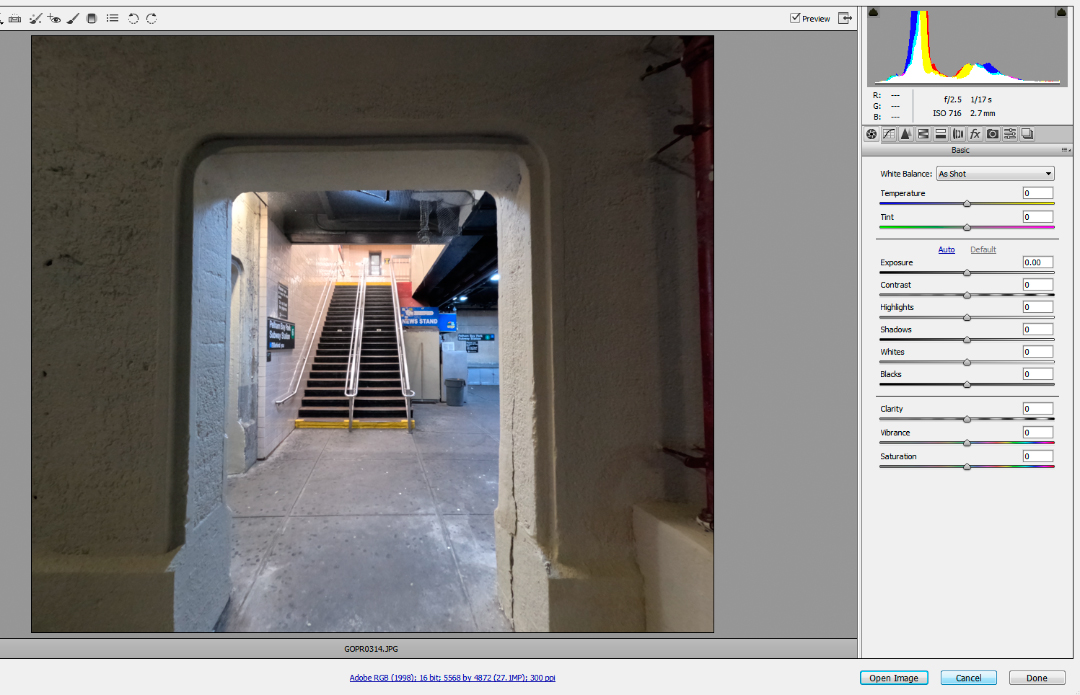
Admit it – the Camera RAW interface is much more pleasant for editing photos than using a bunch of layers in Photoshop. This is why Lightroom is so popular among event photographers. But sometimes you just need Photoshop, and sometimes you shot everything as JPG for whatever reason. In this instance, you’re better off using Adobe Camera RAW for editing your JPG images.
While Photoshop’s Camera RAW is commonly associated with RAW image formats, it’s possible to set it as the default editor for your JPG files too. In this blog post, let’s look at the process for making JPG files automatically open in Adobe Camera RAW.
Why Use Adobe Camera Raw for JPGs?
Before we dive into the process, you might be wondering why you should use Adobe Camera RAW for JPEG files when you can simply open them in Photoshop or other image editors. Here’s why:
- Advanced Editing: Camera Raw simplifies advanced editing such as color correction, exposure adjustment, better dodge and burn through adjustment brushes, and easier colorization of shadows and highlights for split-toning. These tools can significantly improve the quality of your JPG images.
- Consistency: By using Camera Raw for both raw and JPG files, you can maintain a consistent editing process and style while working on your photos.
- Sliders are Easier to Use Than Curves: Let’s face it, it’s true. Sliders are also more accurate. Don’t argue with me.

Now that you understand the benefits, let’s walk through the process of configuring Adobe Camera Raw so your JPG files will open in it.

Open Photoshop: Launch Adobe Photoshop on your computer.
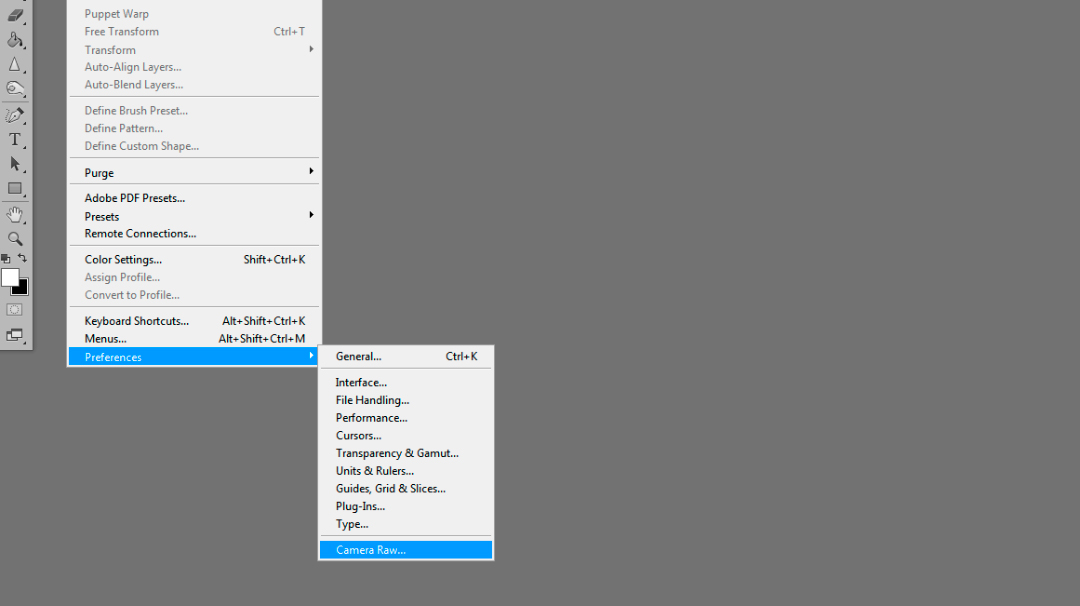
Go to Preferences: Navigate to the “Edit” menu and select “Preferences”
Choose Camera RAW: Under the “Preferences” menu, choose “Camera Raw…”

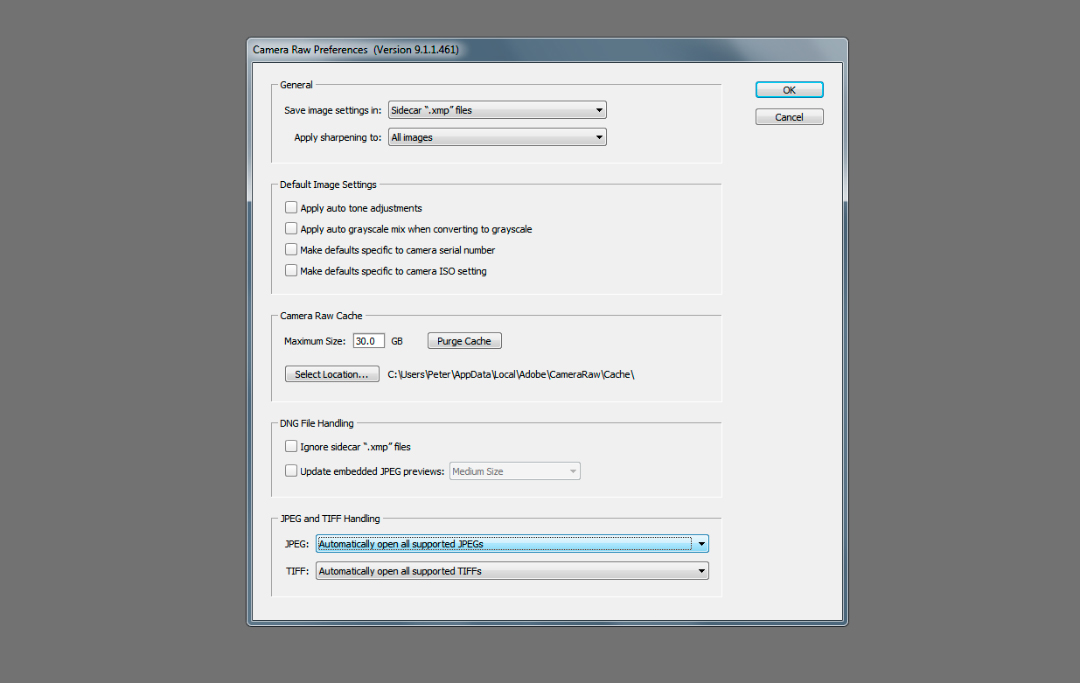
When the Camera Raw Preferences dialog opens, find the JPEG and TIFF Handling section at the bottom. Under the JPG pulldown menu, select Automatically Open All Supported JPGs. While you’re there, you might as well also select this option for TIFF files as well. Click OK at the top of the dialog box.

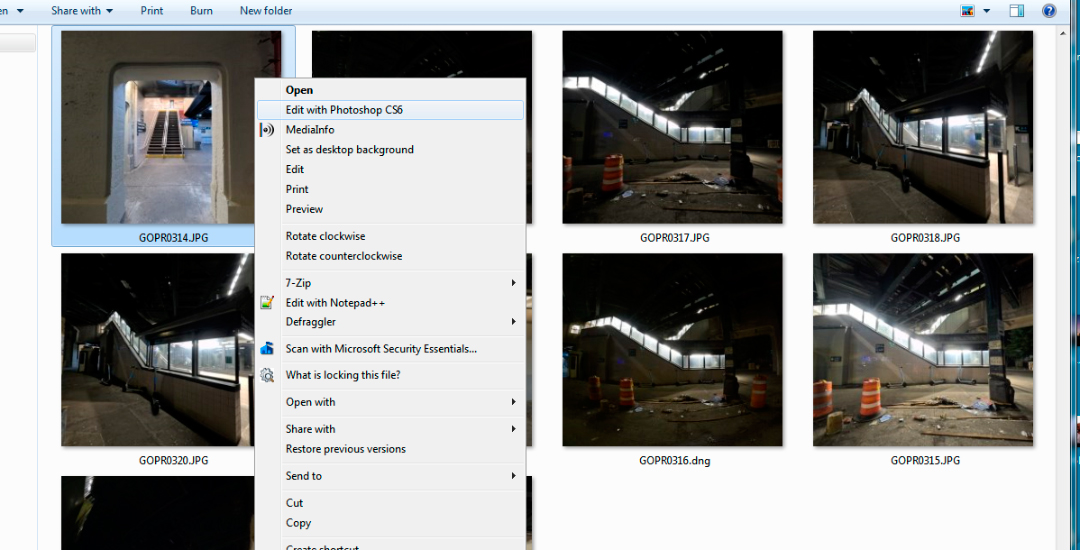
Now when you right-click to open a JPG from Windows Explorer and open in it Photoshop, it will automatically open in Camera RAW first. Then you can do your edits as if you are working on a RAW file.
Configuring Adobe Camera Raw as the default editor for your JPG files is a simple process that can significantly improve your workflow and maintain consistency in your post-processing workflow. If you have any Camera RAW tips, feel free to leave them below.
Reviewed and revised on August 18th, 2024.

