Let’s cut to the chase – you wanted a “real camera” (which for most people means a DSLR) because you wanted to take photos with a blurry background. You were tired of your cell phone images where everything was flat and in focus, and you wanted to produce gorgeous images where your subject was sharp but the background was blurred.
You might have heard the term “bokeh” used alongside images with a blurred background. On Instagram, photos with a blurred background often have tags such as #bokeh or #bokehlicious on them.
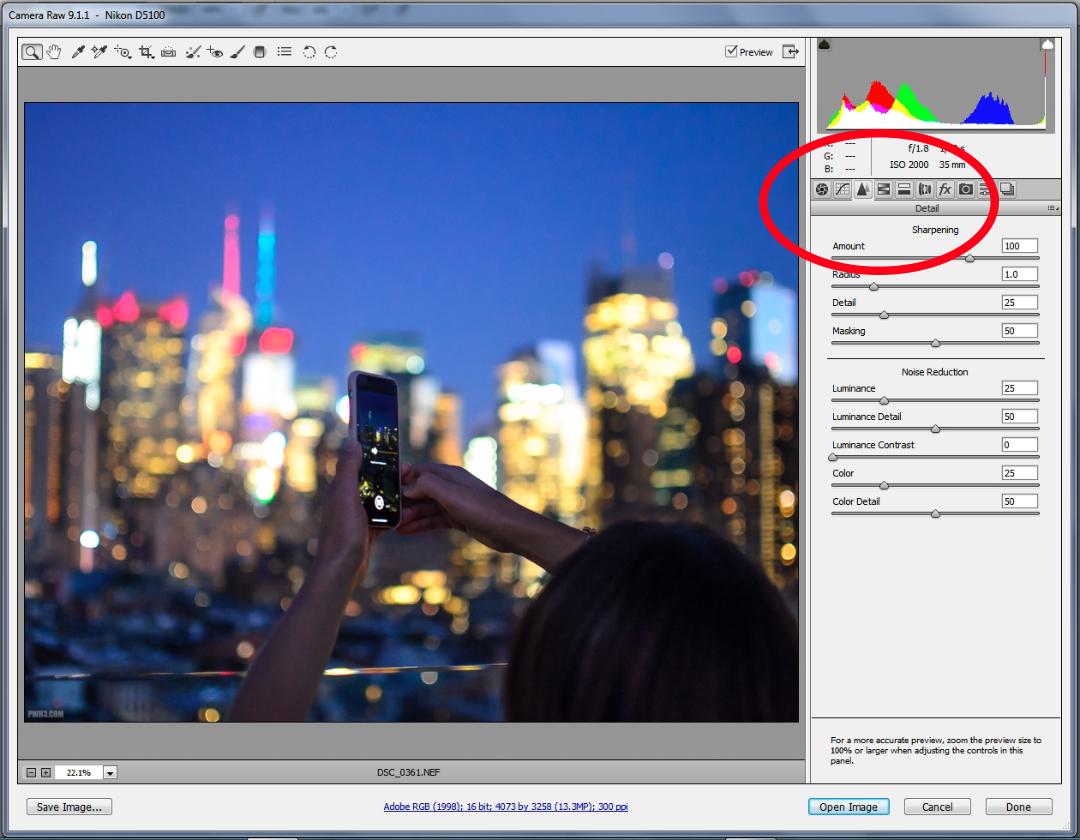
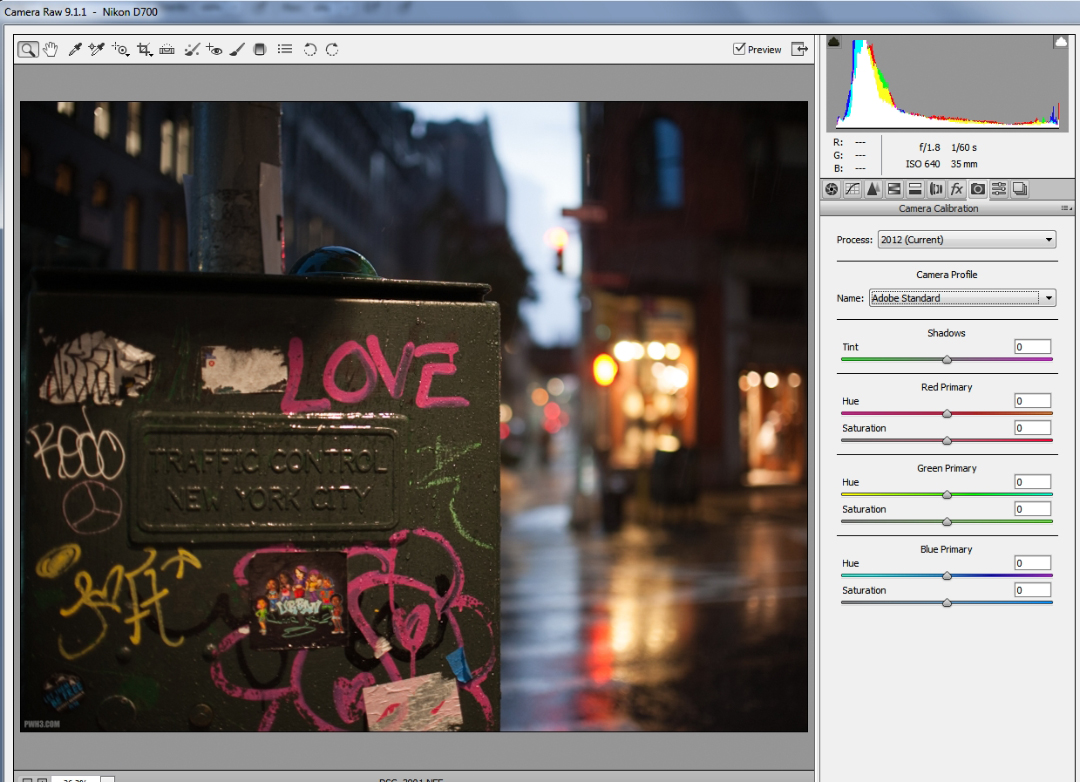
There’s a simple but little-known trick in Photoshop and Lightroom that will help you sharpen your RAW photos more accurately. This trick works with any version of Photoshop or Lightroom.
Give me all the details.
To perform this trick, you’ll need to be in the Detail section of the menu, which looks like two little triangles. You’ll see all of the Sharpening sliders there. Set the Amount to 100 as a starting point.
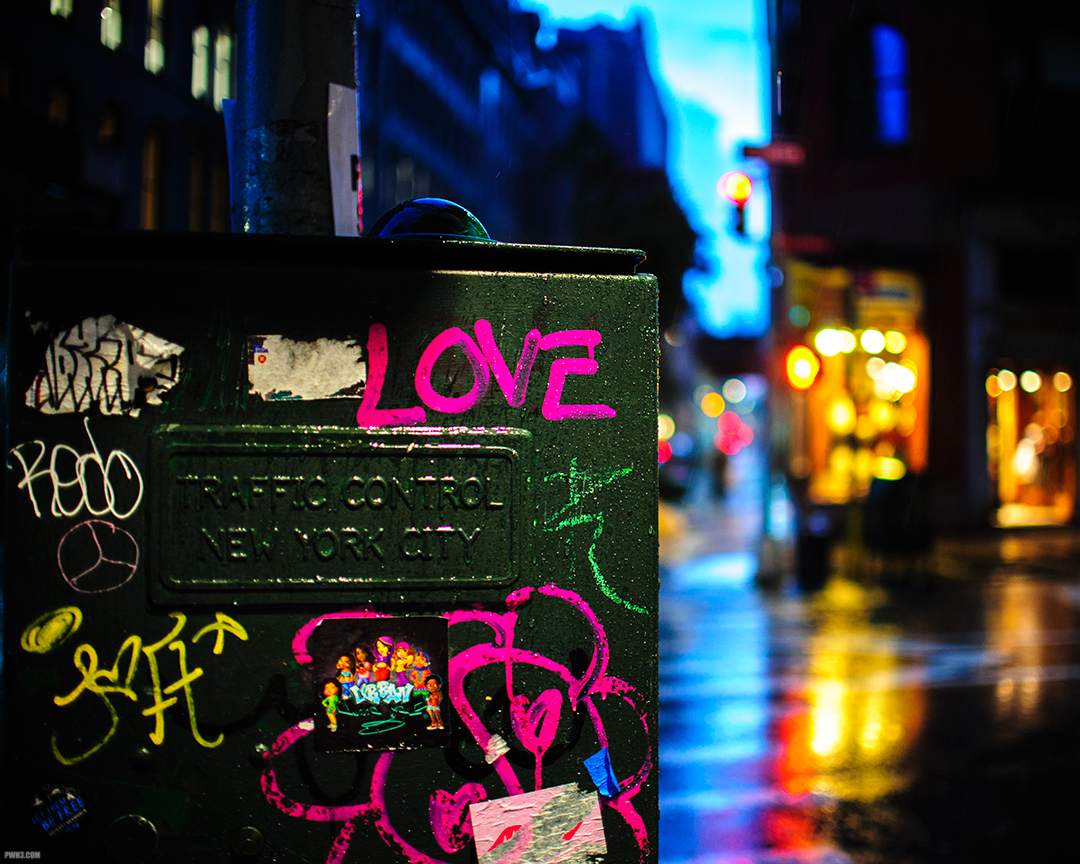
Many new photographers find the idea of shooting in RAW to be intimidating because RAW files must be edited. Without editing, RAW photos usually look flat and dull since no post-processing has been applied to them by the camera. This is quite different from JPEGs, which always have color correction applied to them.
This guide is aimed at beginners. Follow these tips and you’ll be able to get great results from your RAW files in just a few minutes.
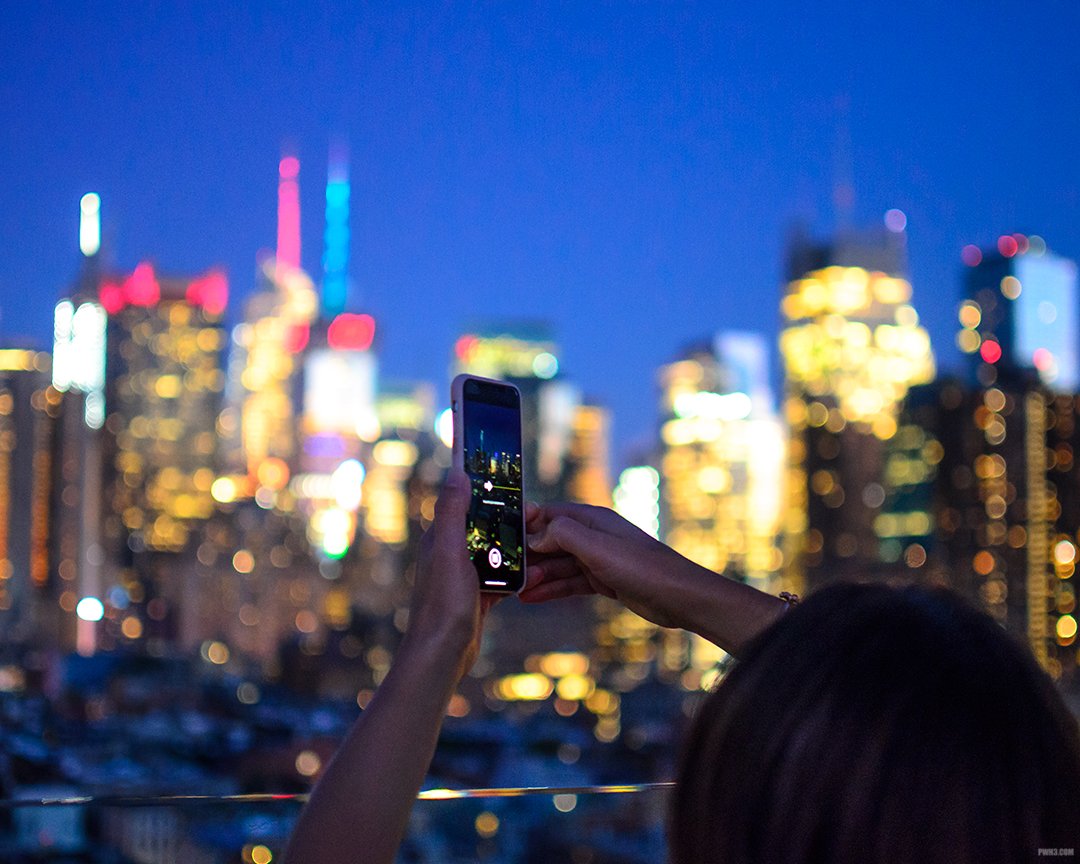
The original RAW image is flat and dull – just like my personality!
I always recommend shooting in RAW. The RAW files contain much more information than JPEGs, and give you more leeway when editing. You can brighten an image or correct the colors much more easily in RAW, without degrading the quality.
My simple technique here works with any RAW file from any camera. It doesn’t matter if you’re shooting RAW with a Micro Four Thirds camera, an APS-C camera or a full-frame camera. These are the basic steps I use to process all my RAW images, regardless of the camera.
In this example I am using Adobe Camera RAW inside Photoshop, but this will also work with Adobe Lightroom since the menus are basically the same. Any version of Photoshop or Lightroom will do.
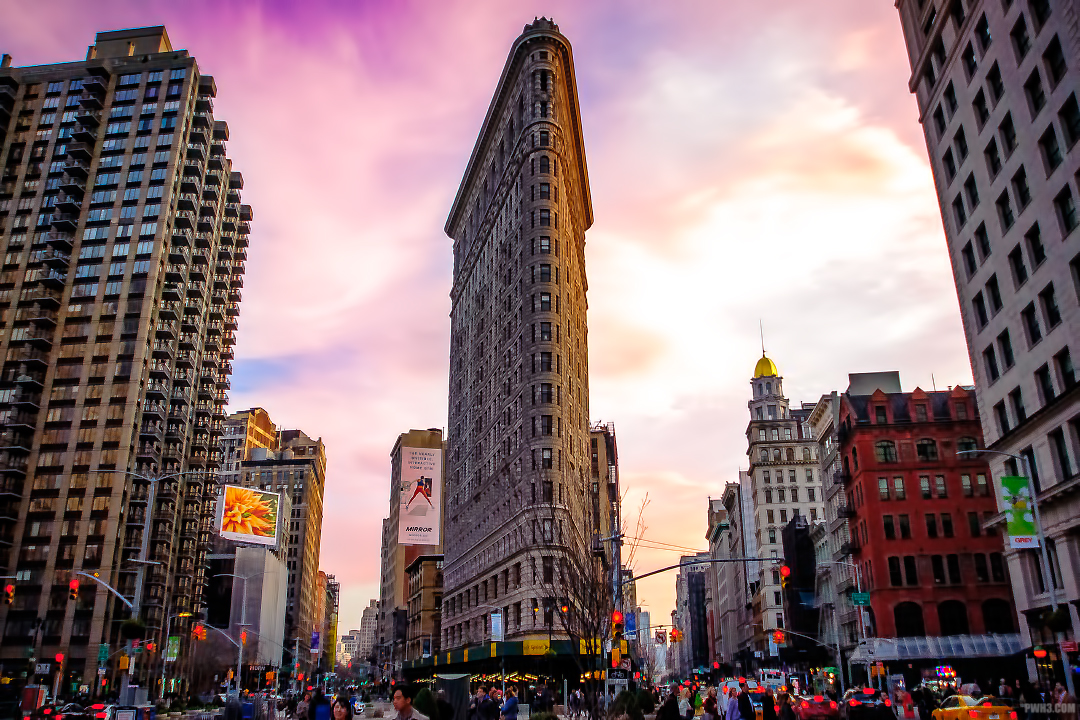
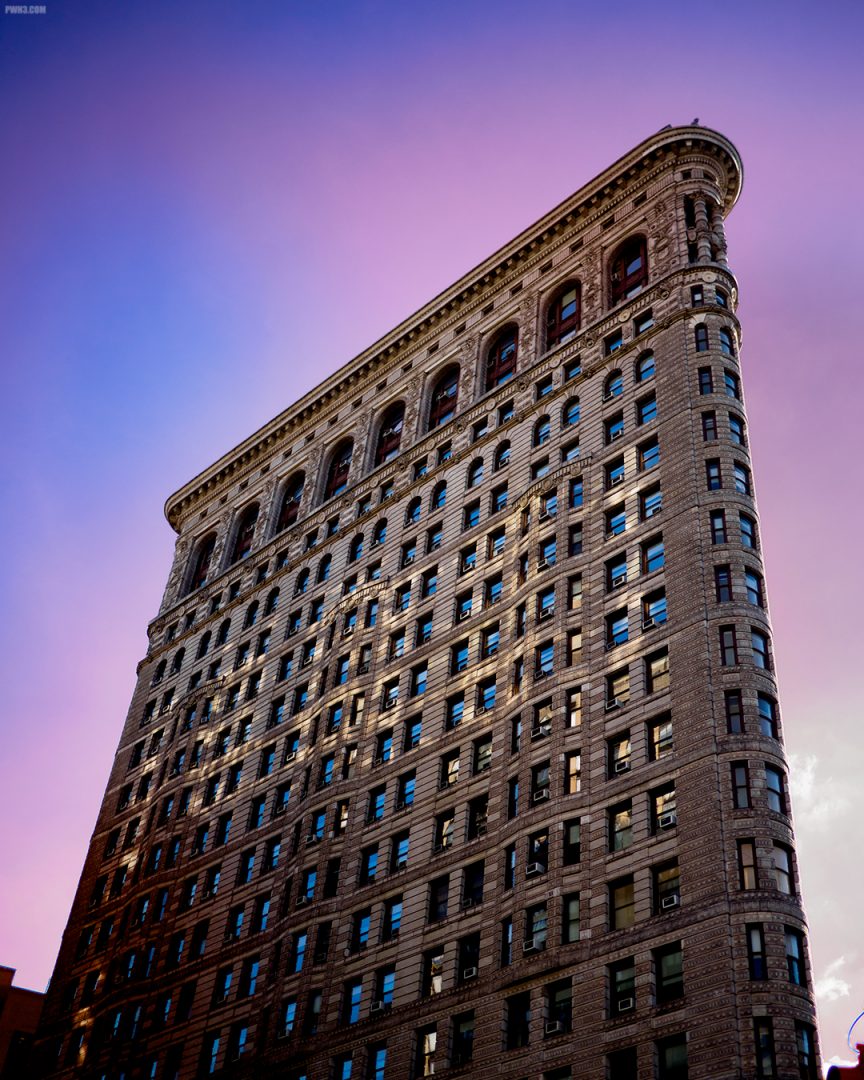
Everyone seems to love the Flatiron Building. A lot of tourists have told me that it’s their favorite building in New York City. The relatively short height of the building, its unique shape, and the detail of the architecture make it very interesting to photograph.
Exit the subway at 23rd street and look up — it’s the Flatiron Building!
The Flatiron Building is located at 175 Fifth Avenue, which is very close to 23rd street in Manhattan. If you want to visit it, take the R or W train to the 23rd street station. You can use any subway exit and you’ll automatically be in a great position to take a picture of the Flatiron Building, since all of the station’s exits will leave you across the street from it.
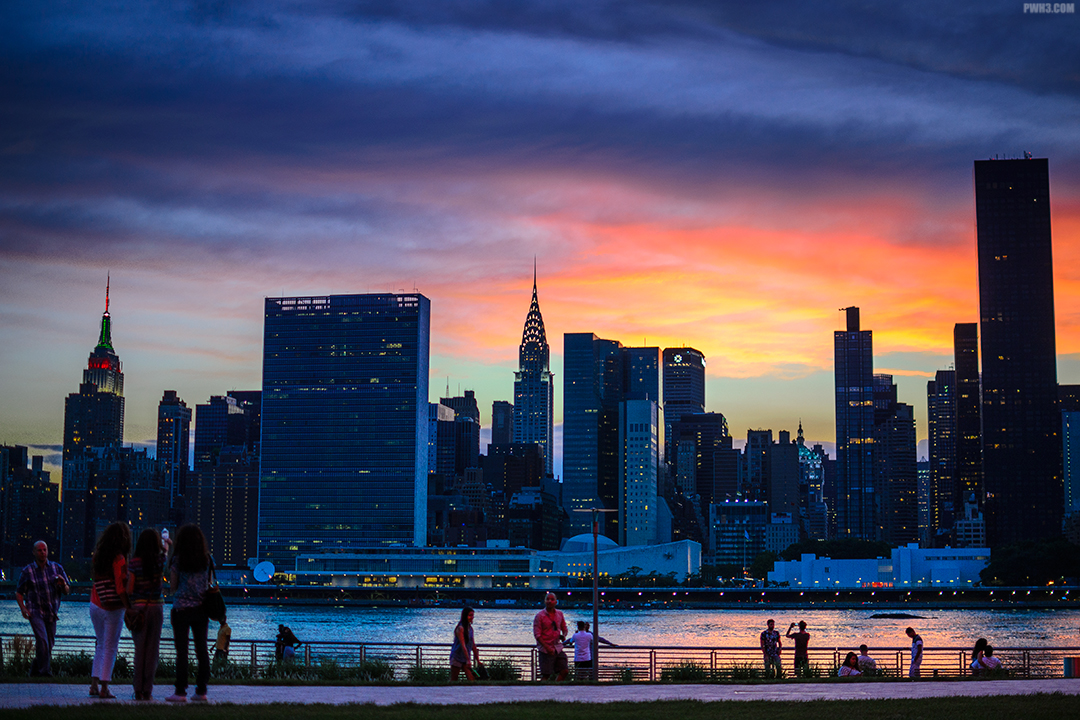
New York City has one of the most beautiful and iconic skylines in the world, thanks to all of the tall and unique buildings on the island of Manhattan.
But of course, you can’t photograph the full skyline while on the island — you have to travel outside of Manhattan to do it.
While there are many spots to photograph the skyline, I feel one place is much better than all of the rest to do it, and in this article I’ll explain where that is and why.
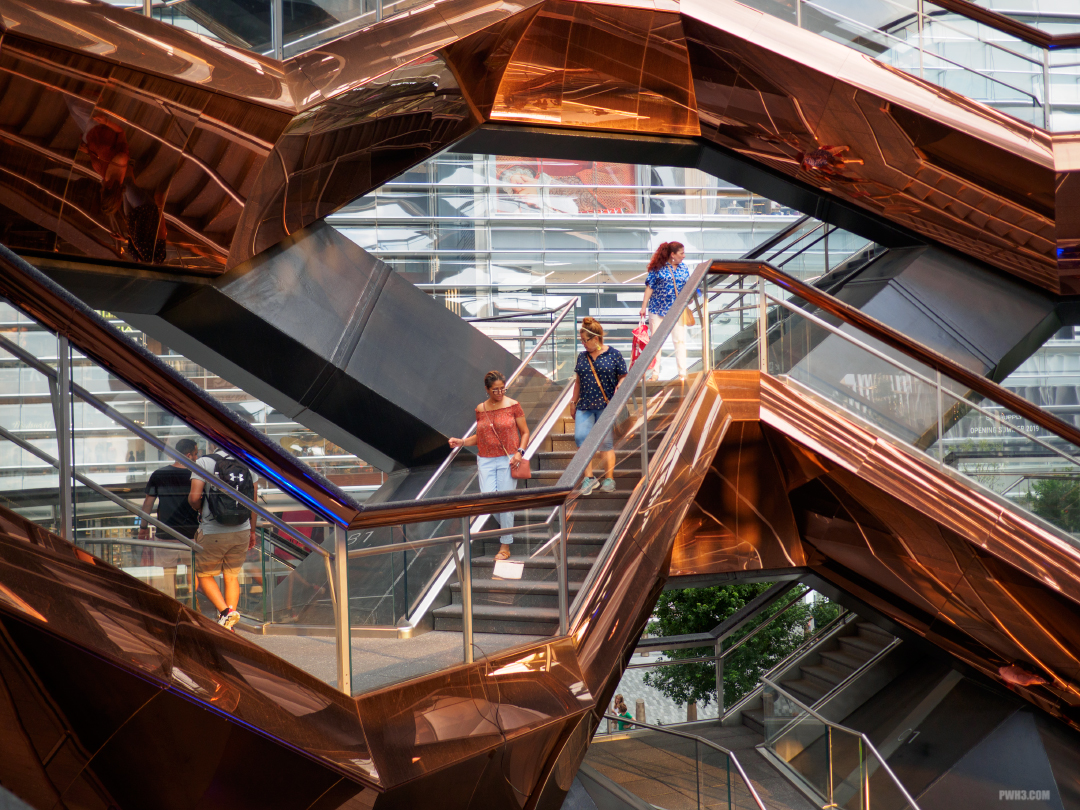
The Vessel is a new structure built as part of the revitalization of the Hudson Yards area of the West Side of Manhattan. Construction of The Vessel began in April of 2017 and it opened to the public in March 2019.
They might look like it, but no, these aren’t mall escalators!
The Vessel consists of a series of interconnected staircases and tiers designed to allow visitors to walk from the bottom to the top of the structure easily. The Vessel is 16 stories tall and consists of 154 flights of stairs totaling 2,500 steps.
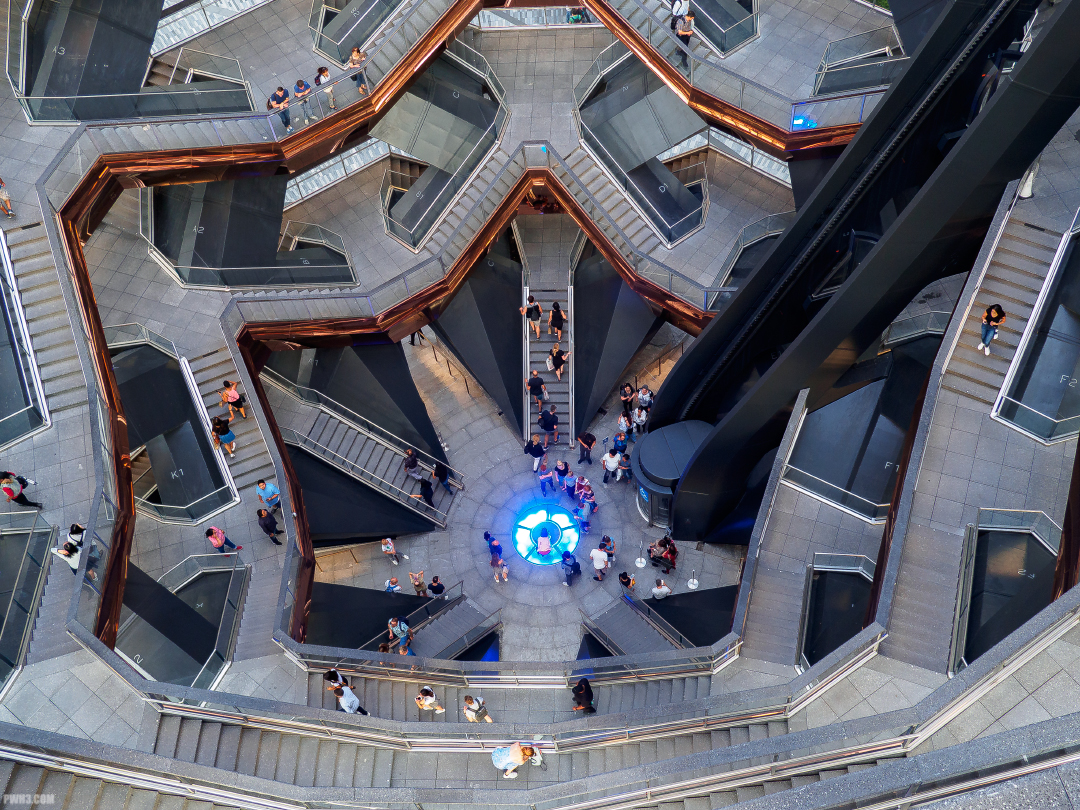
I’m not afraid of heights, I’m afraid of falling.
Looking down from the top tier, one can see how elaborately designed and constructed The Vessel is. For those that can’t or don’t wish to walk up and down the stairs, there is also an elevator, which you can see on the right side of the photo above.
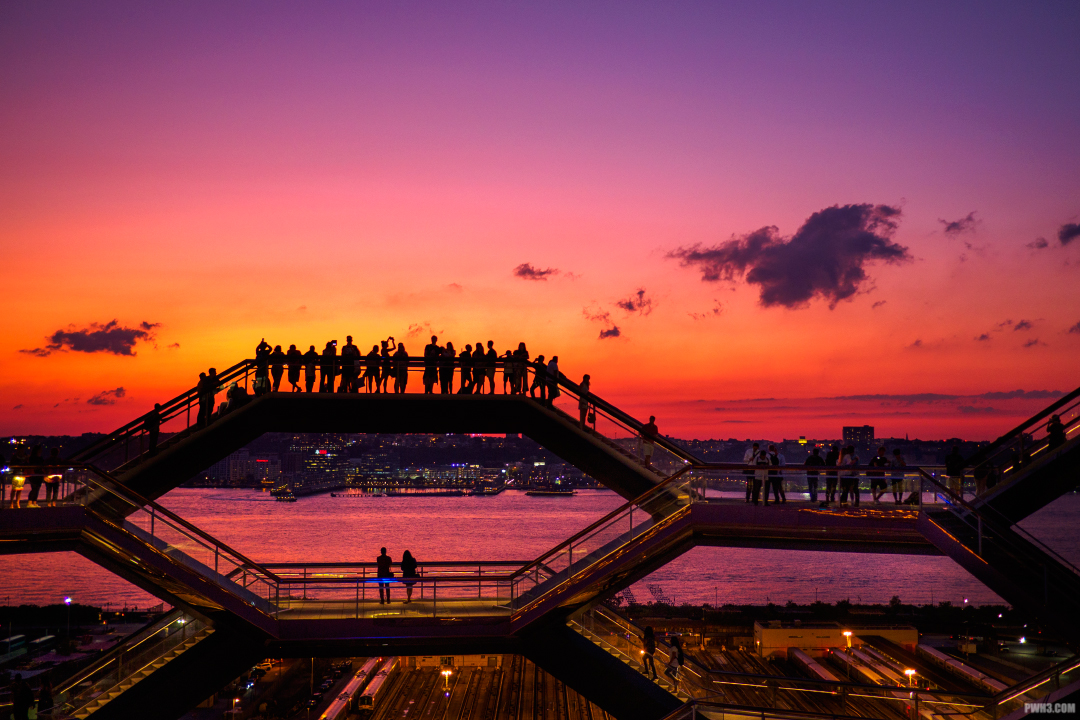
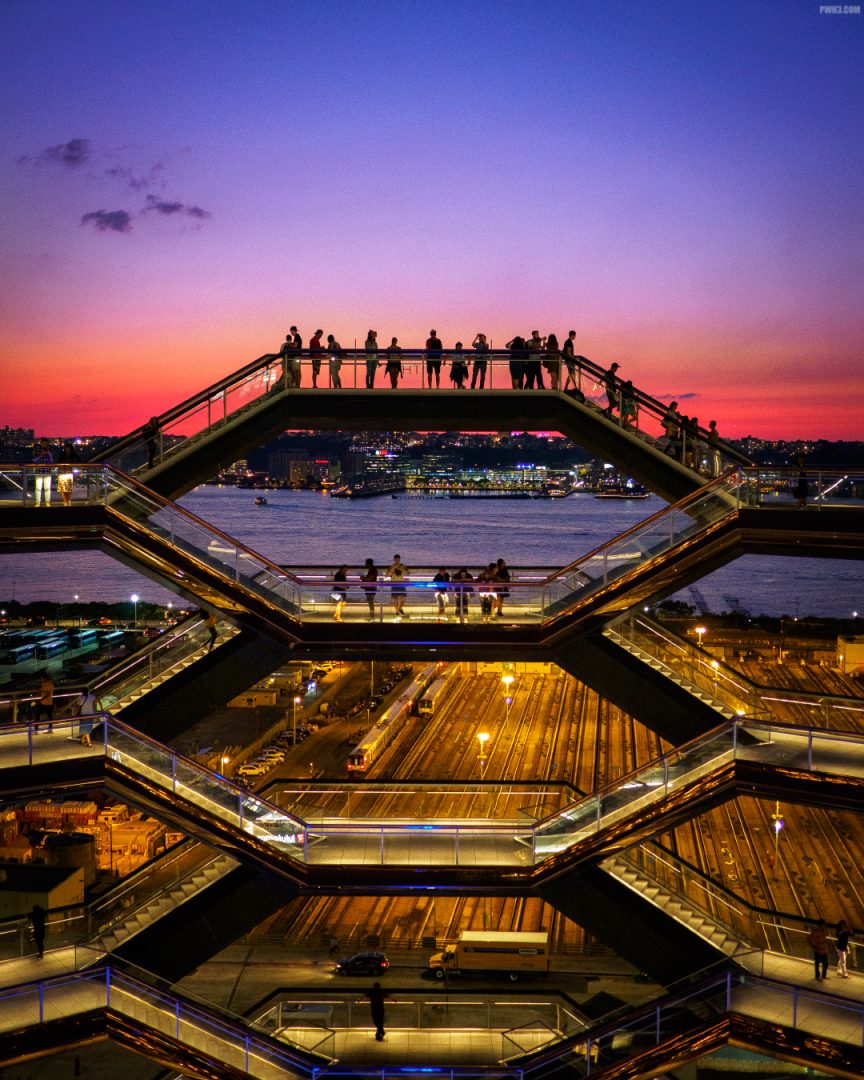
Are they waiting for the sun to set, or for a train?
The Vessel offers great views of the Hudson River and the distant New Jersey skyline. In the photo above, visitors wait on the top tier facing West to catch the sunset. Below you can see the rail yard – that’s where Hudson Yards gets its name.
As the sun sets it brings out amazing colors in the sky. It’s best to plan a trip to the Vessel around sunset time. Tickets are free but must be reserved in advance. Reservations fill up quickly, so be sure to reserve them a week or two ahead.
It’s time for some moon shopping.
After the sun sets, the revitalized Hudson Yards area is a great place to hang out at night. It’s still under construction, but so far a shopping mall and arts center have been built in the area and more attractions are planned.
Have you visited The Vessel at Hudson Yards? What was your experience like? Let me know in the comments, and follow me on Instagram.
If you’d like an NFT of my sunset photo of The Vessel for your collection, visit here.