
Many new photographers find the idea of shooting in RAW to be intimidating because RAW files must be edited. Without editing, RAW photos usually look flat and dull since no post-processing has been applied to them by the camera. This is quite different from JPEGs, which always have color correction applied to them.
This guide is aimed at beginners. Follow these tips and you’ll be able to get great results from your RAW files in just a few minutes.
I always recommend shooting in RAW. The RAW files contain much more information than JPEGs, and give you more leeway when editing. You can brighten an image or correct the colors much more easily in RAW, without degrading the quality.
My simple technique here works with any RAW file from any camera. It doesn’t matter if you’re shooting RAW with a Micro Four Thirds camera, an APS-C camera or a full-frame camera. These are the basic steps I use to process all my RAW images, regardless of the camera.
In this example I am using Adobe Camera RAW inside Photoshop, but this will also work with Adobe Lightroom since the menus are basically the same. Any version of Photoshop or Lightroom will do.
The concepts and ideas here will also work with many other RAW editing software programs and apps as well, so you may find this article useful even if you’re not using Photoshop or Lightroom. The techniques can even be used on phone apps which allow RAW editing on your phone.
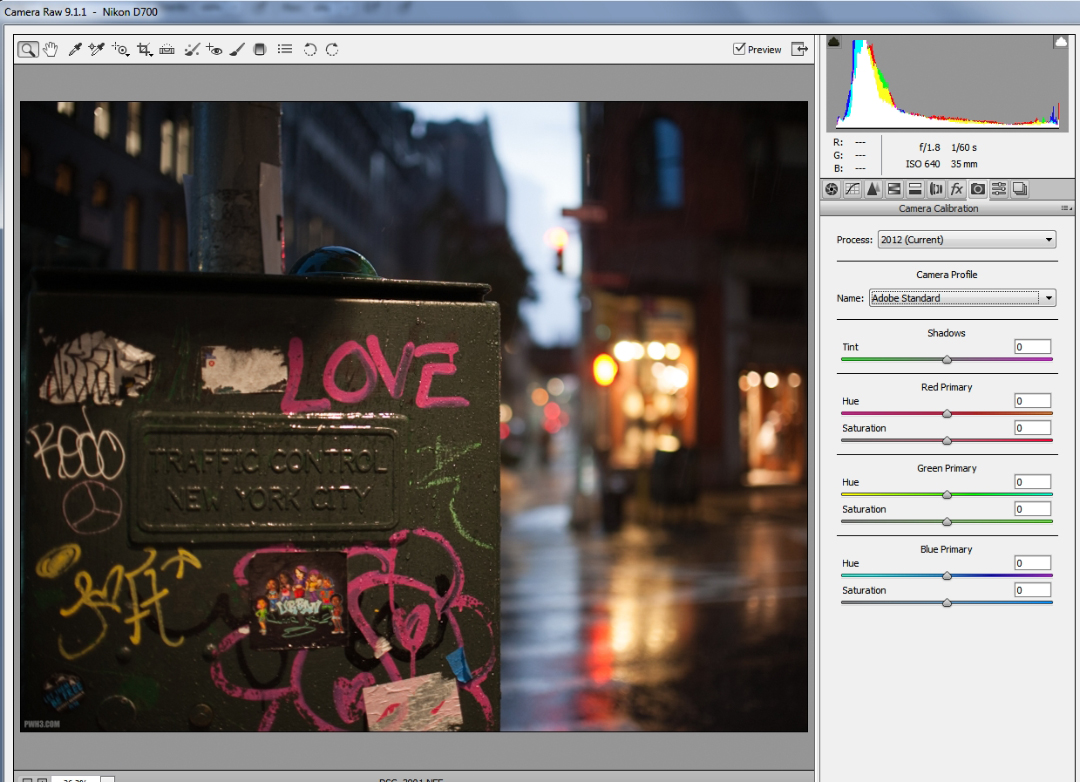
Step One – Set the Camera Profile
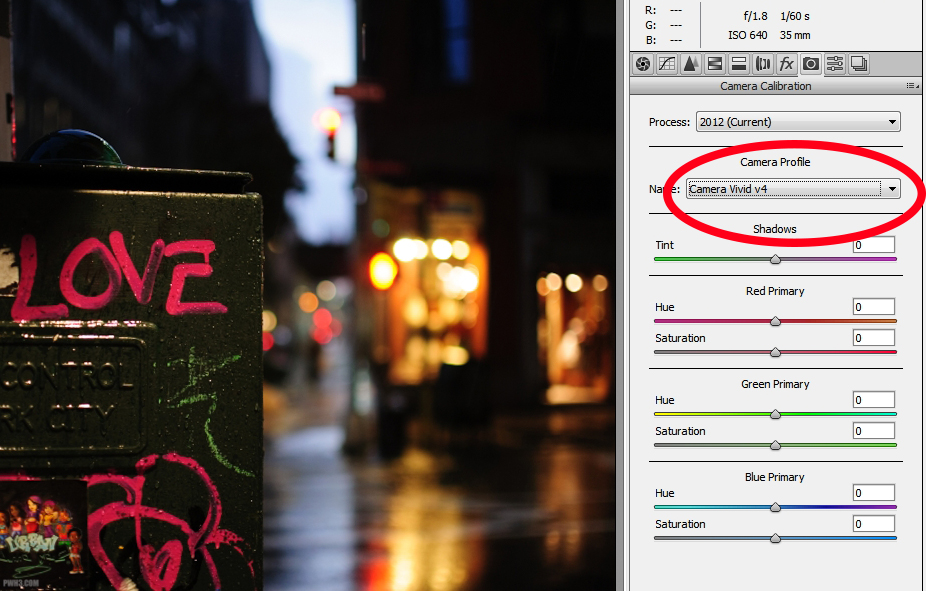
The first step is the change the Camera Profile under the Camera Calibration section. This is crucial since it will give you a correct starting point with colors that are closer to what your camera’s manufacturer had in mind. I usually change it to “Camera Vivid” on images from my Nikons. Depending on what camera you’re using, the profile may have a different name, but look for anything that has “vivid” in it and select that.
If it ends up being *too* vivid for your tastes, choose a Camera Profile that says “Standard” instead. You can also experiment with other Camera Profile options to see which ones fit your image best. Other common Profile options are Neutral and Portrait. These profiles will usually give your image less contrast, more muted colors, and softer shadows.
You can see in the image above that just changing the Camera Profile has dramatically changed the image from flat and dull to more contrasty and colorful, without any additional tweaking.
Step Two – Press the “Auto” Button in the Basic Menu
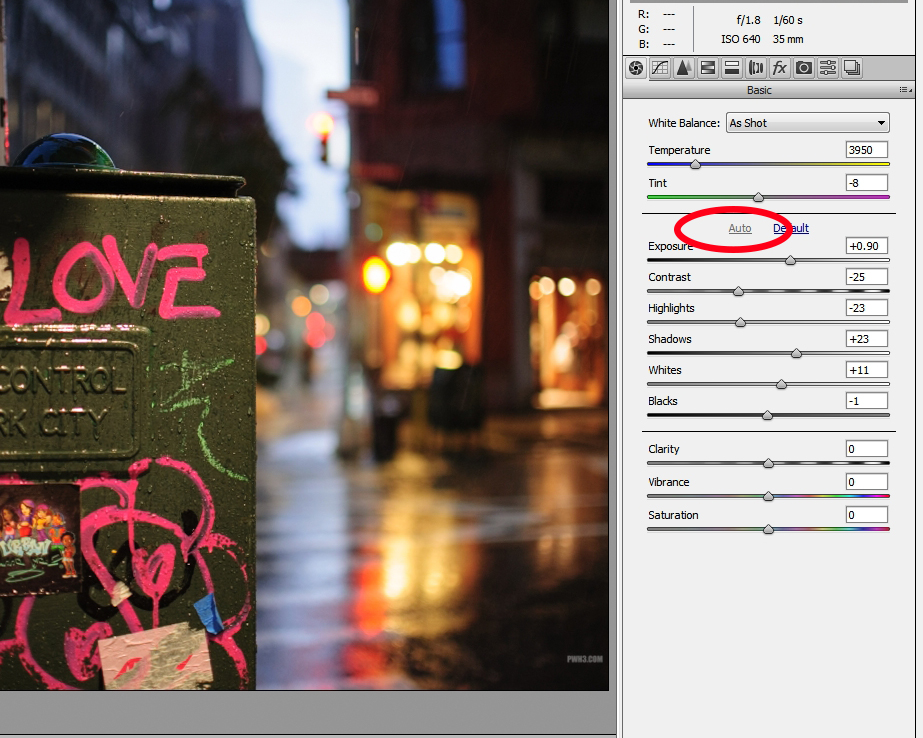
Yes, we’re using the Auto option from the Basic menu. For a long time I was adjusting exposure, contrast and all the other stuff manually. But I have found that just clicking Auto gives me similar or even better results and it saves me time. So nowadays I select Auto as a starting point and then make tweaks from there.
You can see in the image above that Auto has corrected the exposure rather well, and lifted the shadows so that we can see more detail.
Step Three – Tweak What “Auto” Has Done
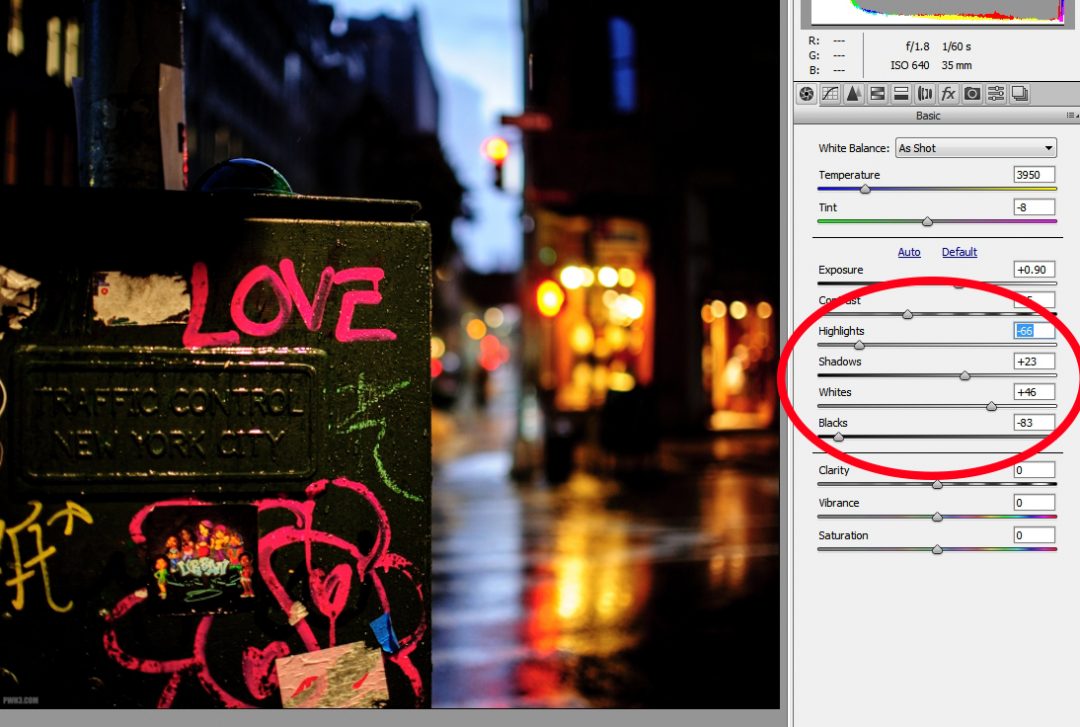
Now we’ll tweak the image a bit to make it “pop”. We’re staying on the Basic menu section for all of these little tweaks. Remember that these tweaks depend on your tastes and your image, so play around with the sliders as we go until you get your image to look the way you want it to.
- Lower the Highlights slider until you can see more detail in bright areas such as street lights, the sky, or people’s skin.
- Raise the Shadows slider a little bit to brighten shadowy areas.
- Raise the Whites slider to brighten the image overall. This will sometimes also make the colors in the image more intense.
- And finally lower the Blacks slider to make it have more contrast. In RAW files from some cameras, lowering the Black levels will also darken the shadows all over again; other cameras do a good job of separating black areas from true shadows. Play around with this to see what happens in your image.
If after doing this, you feel the image is too bright or dark, then adjust the Exposure accordingly.
Step Four – Color Correction
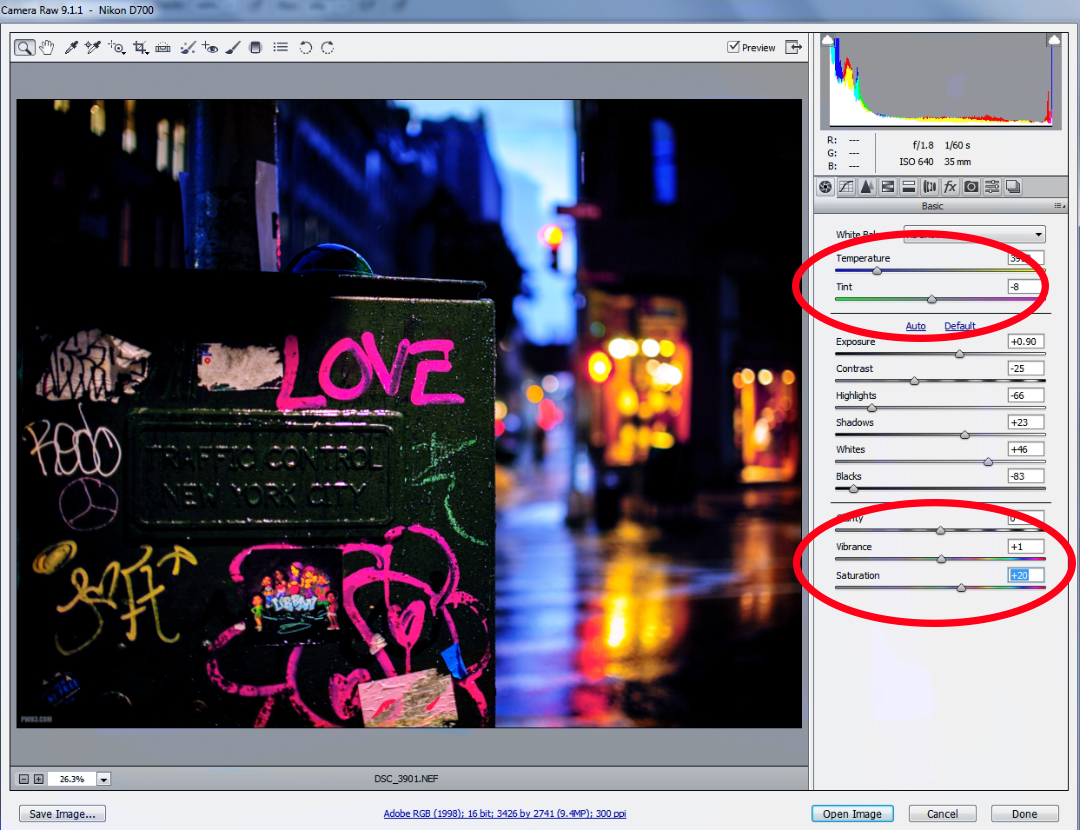
Now we can adjust the colors from the Basic menu. I like my images to have a “colder” look about them, so I usually change the Temperature to be more blue and the Tint to be a little more purple. If you want a warmer looking image, use more yellow for the Temperature and leave the Tint at zero. I made the final version of this image have a very cold and blue look by simply adjusting the Temperature slider far to the left.
Try playing with the Vibrance and Saturation sliders as well. Vibrance will generally intensify the blues in your image, while Saturation will intensify the reds and yellows. Keep experimenting with the sliders until you are satisfied with the colors and the overall feel of the image.
And We’re Done!
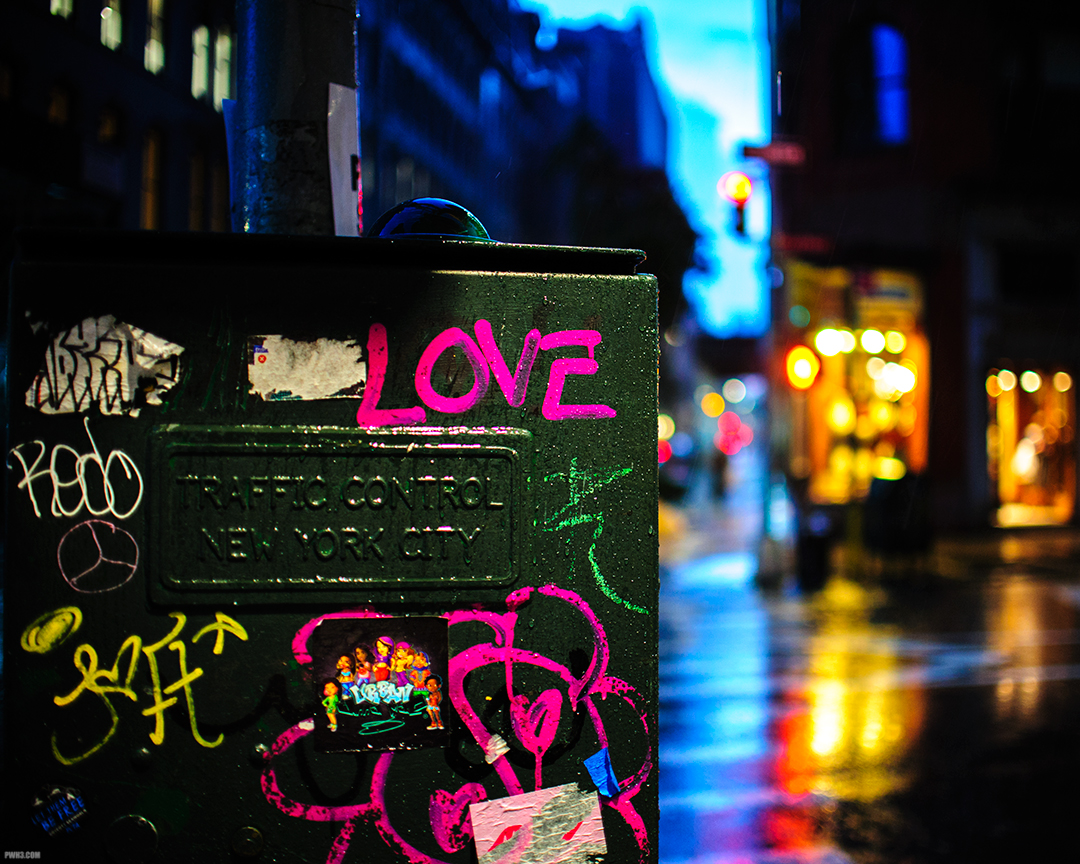


Easy, right? And if you don’t like the final image, you can always reset everything and start over from the beginning. By simply playing around with the sliders in your RAW editor, you can take the image in a completely different direction.
I hope this quick introduction to RAW editing will encourage you to start shooting RAW if you don’t already, or help to bring out the best in your RAW images if you are just starting out. Follow me on Instagram to see a collection of the many RAW images I have edited over the years. If you have any questions about RAW editing feel free to ask in the comments below.
Reviewed and updated and March 24th, 2024.