GoPro pioneered the concept of an “action camera” – a tiny, rugged, easy-to-operate camera that is intended to be used to record action sports. In the years since the first GoPro was launched, many competitors such as Akaso and DJI have produced action cameras as well. Regardless of the brand, these cameras are primarily video-focused, and the newest ones are capable of recording crisp and detailed 4K and even 5K video. Though it’s not their primary function, most of these cameras are capable of doing still photography as well.
While they aren’t the best choice for general still photography, action cameras can be very useful as a photographic tool, particularly to capture very wide landscape shots. Here are some things to consider when using an action camera for photography.
Note: In this article, I used an Akaso Brave 6 Plus for all of the photographs.
Not Just Wide – Ultra-Wide
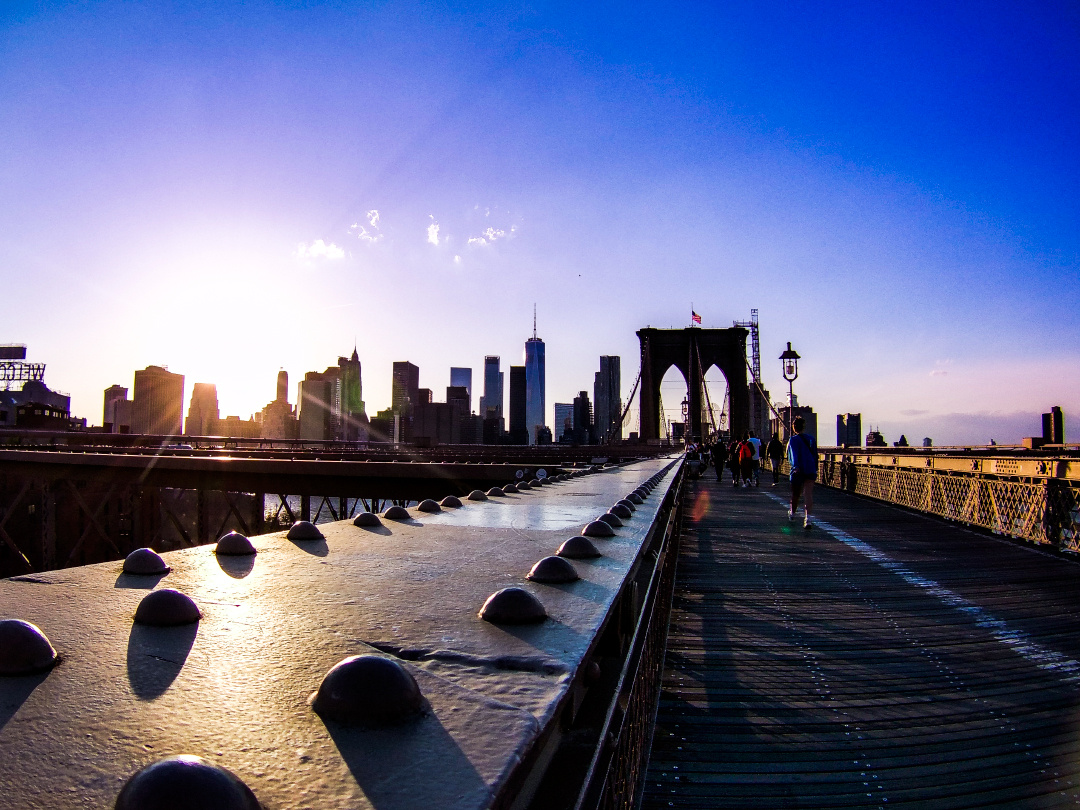
Most action cameras have an f/2.8 aperture lens and a 3mm 1/23-inch sensor. f/2.8 sounds like it would create a shallow depth-of-field, but because of the crop factor of the small sensor, it’s the equivalent of f/16 on a full-frame camera. In terms of field-of-view, the crop factor gives you the equivalent of a 16mm lens.
What this means is an action camera will give you a very wide field-of-view and extremely deep depth-of-field, rendering a photograph where pretty much everything in front of you is captured and everything is in focus.
Managing a Small Sensor
The small sensor in these cameras means that they aren’t well-suited for low-light situations, and that generally includes indoor photography. Unless you’re inside a very well-lit room, you’ll end up with grainy photographs.
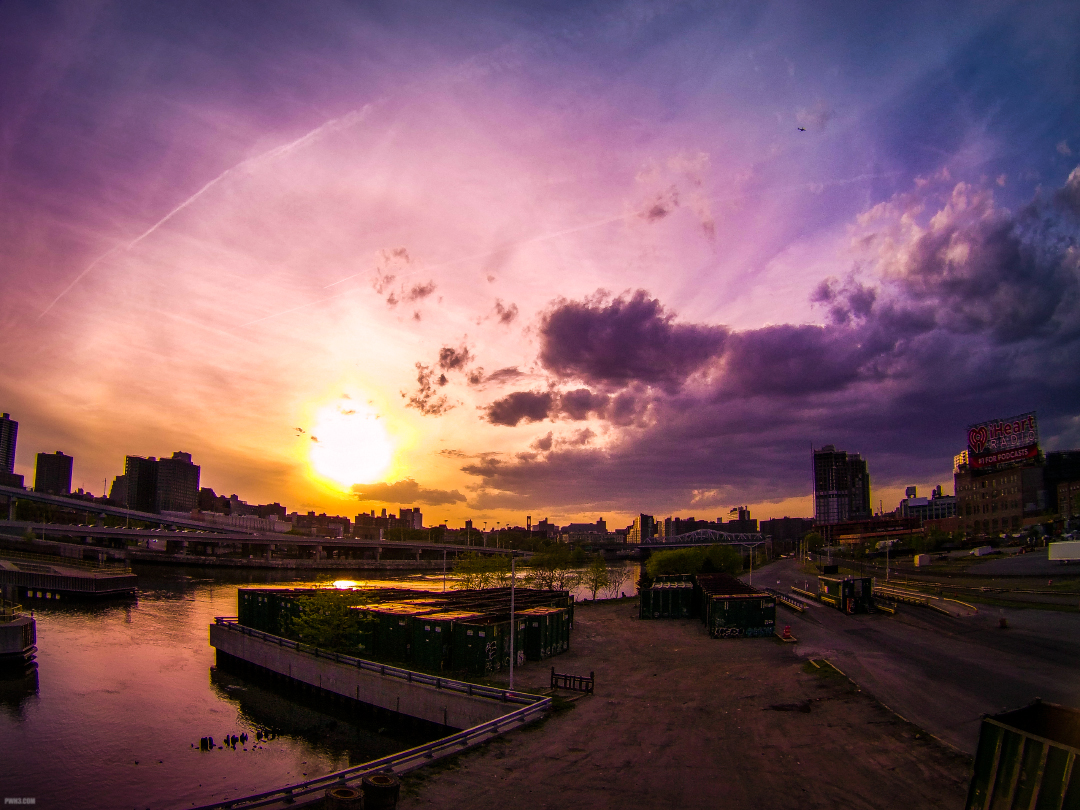
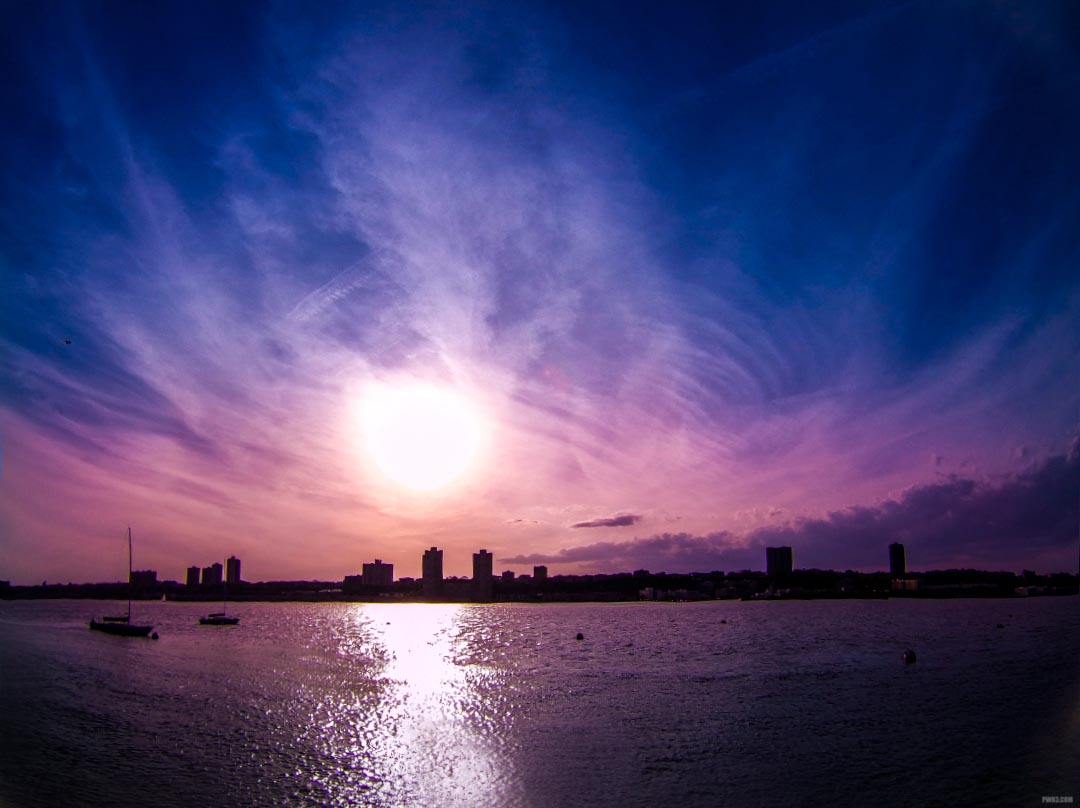
Where small sensors perform best is outdoors in bright sunshine, or during sunrises and sunsets. For the best image quality, make sure you have enough light in your scene. Most action cameras do have settings to let you manually adjust the shutter duration, exposure compensation and ISO, so your photography knowledge can help you as the light levels change.
By playing with these settings and using a tripod, you might be able to do some decent night photography, but I haven’t tried.
Lens Distortion
Due to the ultra-wide design of the lenses on action cameras, there’s a lot of distortion. This ends up creating an extreme “fisheye” effect, particularly at the edges of the photo. The sides, tops and bottoms of your photos will have a curved, “warped” look. If you are shooting the horizon, sometimes the horizon will be warped too if your photo isn’t composed properly.
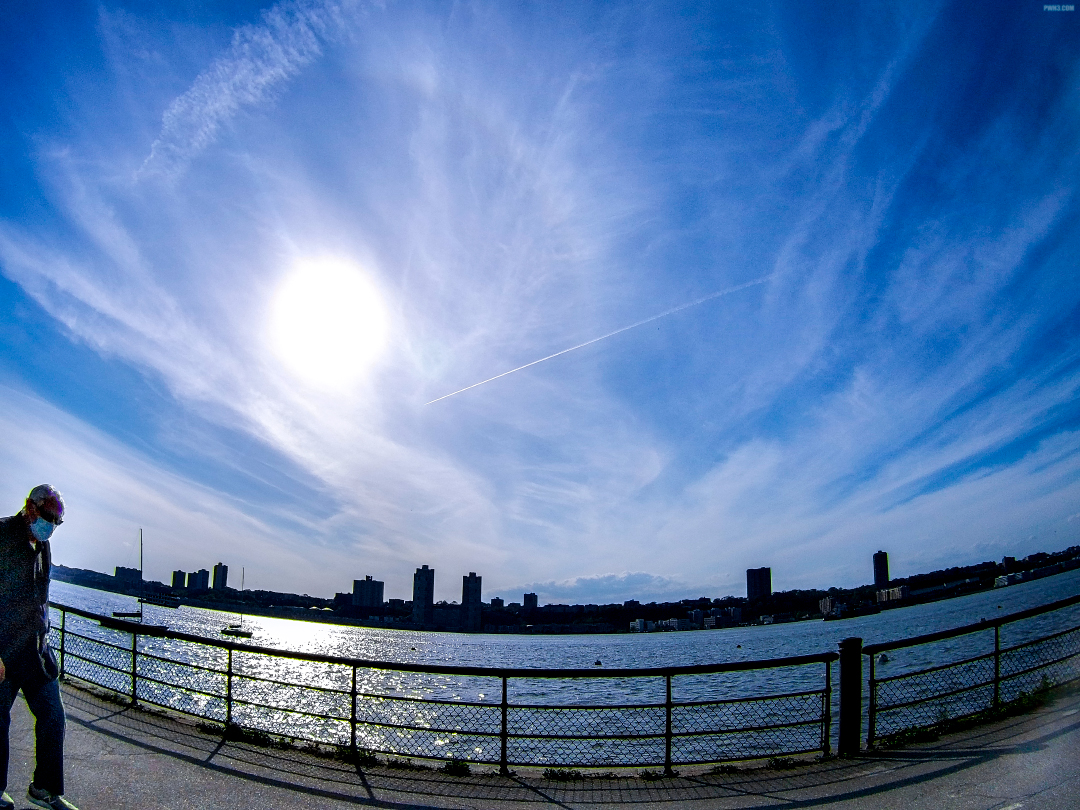
A way to compensate for the lens distortion is to put the horizon dead-center in your frame. This way the horizon will be level. Depending on the shot, this may not be a good composition, but it works if you have no other choice.
Distortion can also be corrected with some success in your editing software. Photoshop and Lightroom have lens correction settings that can almost fully eliminate the fisheye effect, though the photo still may look a little weird.
Finally, some models of action cameras have built-in distortion correction. I use an Akaso Brave 6 Plus, and the distortion correction feature is pretty good. I thought the in-camera correction might reduce the quality of the images, but it doesn’t (or if it does, I can’t tell, and I did many comparisons with the feature turned on and turned off).
Remember that you don’t have to avoid distortion completely. You can use it for interesting effects in your photos if you want to. After all, some photographers buy fisheye lenses for their cameras just for this purpose. The creative choice is yours. Sometimes I really like the way the distortion looks.
Image Size and Quality
The very latest models of action cameras let you shoot RAW and they produce large 20 megapixel files, which is fantastic. Older models may only allow jpeg shooting and many are limited to smaller 12 megapixel images. Keep this in mind while shooting so you can minimize the need to crop later.
At the edges, the photos are soft, but that’s a problem with a lot of cameras. On the Akaso Brave 6 Plus, I noticed a good amount of purple fringing in high-contrast areas (such as tree leaves against a bright sky) but again, I have many DSLR lenses that are guilty of purple fringing all the time, and this isn’t even a “real” camera. In any case, both of these flaws can be easily corrected in your photo editor of choice, through smart sharpening and the use of the color fringing tool.
The color depth of most of these cameras seems very good. Even with jpeg files, there’s a lot of leeway when editing, allowing you to bring out richer colors and deeper black areas without ruining the photo. There’s also a bit of room for exposure correction and lifting shadows.

Another Tool in Your Toolbox
Bringing an action camera along with you in addition to your main camera is very easy to do. They’re all tiny, lightweight and virtually indestructible. Even action camera accessories like tripods and selfie sticks are lightweight and portable, and no big deal to add to a backpack. Plus, it will take much better video than your cellphone. Even better, it can replace your wide-angle lens, which probably isn’t this wide or is probably very heavy. And because the cameras are either inherently waterproof or come with waterproof housing in the box, they can be used in the rain without worry or for underwater photography.
With conscientious shooting – and a little help from your photo editing software – you can produce stunning images that rival the output of much larger cameras.