Many new photographers find the idea of shooting in RAW to be intimidating because RAW files must be edited. Without editing, RAW photos usually look flat and dull since no post-processing has been applied to them by the camera. This is quite different from JPEGs, which always have color correction applied to them.
This guide is aimed at beginners. Follow these tips and you’ll be able to get great results from your RAW files in just a few minutes.
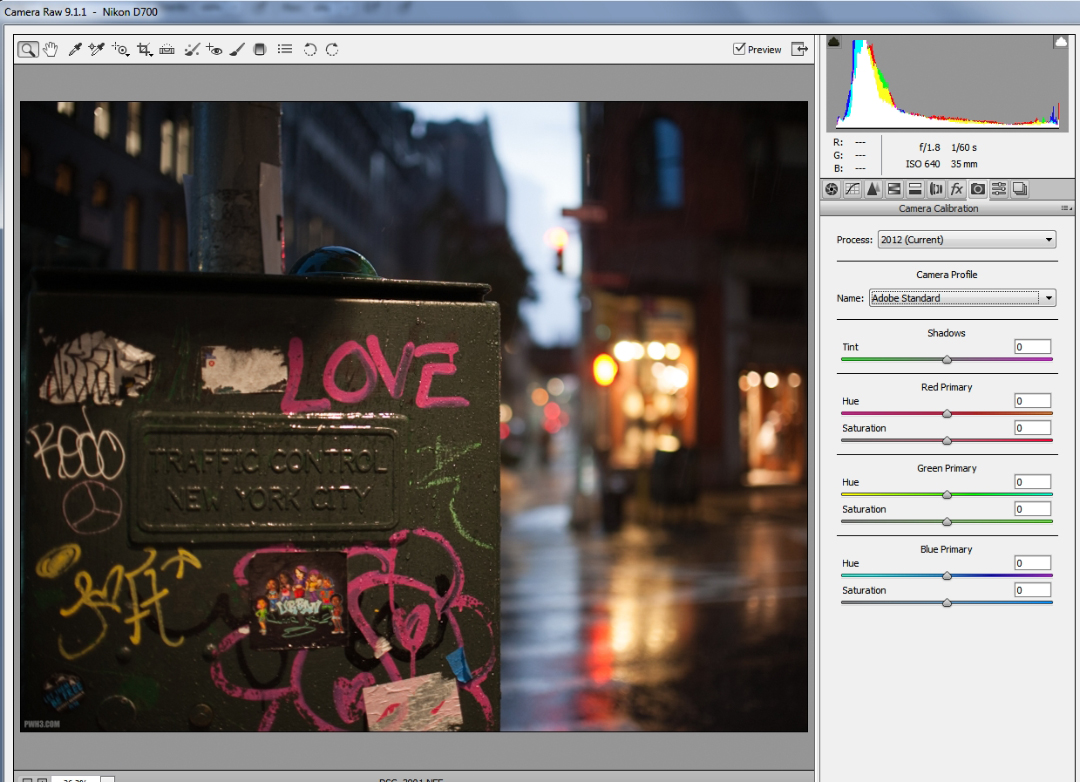
The original RAW image is flat and dull – just like my personality!
I always recommend shooting in RAW. The RAW files contain much more information than JPEGs, and give you more leeway when editing. You can brighten an image or correct the colors much more easily in RAW, without degrading the quality.
My simple technique here works with any RAW file from any camera. It doesn’t matter if you’re shooting RAW with a Micro Four Thirds camera, an APS-C camera or a full-frame camera. These are the basic steps I use to process all my RAW images, regardless of the camera.
In this example I am using Adobe Camera RAW inside Photoshop, but this will also work with Adobe Lightroom since the menus are basically the same. Any version of Photoshop or Lightroom will do.
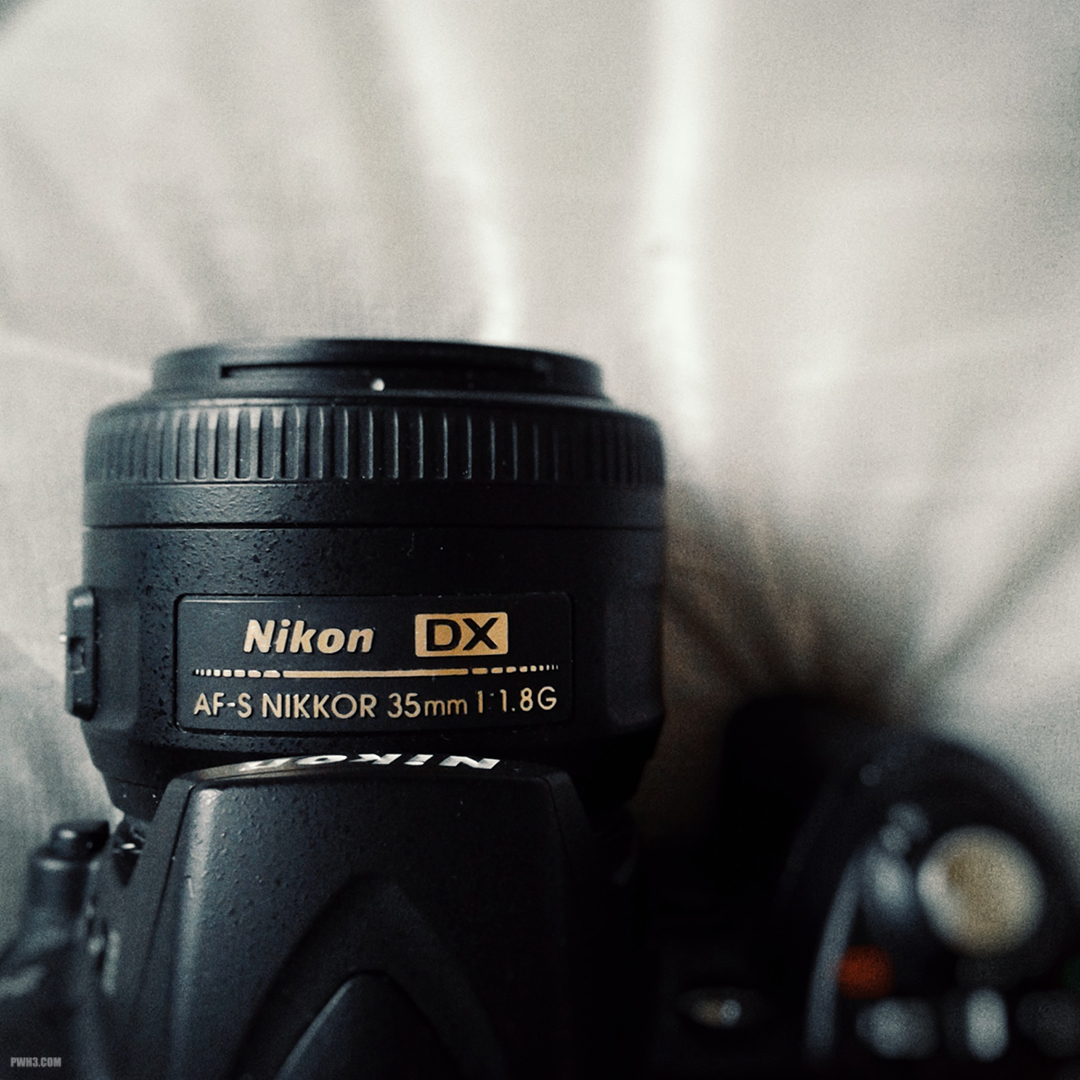
The answer is yes. You can use Nikon’s 35mm DX lens on an FX camera in FX mode. For some reason, the lens was designed to *almost* cover a full-frame sensor, despite being designed and marketed only for DX bodies. There are some problems with it, but if you recently upgraded to a full-frame Nikon and already have this lens, it’s worth giving it a try.
The first thing you need to do is find the “Image area” submenu on your camera and turn OFF the “Auto DX crop” option. Also make sure “Choose image area” is set to FX, which it probably already is unless you’ve been screwing around.
Turn off Auto DX crop! This is the most important menu option change you will ever make in your entire life.
Once that’s all set, the camera will no longer go into DX mode and you’ll be able to use the full 35mm glory of this tiny lens on your full-frame system. You will now get a nice and useful 35mm field of view with only some minor vignetting at wider apertures (generally speaking, under f4).
If you stop down too far (past f4) the edges will change from gentle vignetting to totally black, as if you’re looking through the keyhole of a door. That’s the caveat with using this lens on an FX camera. But you bought a full-frame system to use the lenses wide open for that ridiculous background blur, so who cares about f4 and above, right?
Nikon D700 with 35mm f1.8G DX lens at f3.2. This image is uncorrected so you can see the vignetting in the corners.
As you can see in the sample photo above, the vignetting is definitely there but it’s not too bad under most shooting conditions. Vignetting may be become more distracting in bright sunlight, but you can always crop it out or correct for it in Photoshop or Lightroom under the Lens Corrections menu. If you shoot a lot at night or in dark bars like I do, then the vignetting won’t even matter.
Vignetting? Nobody cares! Nikon D700 with 35mm f1.8G DX at f1.8.
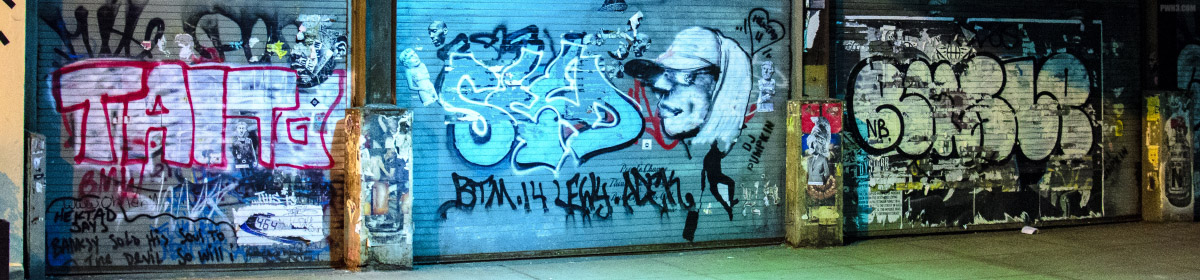
The lens performs well on full-frame cameras, with rich and vivid colors. Sometimes the colors are too vivid, to the point of being almost cartoonish. But you can always color correct in your editing software.
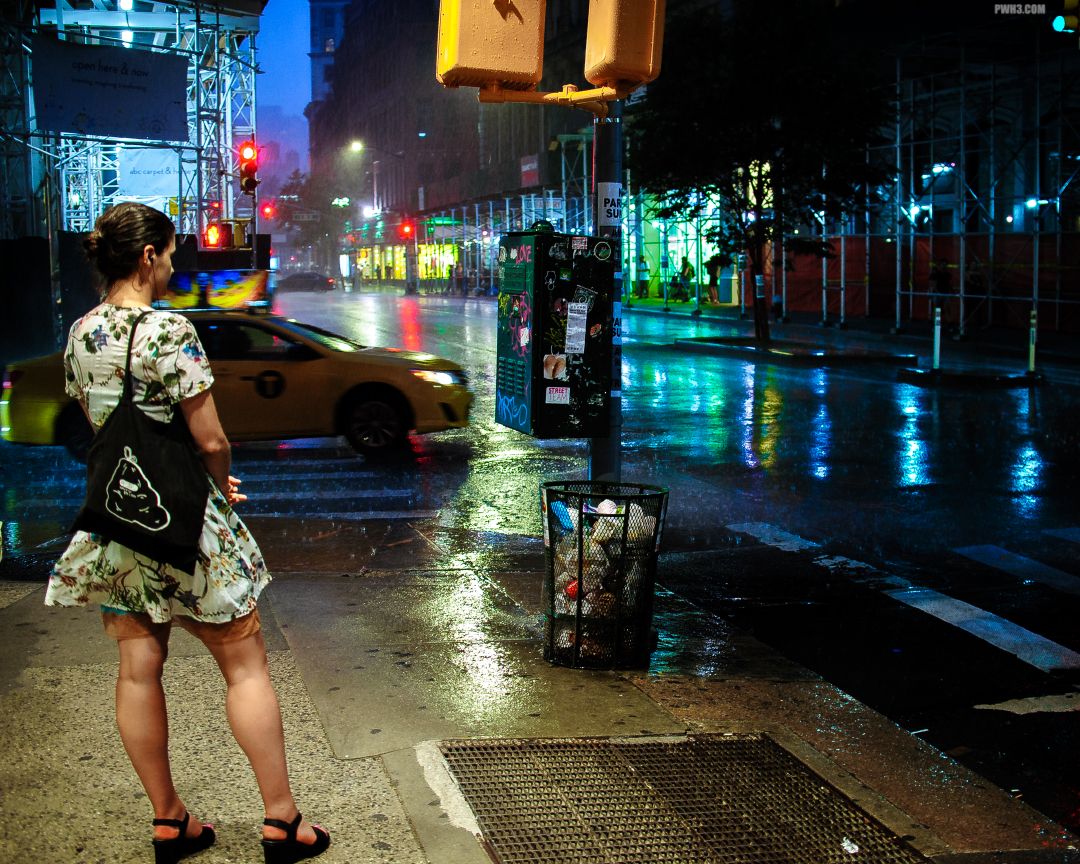
Beware — this lens causes storms and rain when attached to an FX camera! Nikon D700 with 35mm f1.8G DX at f2.5.
Autofocus is quick and accurate, but that’s to be expected since FX autofocus systems are generally the best anyway. It’s also nice to use this lens with a huge, bright FX viewfinder rather than the tiny DX viewfinders.
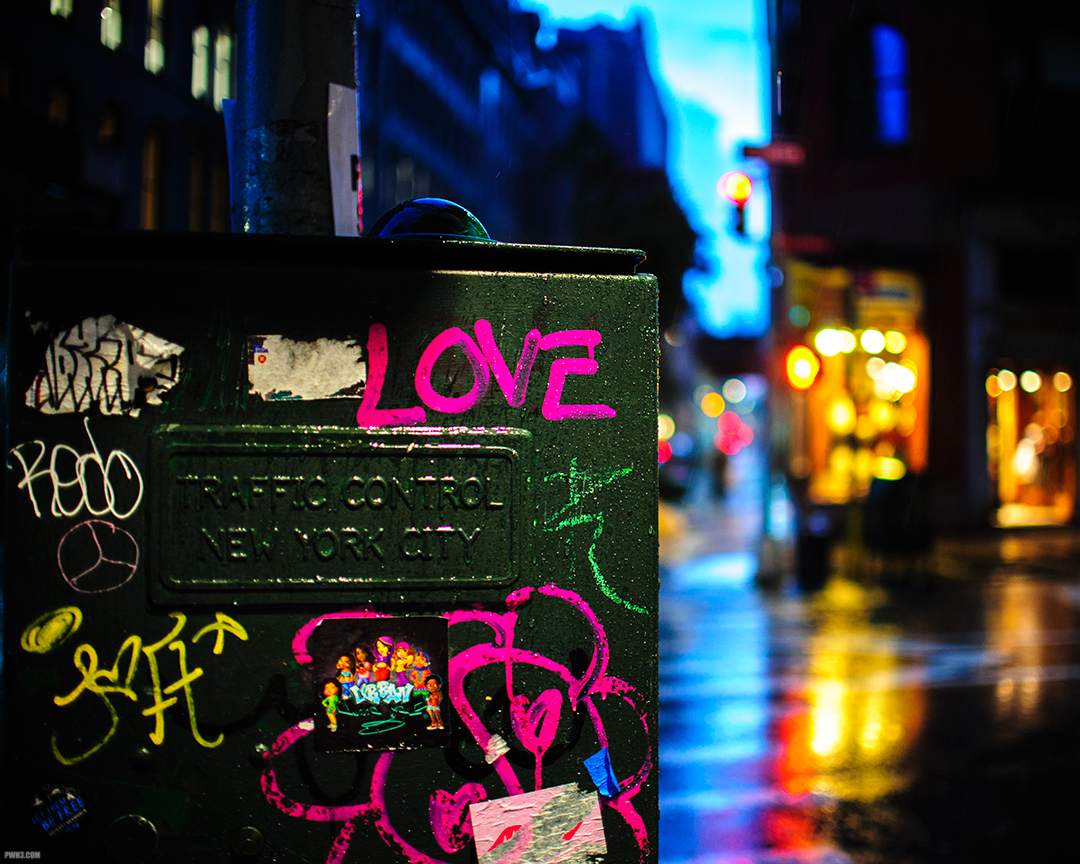
Look at how much crap you can fit into the frame now! 35mm all day, baby! Nikon D700 with 35mm f1.8G DX at f1.8.
Give this lens a try on your full-frame camera and let me know what you think below in the comments! And follow me on Instagram for my latest photos of New York City.
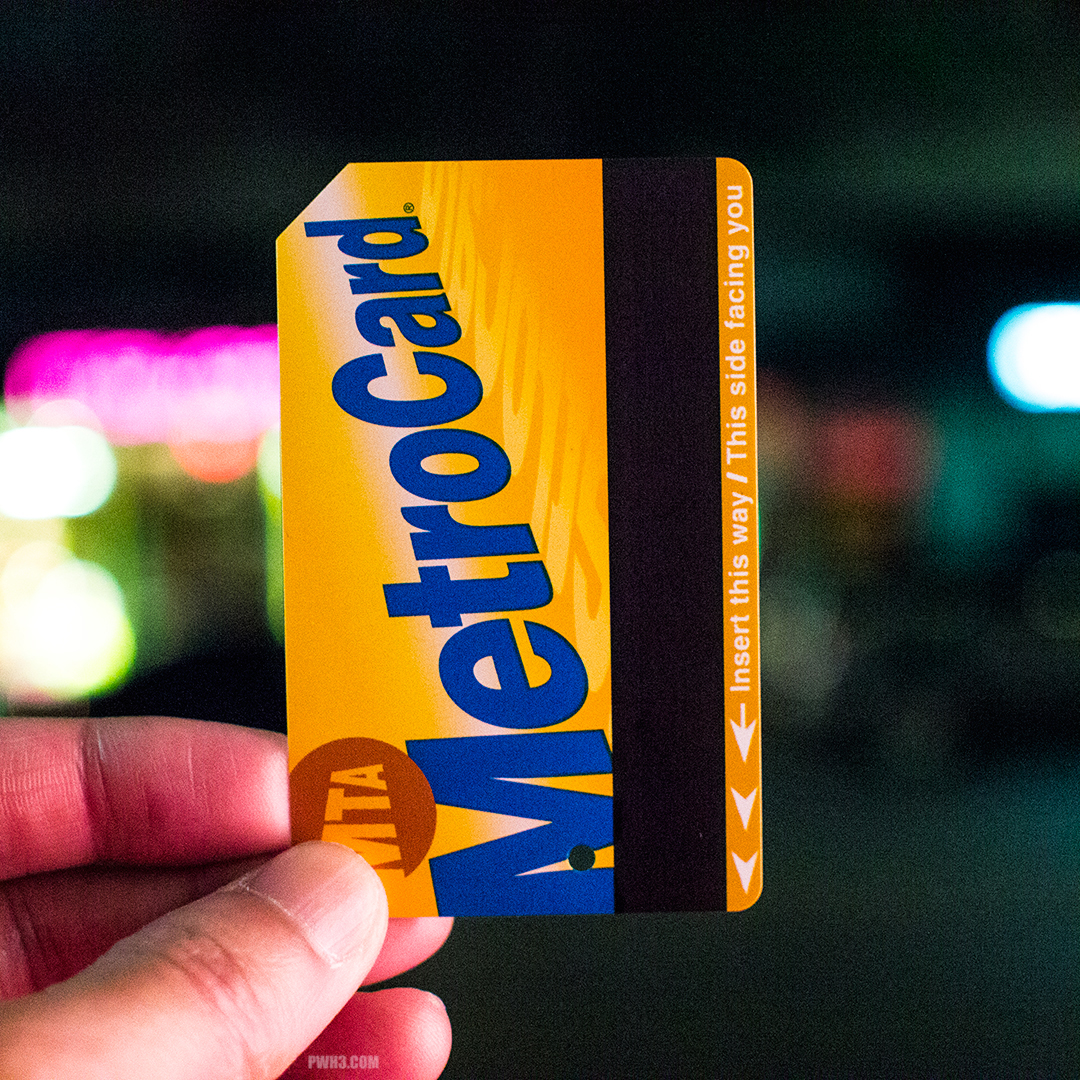
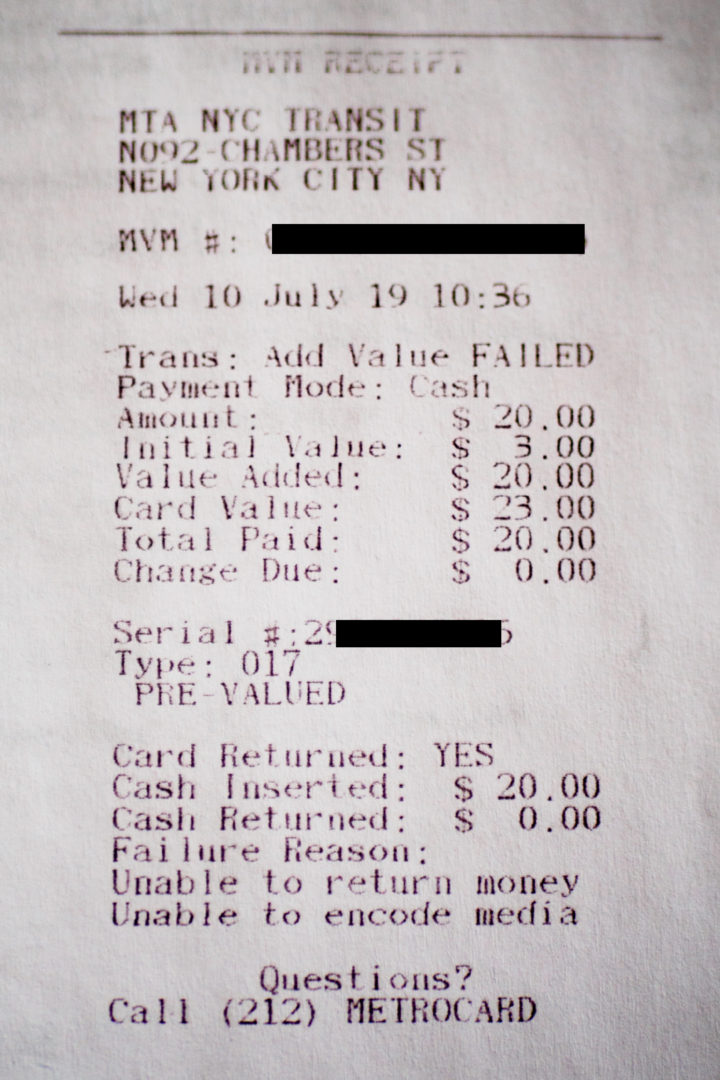
I was coming back from photographing an event in Manhattan, and wanted to add money to my MetroCard because I had a few more places to go to that day by subway and bus. When I tried to add more cash to the card, the machine gave an error, and took the twenty dollar bill without putting anything on the MetroCard. It spit out a receipt that showed an error code. The MTA had just stolen the money.
Robbed in the New York City subway.
I thought no big deal, I’ll just show this to the MTA employee working in the booth and get my money back. But of course, we are dealing with the MTA here: even though it just happened, even though I was holding the card that caused the error, and even though I had the freshly printed error receipt from the machine in my hand, the dude told me he could not refund me the money or even just electronically put the twenty bucks I lost onto the card. He said I had to contact the MTA for a refund. By writing them.
Luckily that wasn’t my last twenty bucks; I had more cash on me. But what if I didn’t? I guess I’d hop the turnstile like everyone else. Anyway, I spent another $20 getting a totally new card from the booth attendant and got on the next train.
The receipt of doom!
The process of getting a refund from the MTA is, naturally, a pain in the ass. First, make sure you keep that receipt AND the MetroCard associated with the messed up transaction. You will have to mail both of them to the MTA as proof of what happened. So even if you think the MetroCard is busted, don’t toss it out, and don’t try to use it again anywhere else. Maybe put a small mark on it with a Sharpie so you don’t get it mixed it up with another card.
You will have to print out and fill out the form located here:
The form is, of course, badly designed — I found it hard to write the letters of my address and all the other stuff inside those stupid little boxes. Then there’s a section of the form where you’ll have to write in all of the information that’s already on the receipt, because why not.
When you’re done, put the form along with the receipt and the MetroCard into an envelope and mail it off to the address on the form. And wait — it took about three months for the MTA send me back a new MetroCard.
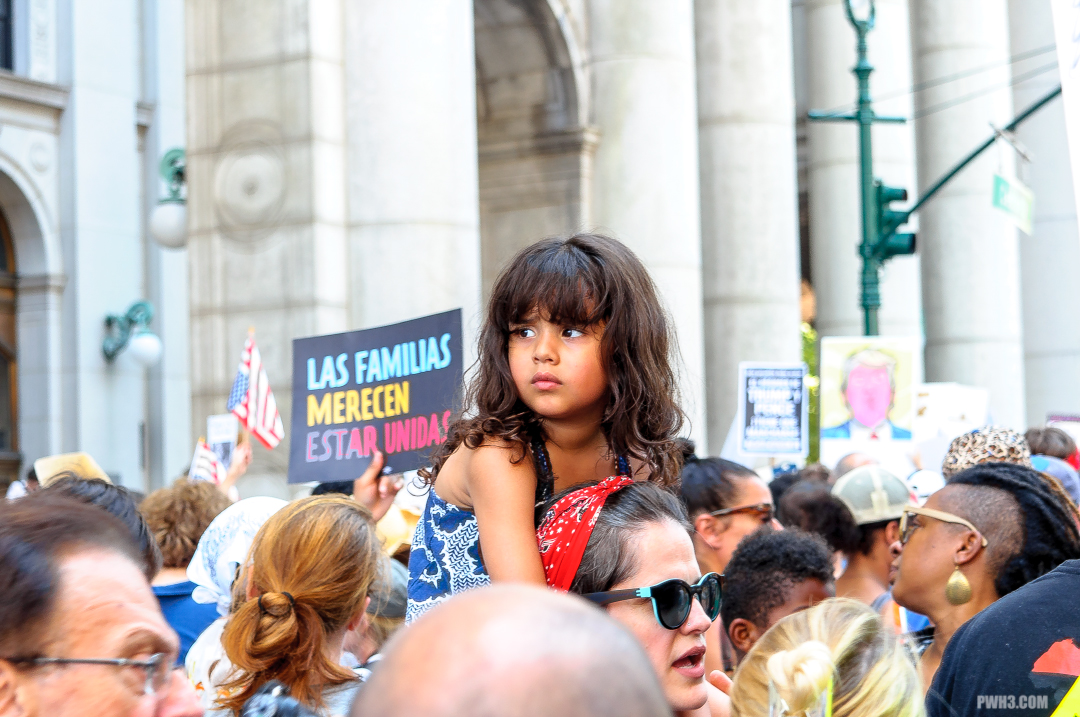
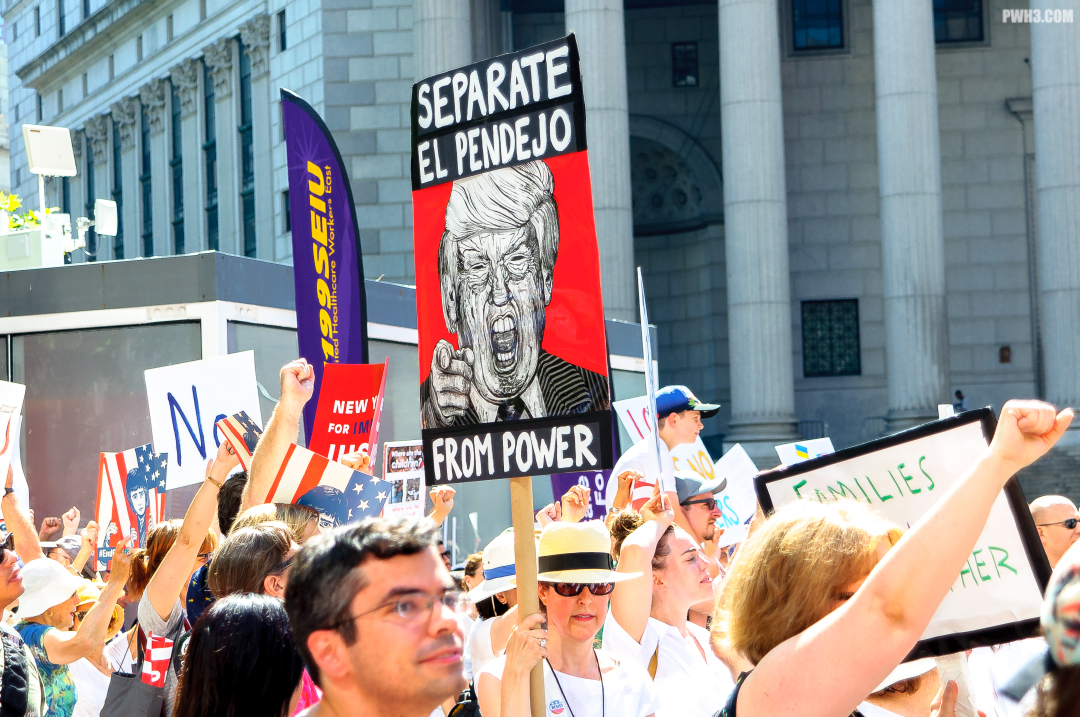
Photographing a political rally or political march can be both exciting and exhausting. In order to properly capture the event, you’ll essentially have to be a participant: you’ll assemble where the protestors assemble, listen to the speakers of the event, and go where the march goes. Here are some of my tips for covering a political march.
Get to the Staging Area Early
Try to show up about an hour before the event begins. There won’t be many people around aside from the organizers and the police setting up barricades. Introduce yourself and talk to the event organizers or event marshals if you can. They are usually helpful and can give you specific information about what is planned, the route, how many people they expect, what happens after the event is over and any last-minute changes to any of the above. They may even offer you a temporary press pass or “behind the scenes” access, depending on how large and serious the event is.
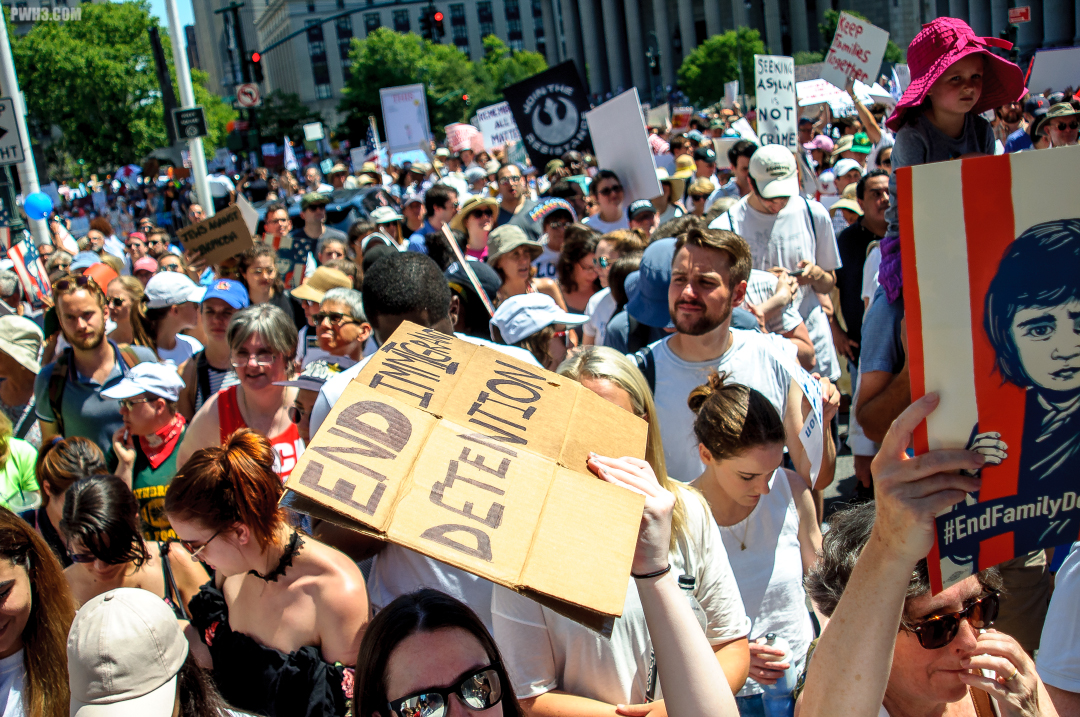
Families Belong Together March in NYC, June 30th, 2018
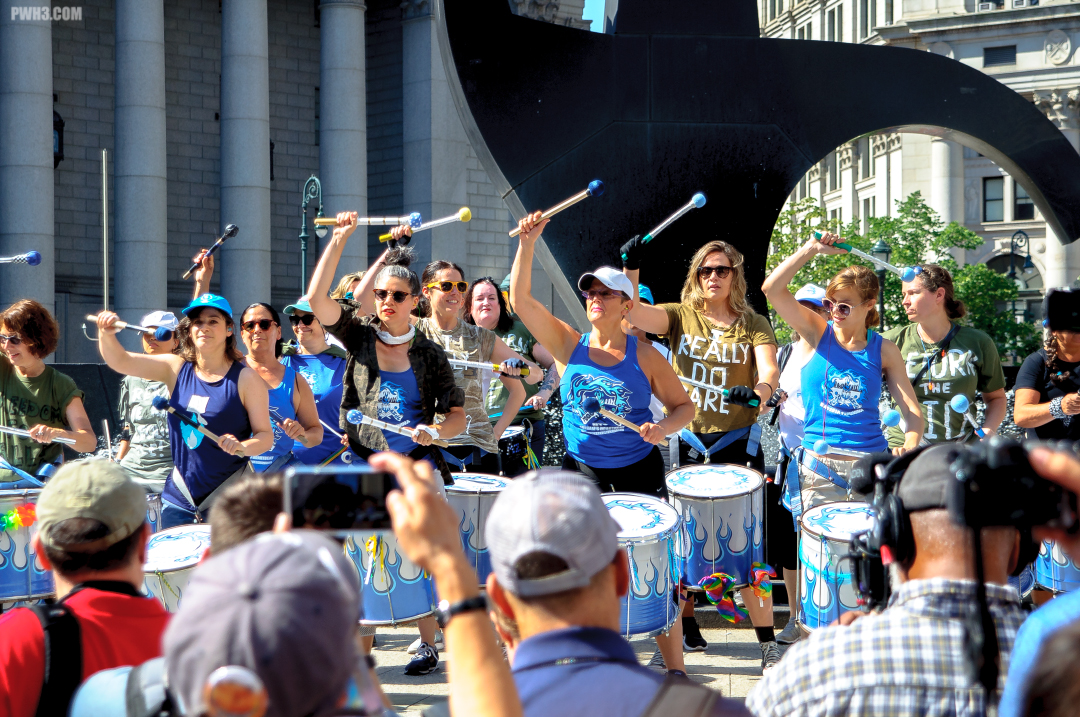
Wear Comfortable Shoes
You will be on your feet all day long. If it’s a march, you’ll have to walk with the protestors in order to capture everything. In almost every case, you’ll be walking on the streets, on concrete and pavement, and you’ll be moving around a lot in order to get the shots you need. Comfortable shoes will keep your feet from getting sore. I actually bought a pair of sneakers just for these types of events.
Families Belong Together March in NYC, June 30th, 2018
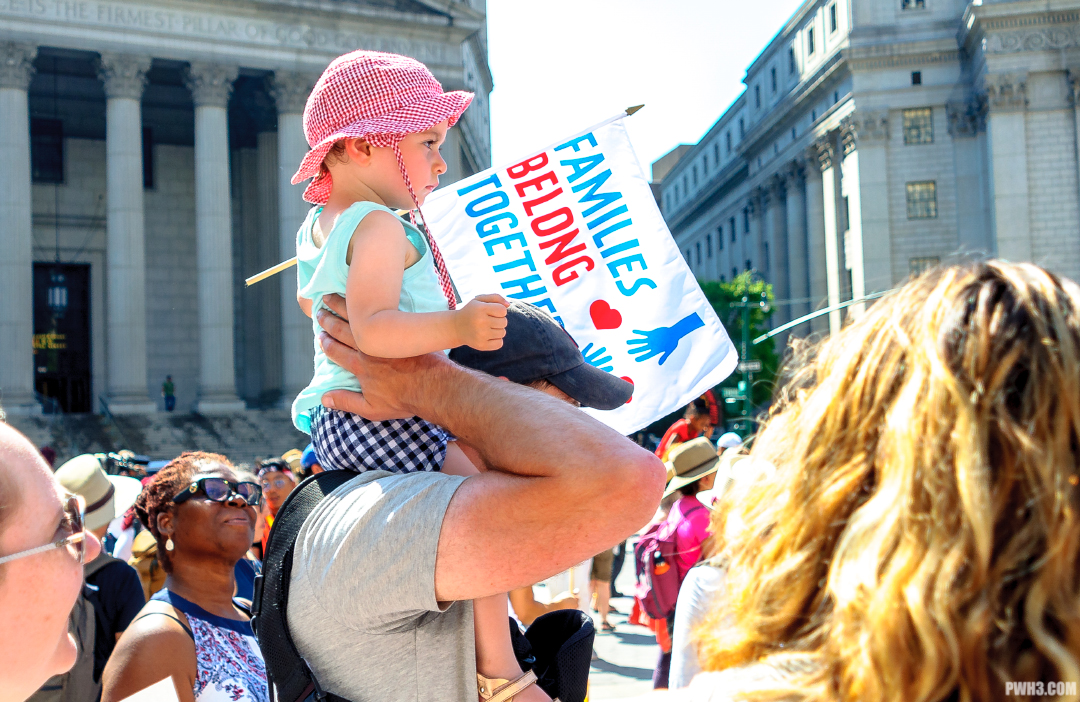
Be Prepared to Deal With the Weather
If it’s going to be a hot summer day, don’t forget to apply lots of sunblock, wear loose & lightweight clothing, and wear a hat. You will be out in the hot sun for several hours. If the event takes place in the winter, be sure to wear clothing that’s warm enough without being so bulky that you’re physically limited. No matter what the season, always bring water or a sports drink. You may not realize how dehydrated you can become while walking, moving around and shooting for hours, even in cold weather.
Families Belong Together March in NYC, June 30th, 2018
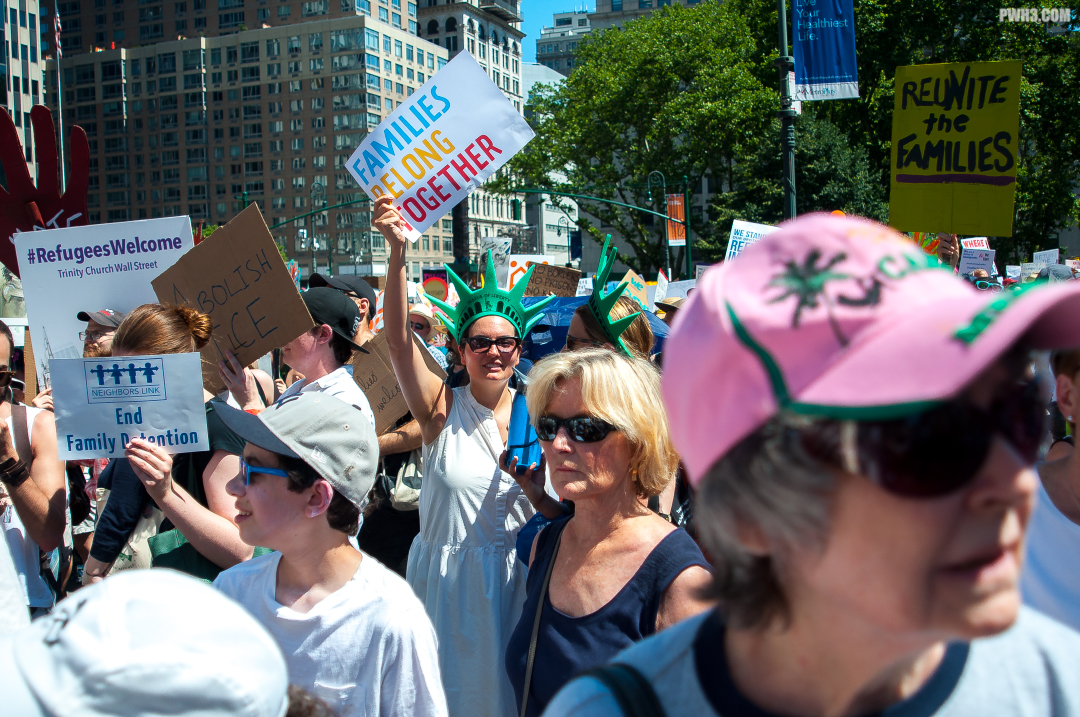
Ask People to Pose For You
The point of a political march or rally is to be seen and have one’s voice heard. People are usually more than happy to have their photo taken. While candid shots are great and should make up the bulk of your photos, a few posed shots can really help to capture the feel of the event and humanize it.
Lady Liberty at the Families Belong Together March in NYC, June 30th, 2018
Look Out For Any Trouble
A political issue that inspires people so much that they assemble to rally and march will probably bring out a lot of emotion in them while they’re on the streets. Sometimes these emotions can get out of control. As a photographer, you’re there to capture what happens, but be sure to keep yourself (and your gear) safe. If someone seems a bit too aggressive for your tastes, quietly move away from them. In addition, some marches tend to bring out opposition protestors, which can lead to open conflict. Be cautious of situations like this, since they can spiral out of control quickly. If anyone is causing real trouble (such as threatening violence or throwing objects) tell an event marshal or a police officer.
Donald Trump appears at the Families Belong Together March in NYC, June 30th, 2018
Be Prepared to Be Jostled Around
You’ll be among a large crowd with active and fired up people, so it can’t be helped if people accidentally bump into you, step on your feet, or knock into you from behind (and you might be guilty of accidentally doing it too!) It’s nothing personal and not a big deal. Just be mindful of your photography equipment so it doesn’t get damaged. Keep your camera close to your body and don’t let it swing around.
30,000 people attended the Families Belong Together March in NYC, June 30th, 2018
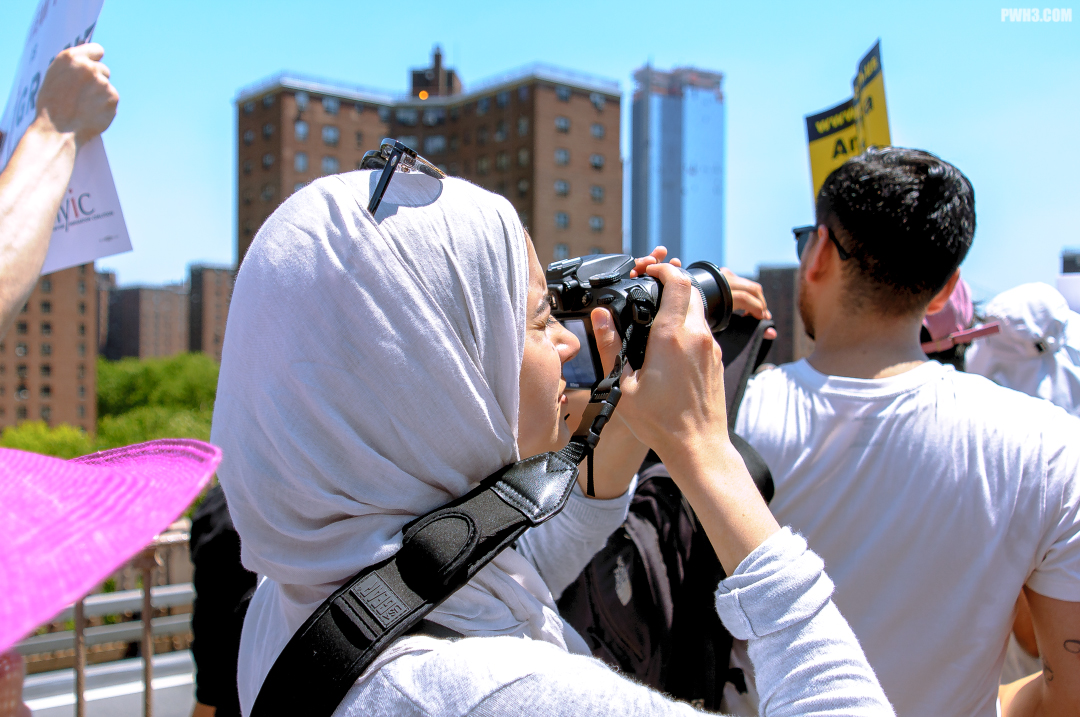
Use a Zoom Lens
This is one of the few times you’ll hear me say not to bother with prime lenses. Instead, use a zoom with a good range (24mm to 120mm is my favorite). You’ll often need to go from wide to close-up very quickly, and because of the crowd you may not always be in the position to get the shot you want. You will often be too far away, and the crowd will make it impossible to “zoom with your feet” with a prime lens. You also won’t need to worry about how bright the aperture is; these events always start in the morning and typically finish by late afternoon.
Families Belong Together March in NYC, June 30th, 2018
These are my tips for photographing a political march or a rally. If you have a question or any other tips, feel free to leave a comment below or contact me on Instagram.
All photos in this article were taken with a Nikon D90 and an old Nikkor 24-120mm f3.5-5.6D Streetsweeper lens from the year 1996 (my favorite Nikon lens of all time).
So you want your very first “real camera” — you want a DSLR. You’re ready to step up from your point-and-shoot or smartphone. But you’re not sure what you should buy to get started, and you don’t want to spend too much money as a beginner. Here’s my advice:
Buy Used
There are some people that will scoff at the idea of buying anything used, but it’s extremely common in the photography world to buy used gear. Photographers are constantly selling their equipment for various reasons. Sometimes a photographer doesn’t use a camera or lens as much as they thought they would. Or maybe they are selling off equipment to buy something more expensive. Whatever the case, the used photography gear market is thriving and you’re sure to find whatever you want at a discount. It’s true that there’s always a risk that some used gear may be in bad shape or may not function properly, so use a reputable source like KEH or Amazon (both have generous and easy return policies) and you’ll be fine. You can also try ordering refurbished equipment directly from the manufacturer.
I personally rarely buy any of my equipment new; nearly every piece of gear I have was bought used. Many of my cameras and lenses are very old.
Buy a Nikon
For a beginner, choosing between Canon and Nikon is often an agonizing decision, so I’m going to make it easy for you: just buy a Nikon. Okay, I’m a Nikon fan, it’s true. But they really are great cameras, and any Nikon DSLR made after 2011 is going to give you very high-quality images. And when compared with similar cameras from Canon, Nikon cameras usually have more megapixels and better sensors.
Buy One Lens
When you’re shopping for your used Nikon, keep in mind that it’s likely just the body you’re buying. You’ll also need to buy a lens. But don’t buy a bunch of lenses. As a beginner photographer, you’re going to be figuring out your style and what you like to shoot. Get one general-purpose lens and stick with that for a while.
My Specific Recommendation
Buy a used Nikon D3300 and a 35mm f1.8G DX lens. The Nikon D3300 is a very good camera, with excellent image quality. It’s also small and light, which means you’ll be more likely to throw it in a bag and bring it with you everywhere.
The 35mm f1.8G DX lens is a great all-around lens. It’s inexpensive, very sharp, focuses quickly, and it’s small. It’s also good for low-light situations, such as night photography or taking pictures of your friends in dimly lit bars. The lens is also good for people shots since it will give you that nice “blurred background” look when you take a picture of someone’s face. Also, it can focus very closely on objects — great for food shots, for example. And you won’t have to buy anything else for a while.
Good luck getting started on your photographic journey, and if you have any questions feel free to e-mail me, message me on Instagram, or leave a comment below.