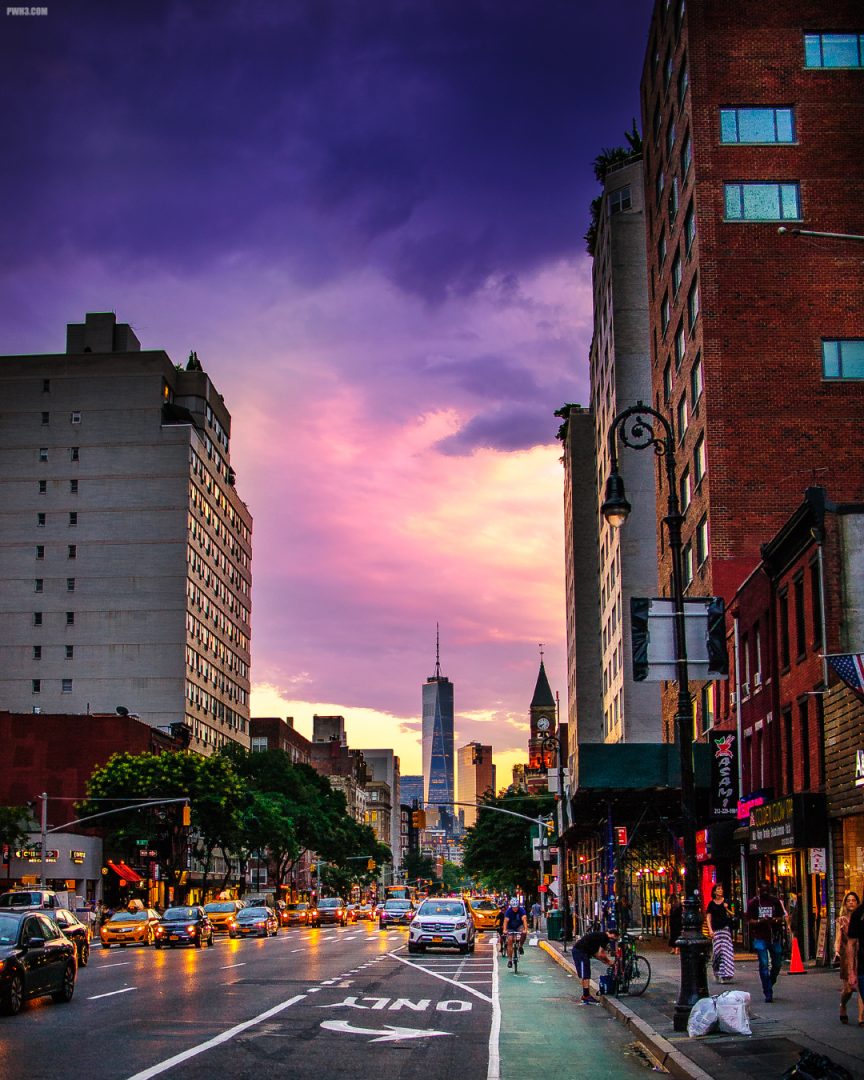
New York City has one of the most beautiful and iconic skylines in the world, thanks to all of the tall and unique buildings on the island of Manhattan.
But of course, you can’t photograph the full skyline while on the island — you have to travel outside of Manhattan to do it.
While there are many spots to photograph the skyline, I feel one place is much better than all of the rest to do it, and in this article I’ll explain where that is and why.
The answer is yes. You can use Nikon’s 35mm DX lens on an FX camera in FX mode. For some reason, the lens was designed to *almost* cover a full-frame sensor, despite being designed and marketed only for DX bodies. There are some problems with it, but if you recently upgraded to a full-frame Nikon and already have this lens, it’s worth giving it a try.
The first thing you need to do is find the “Image area” submenu on your camera and turn OFF the “Auto DX crop” option. Also make sure “Choose image area” is set to FX, which it probably already is unless you’ve been screwing around.
Turn off Auto DX crop! This is the most important menu option change you will ever make in your entire life.
Once that’s all set, the camera will no longer go into DX mode and you’ll be able to use the full 35mm glory of this tiny lens on your full-frame system. You will now get a nice and useful 35mm field of view with only some minor vignetting at wider apertures (generally speaking, under f4).
If you stop down too far (past f4) the edges will change from gentle vignetting to totally black, as if you’re looking through the keyhole of a door. That’s the caveat with using this lens on an FX camera. But you bought a full-frame system to use the lenses wide open for that ridiculous background blur, so who cares about f4 and above, right?
Nikon D700 with 35mm f1.8G DX lens at f3.2. This image is uncorrected so you can see the vignetting in the corners.
As you can see in the sample photo above, the vignetting is definitely there but it’s not too bad under most shooting conditions. Vignetting may be become more distracting in bright sunlight, but you can always crop it out or correct for it in Photoshop or Lightroom under the Lens Corrections menu. If you shoot a lot at night or in dark bars like I do, then the vignetting won’t even matter.
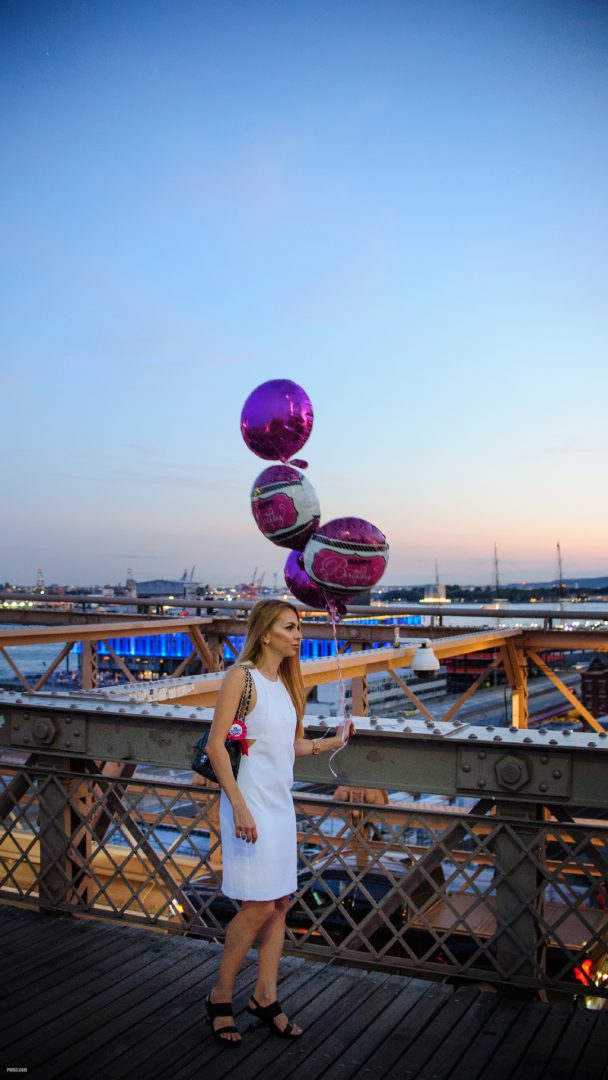
Vignetting? Nobody cares! Nikon D700 with 35mm f1.8G DX at f1.8.
The lens performs well on full-frame cameras, with rich and vivid colors. Sometimes the colors are too vivid, to the point of being almost cartoonish. But you can always color correct in your editing software.
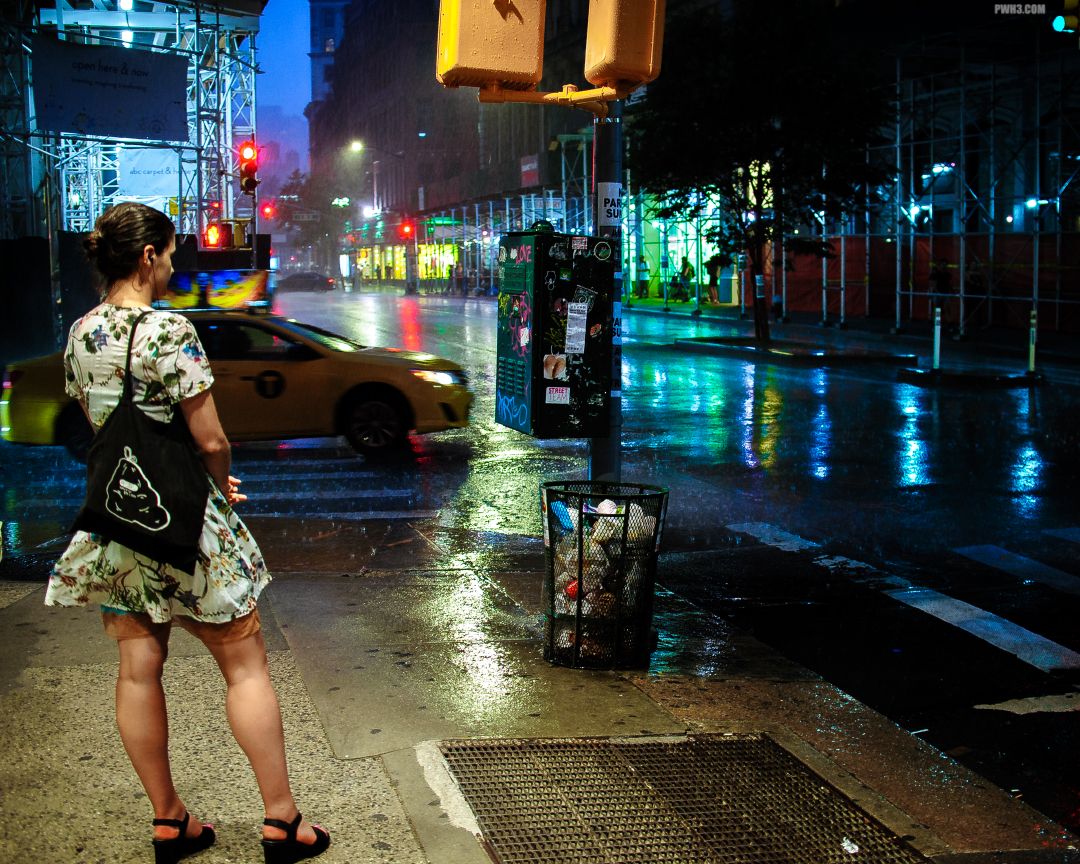
Beware — this lens causes storms and rain when attached to an FX camera! Nikon D700 with 35mm f1.8G DX at f2.5.
Autofocus is quick and accurate, but that’s to be expected since FX autofocus systems are generally the best anyway. It’s also nice to use this lens with a huge, bright FX viewfinder rather than the tiny DX viewfinders.
Look at how much crap you can fit into the frame now! 35mm all day, baby! Nikon D700 with 35mm f1.8G DX at f1.8.
Give this lens a try on your full-frame camera and let me know what you think below in the comments! And follow me on Instagram for my latest photos of New York City.
I have owned many cameras over the years: manual film cameras, point and shoot cameras, Micro Four Thirds cameras, APS-C cameras and professional full-frame cameras.
I’ve also bought lots of different lenses for all of these different cameras and camera formats, from cheap zooms to expensive primes.
But if I could start over, knowing what I know now and having experience with all of this gear, would I make the same choices? Would I buy and own the same stuff?
The answer is no way.
Late nights drinking… I mean… listening to jazz… in Harlem.
Keep it Simple
Starting over, I would try to keep everything as simple as possible. That means only two cameras. I say two cameras because I do think every photographer needs a backup camera, so in my “starting over” plan that’d mean owning a second copy of the same kind of camera or a closely similar model.
There were no sandwiches in here.
Keep it Cheap
I’ve spent a lot of cash on gear. I wouldn’t do that again. I would just get the cheapest camera that fits my needs and be done with it. Also consider that when a more expensive camera breaks, it’s more expensive to repair. I want a camera so cheap that I can just buy a new one for the cost of repairing a higher-end camera.
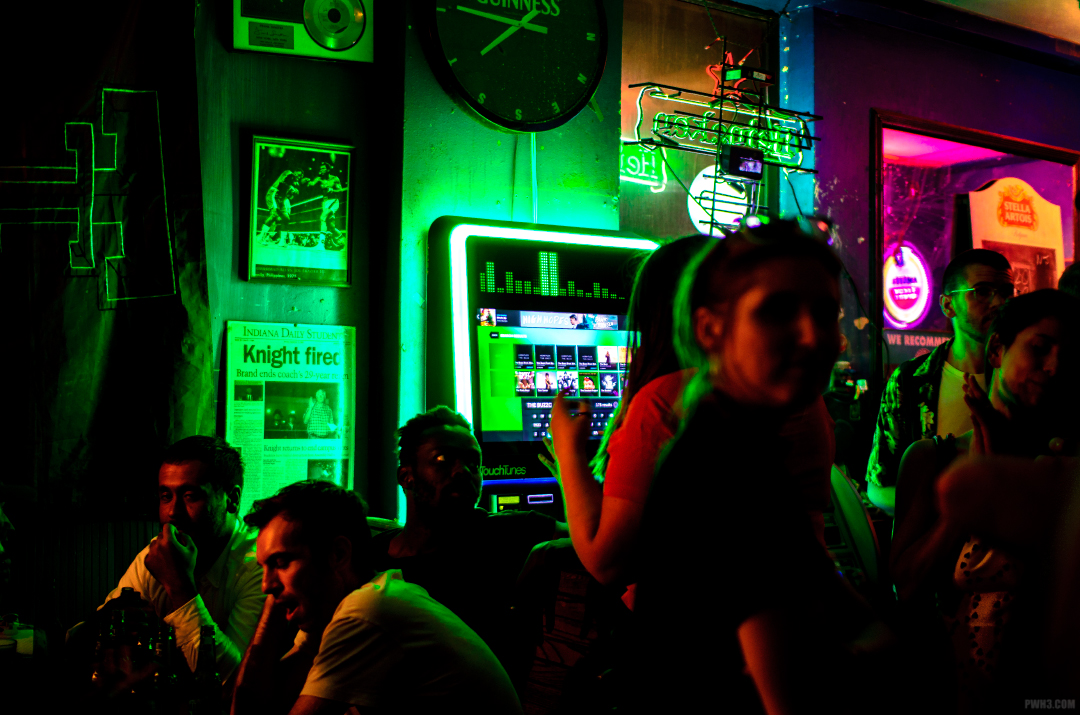
A dive bar during happy hour means I’m finally not the drunkest person in the room!
Image Quality Above All Else
In the past I have told myself that the image quality of certain cameras was “good enough”. Why even bother with carrying a camera around if you’re aiming just for “good enough” image quality? It is true that all modern sensors perform very well, but there are differences between the formats. There is a point where it’s hard to tell those differences (such as newer APS-C sensors versus full-frame sensors), but smaller sensor formats than APS-C just don’t deliver in a lot of circumstances. So no more “good enough” — I want superb image quality.
Give me a pink and teal hotdog, please.
Controls Aren’t That Important
I don’t care that much about controls, buttons, dials, menu design, and so on. Are you going out shooting to make beautiful images, or are you out there to hold a camera and play with the buttons? I would absolutely rather have a camera with fewer controls that made stellar images than a “pro” camera with tons of buttons and dials that wasn’t so great.
Another night, another bar.
Okay, Let’s Start Over
So what does this all mean? It means I’d choose an APS-C camera, like one from the Nikon D5x00 series. The sad thing is, I already have a Nikon D5100 that I feel performs better than any other camera I own. I should have just stopping buying cameras after that one. Using it with an old 30mm Sigma f1.4 lens, the D5100 delivers images I haven’t been able to match with other combinations. I can also easily set it up for video since it has a fully-articulated flip-out screen and an input for a microphone.
If I knew everything that I know now I would have just bought that one camera — or these days, Nikon’s latest version of it, the D5500 and focused on taking pictures rather than chasing gear.
Why don’t we ever see the Papaya Queen? Did she abandon him for Canada?
Every photo in this article was taken with my little Nikon D5100 & 30mm f1.4 setup. I bet you, dear reader, probably thought a more expensive, newer, or possibly even a full-frame camera took these images. But they didn’t. It was Nikon’s little outdated “amateur” model that made them.
It seems that every photographer dreams of some day owning a digital full-frame camera. The lure of full-frame is strong, with promises of photos that have less noise, better retention of shadows and highlights, better color accuracy, and that amazing shallow depth-of-field.
However, improvements in sensor technology have made APS-C and even Micro Four Thirds (m4/3) nearly equal to full-frame cameras in many of those areas. In my opinion, the main reason to move to a full frame system is if you really need very shallow depth-of-field at normal to wide angles (such as 50mm, 35mm, 28mm, 24mm, and so on). Otherwise an APS-C or m4/3 will probably serve you better, and for much less cost.
That being said, if you really want a full-frame camera but don’t want to spend a lot of cash, there are lots of used options among older models. Once selling for thousands of dollars, these old full-frame cameras can now be had for mere hundreds.
Enter the Nikon D700
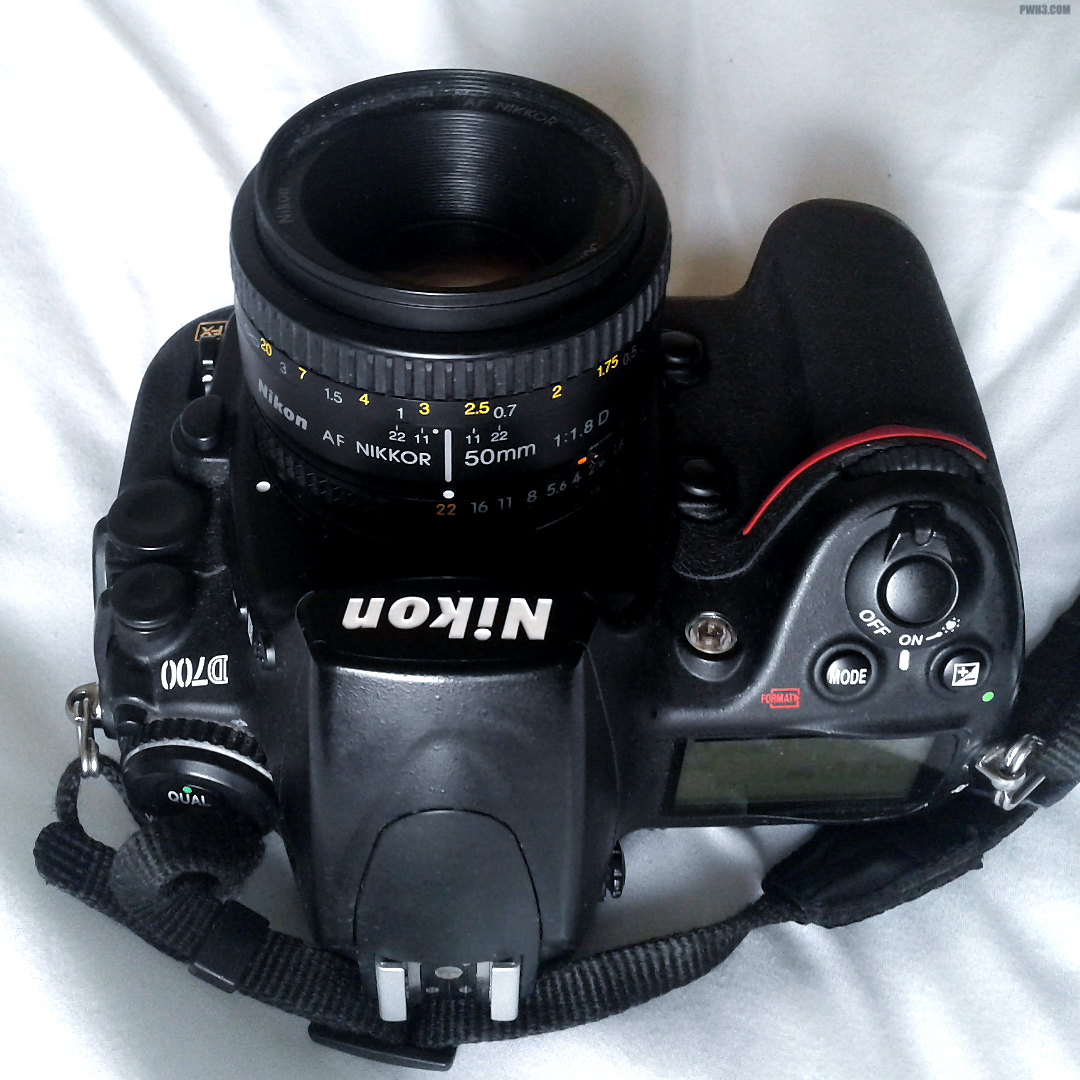
The Nikon D700 is a legendary camera. It has always reminded me of a digital version of Nikon’s F4 film camera in terms of cult status and aesthetic. And much like the Nikon F4, I have always wanted one (and now own both). The Nikon D700 originally retailed for $2999.99 back in the year 2008. In the used market today, you can pick one up for around $399 — or even less if you are patient and find a good sale. At this point, it’s the cheapest viable way to enter the world of full-frame photography.
A well-used Nikon D700 poses on my bed.
Using an Eleven Year-Old Camera
So how does the Nikon D700 hold up today? Pretty well. It’s a rugged, solid, weatherproof camera. It’s *very* heavy but feels good to hold. The grip is perfect. The controls are great. The viewfinder is enormous and clear. And the full-frame images are… alright.
Spring 2019 near Times Square. Nikon D700 and the even older Nikkor 24mm-120mm f3.5-f5.6D “Streetsweeper” at 24mm.
A Camera for the People
Color rendition at lower ISOs is excellent and true-to-life. Highlights and shadows in brightly lit scenes are preserved well. Blue colors seem particularly vivid, as is the case with many older Nikons. Skin tones at the base ISO are pretty good. The D700 seems to excel as a portrait or “people” camera, perfect for events.
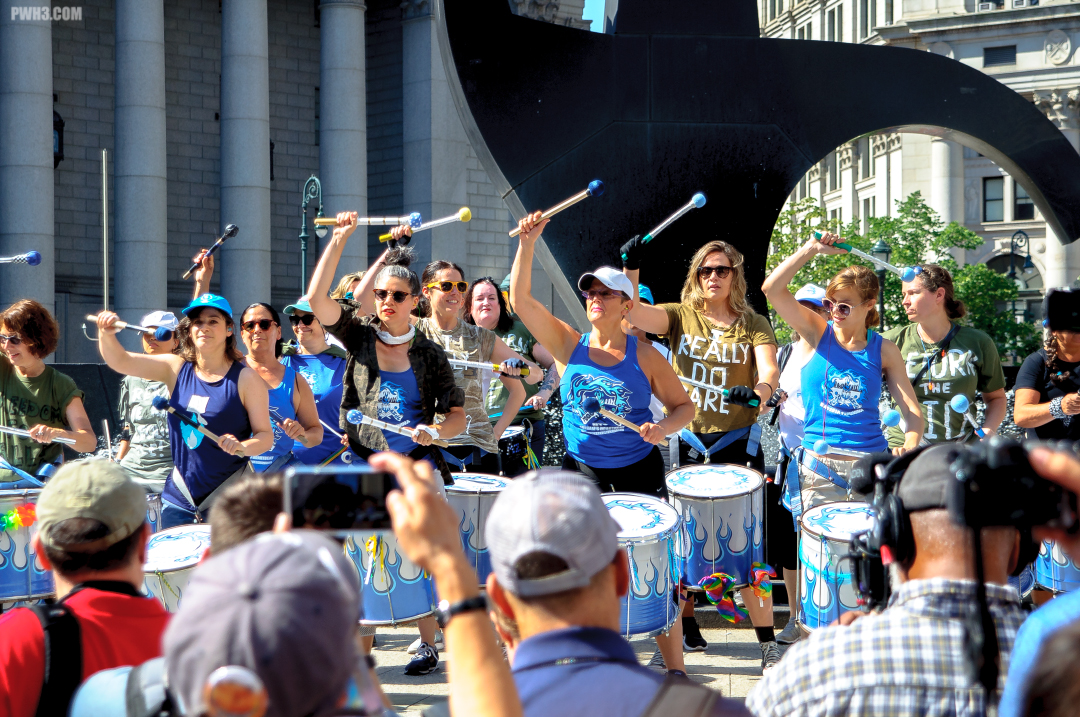
Waiting for the US Women’s Soccer Team’s New York City victory parade to start. Nikon D700 and Nikkor 50mm f1.8D at f1.8, ISO 200.
ISO Performance & Color
As ISO increases, the color rendition does not hold up as well, though that’s true of many cameras. The further up the ISO ladder you go, the more washed-out and inaccurate the colors become. When you reach ISO 3200 and beyond, you may find magenta or green color casts in a lot of your images.
Night Lights. Nikon D700 and 50mm f1.8D at f1.8, ISO 450.
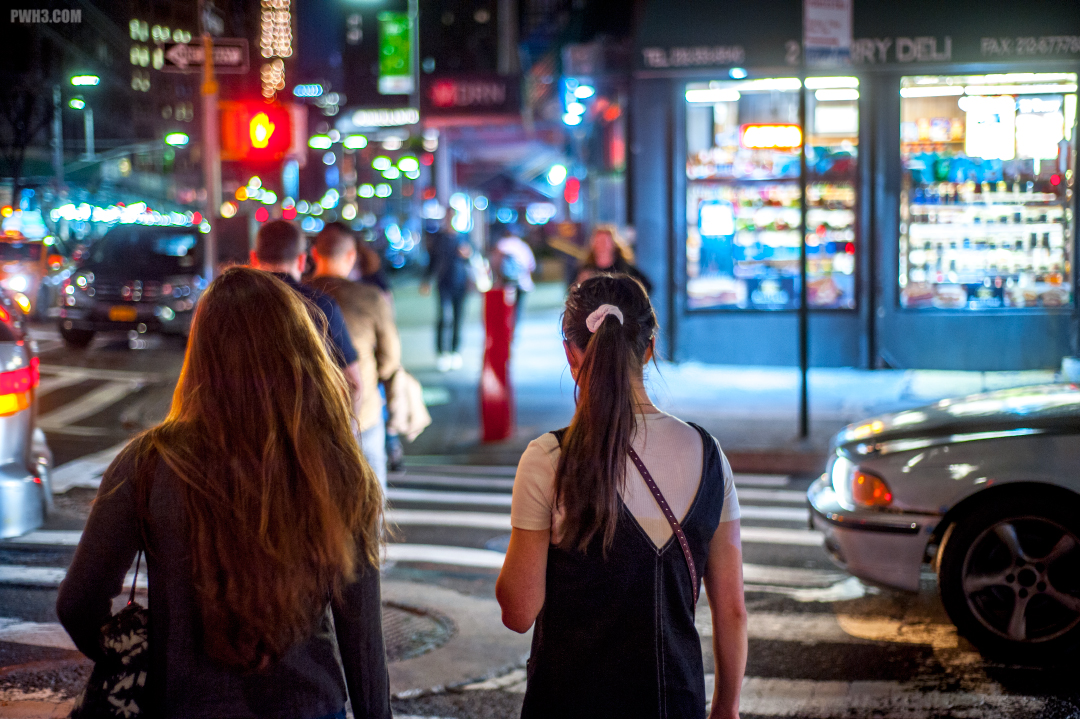
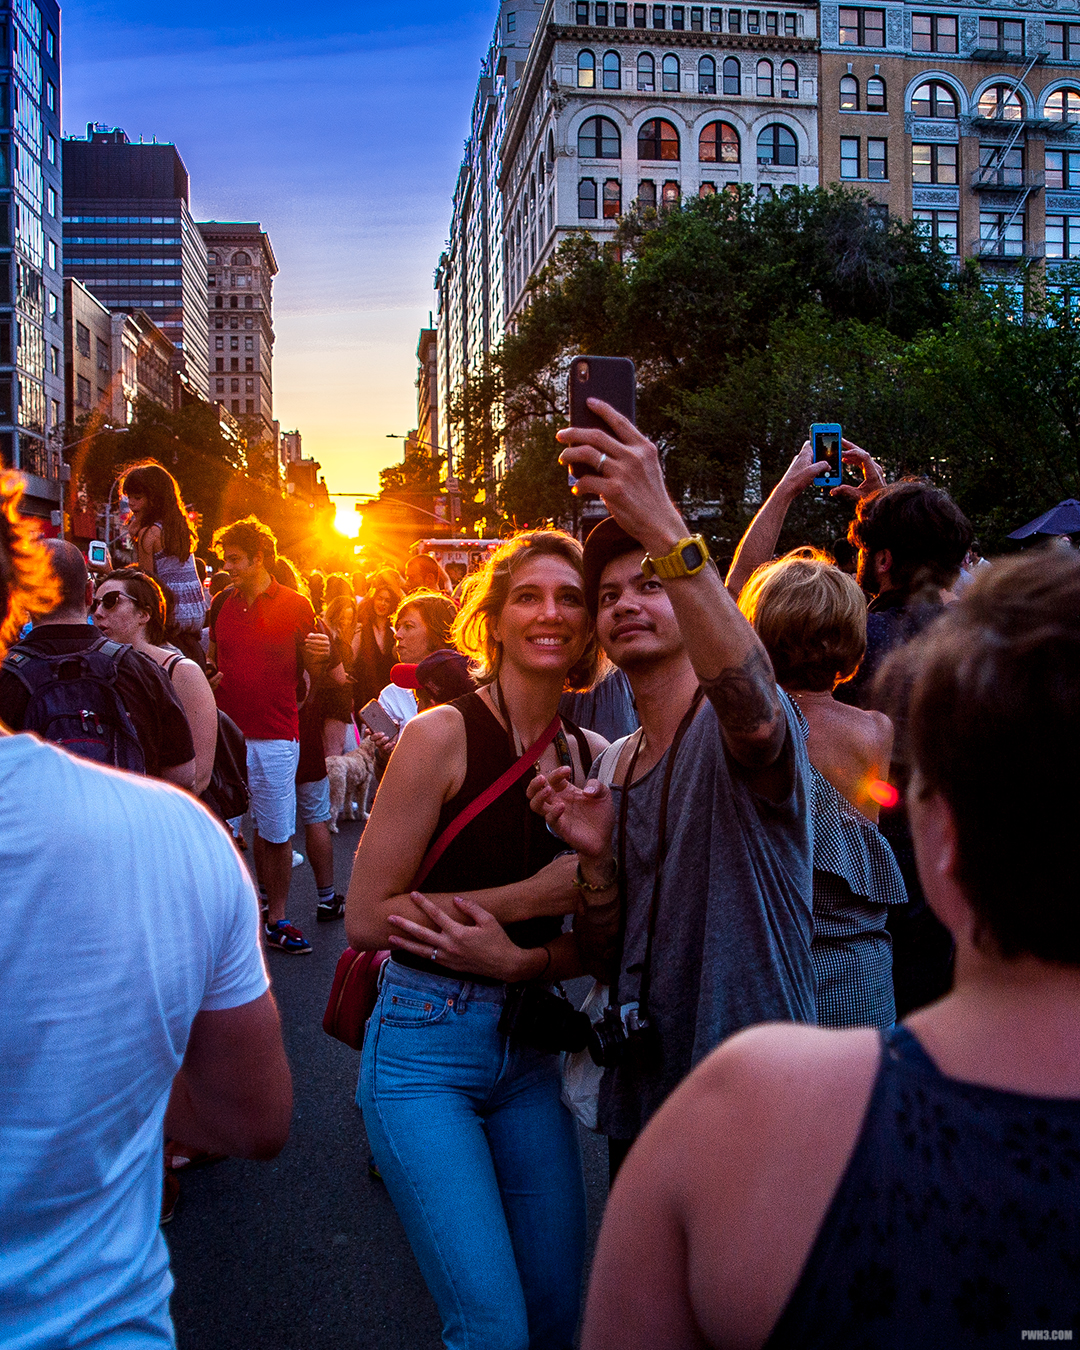
Difficult Shooting Situations
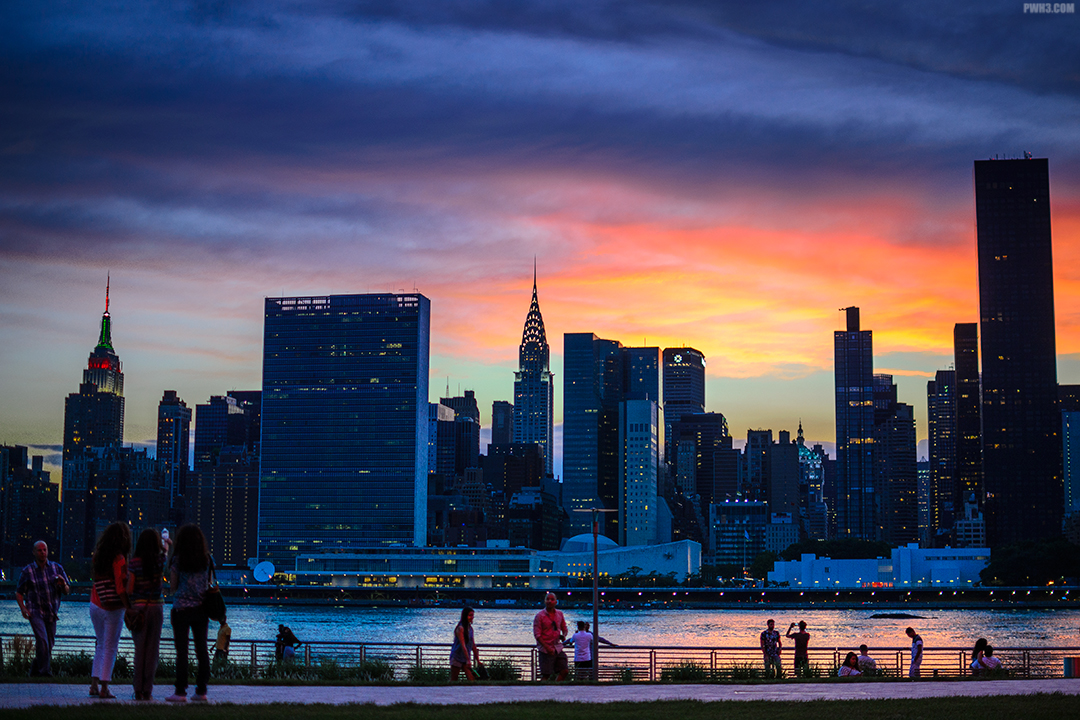
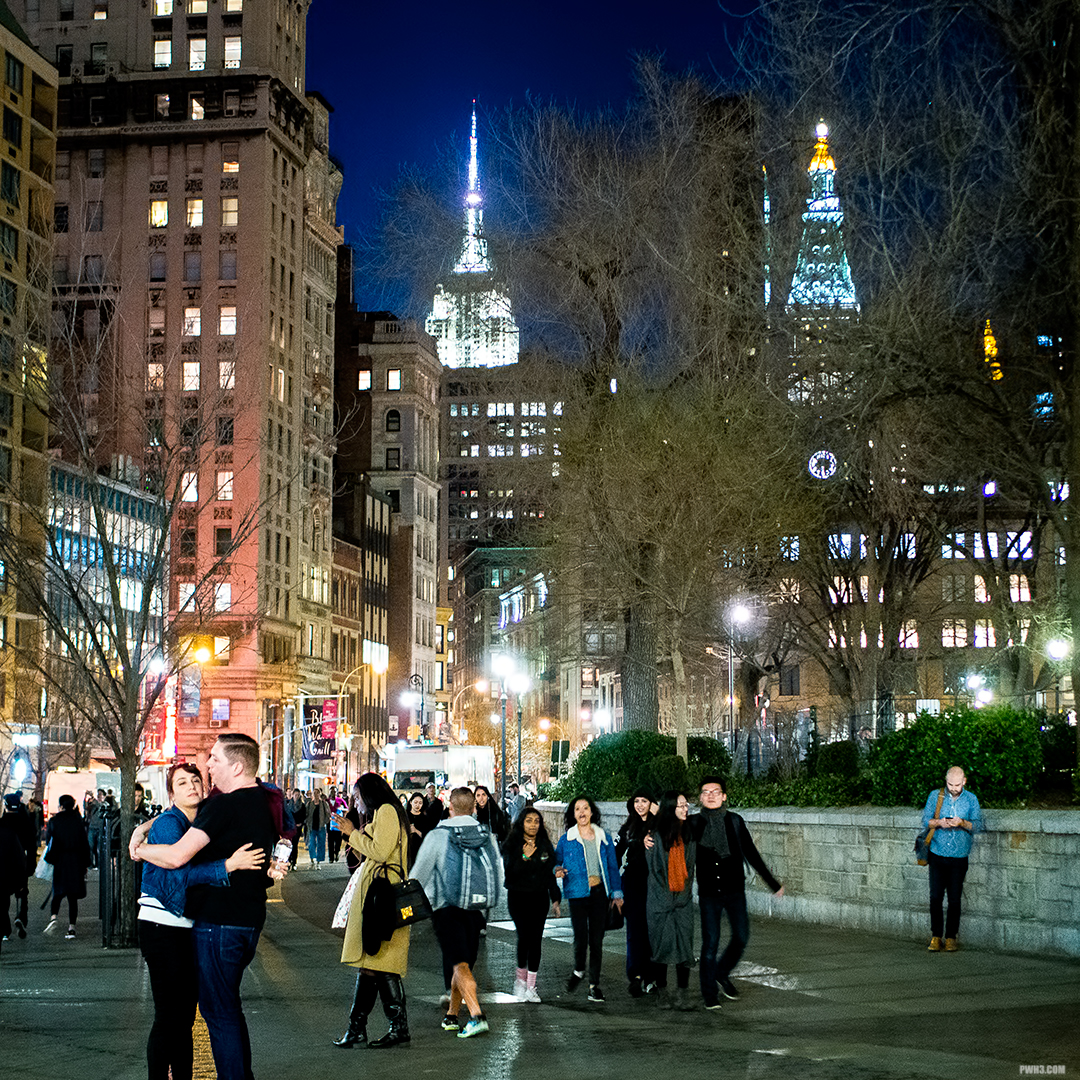
In high-contrast scenes where you may need to lift the shadows — such as trying to capture a group of people as they capture a sunset on their cell phones — there is a noticeable amount of noise. It’s not overwhelmingly bad, and not unlike film grain, but it definitely will be there if you try to salvage a photo taken under difficult conditions.
Manhattanhenge Love. Nikon D700 and “Streetsweeper” 24mm-120mm f3.5-f5.6D lens at 24mm, ISO 200
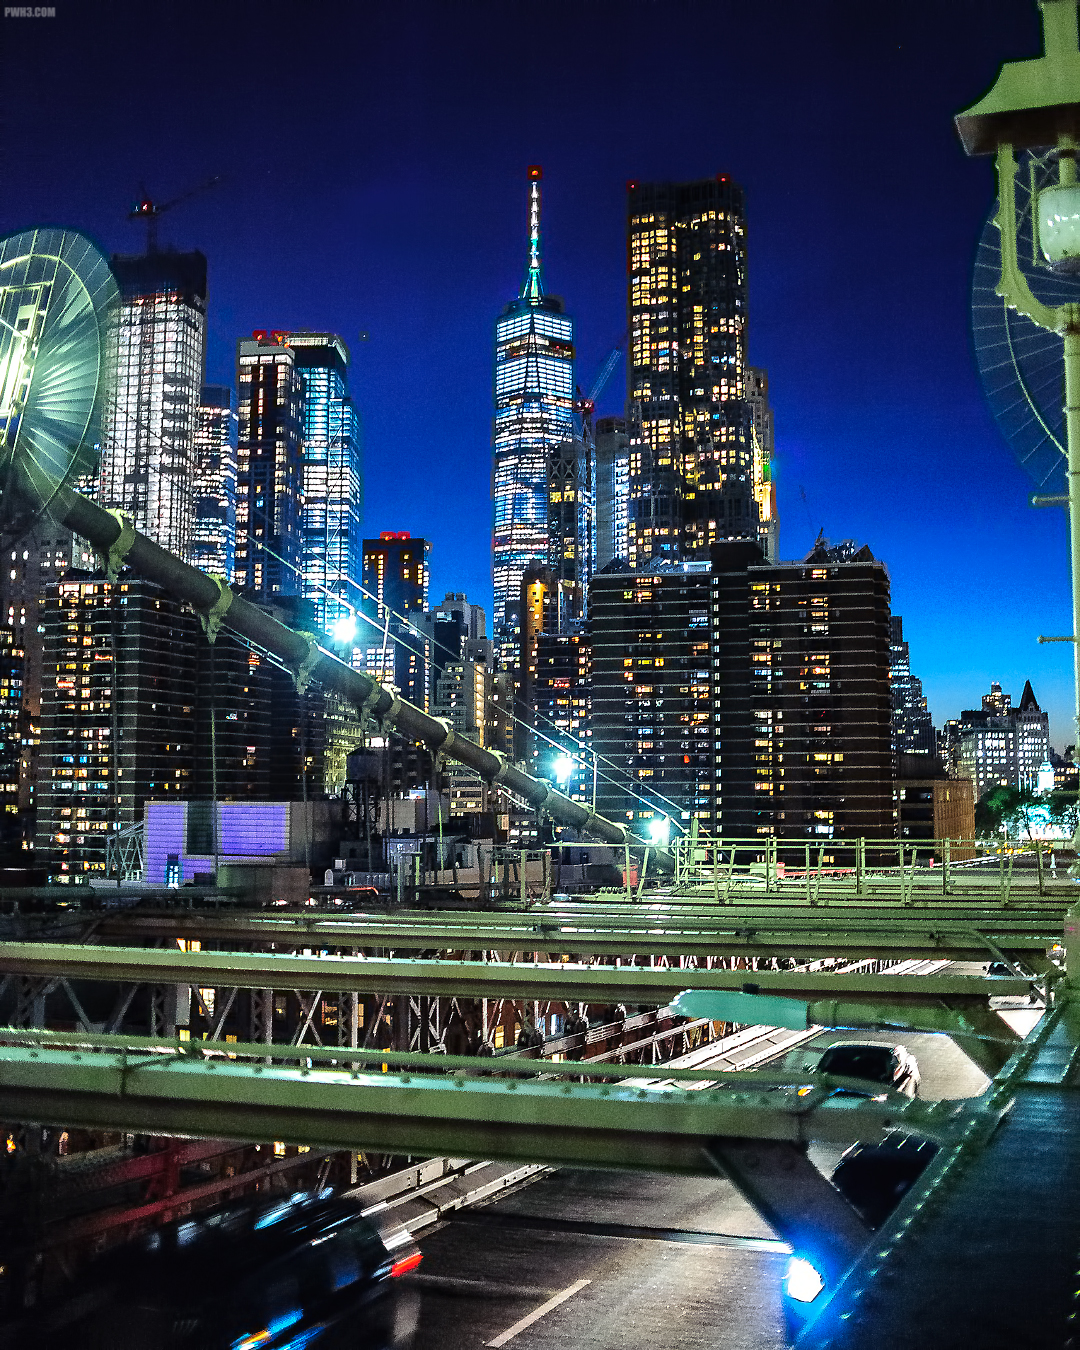
Low Light Performance
Noise is also noticeably present in high-ISO shots and night shots. In addition to noise, some night shots suffered from vertical AND horizontal banding at ISO 3200 and higher. If you shoot a lot of night shots like I do, I would say ISO 5000 is your usable limit in terms of noise. But you’re better off staying at ISO 3200 and below.
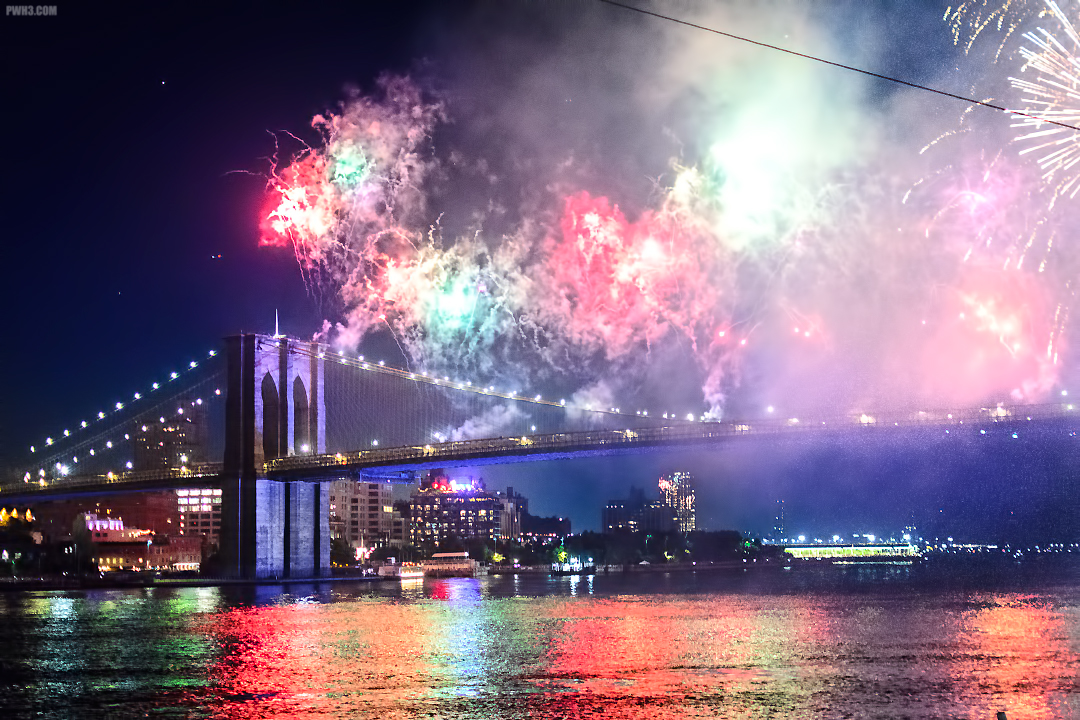
One World Trade Center as seen from the Brooklyn Bridge at night. Nikon D700 and 35mm 1.8G DX (yes, DX!) in FX mode, ISO 3200.
Other Things to Consider
This is an old camera, and the people who owned them were often professionals or serious enthusiasts. Therefore if you buy one it will probably have a very high shutter count. It’s likely that any one you pick up will have a shutter count of well over 100,000 actuations, and possibly over 200,000 actuations. The more actuations your camera’s shutter has, the more likely it is (statistically) that you’ll encounter a shutter failure which will need to be repaired.
If your camera suffers a mysterious problem and simply stops working, other parts needed for repair (such as LCD screens, internal electronics, the internal card reader) may be hard to come by or impossible to obtain.
The camera uses Compact Flash (CF) Cards instead of SD cards, so if you don’t have CF Cards laying around, that will be another thing you’ll need to buy. You will also need an external CF Card reader since no computer or laptop has a built-in CF card reader.
The Nikon D700 does not shoot video. In addition, the Live View mode is extremely cumbersome to the point of being useless, so if you’re a shooter who uses Live View often, you may want to rethink buying this camera.
If you are moving from a Nikon DX camera, you will mostly likely need to buy new lenses. Only FX lenses will work properly on this camera (except for the 35mm DX lens which actually does work pretty well, but that’s for another article).
Note: some of you who are Nikon DX users already have the Nikon 50mm f1.8G or f1.8D lenses which you are using for portraits; those two 50mm lenses will work fine.
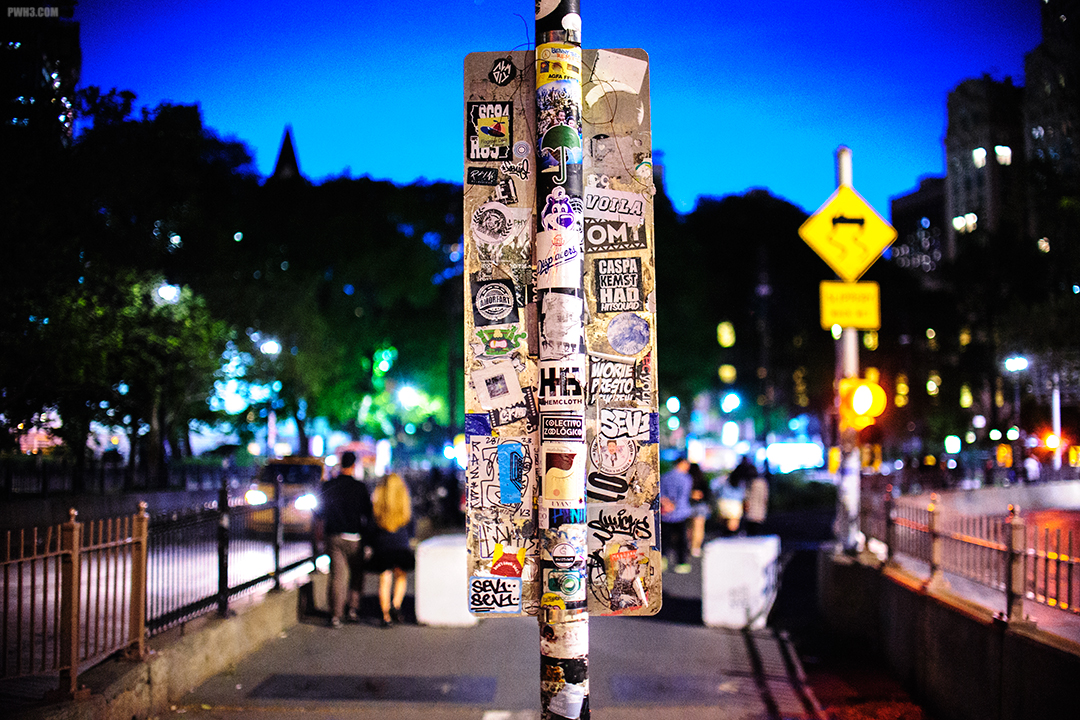
So, remember to factor in the cost of all of these things when deciding to purchase this camera. You may find that your “cheap entry” into full-frame has gotten rather expensive after all.
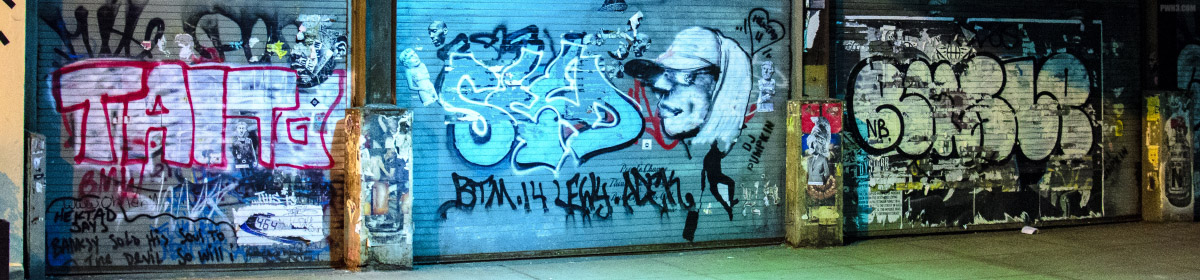
Sticker Life. Nikon D700 and 35mm 1.8G DX (yes, DX!) in FX mode, ISO 3200.
The Final Verdict
Would I recommend this camera over a recent DX Nikon? No. Even my little Nikon D5100 from 2011 performs better in terms of pure image quality and produces much better colors. It even handles noise better. The D700 is not a bad camera, especially for one that’s over a decade old. But technology has moved on and made significant improvements every area.
Would I recommend this camera to someone looking to buy their first full-frame camera? Maybe. The prices of used full frame cameras are all dropping. For a few hundred dollars more, you could pick up a used Nikon D610 or Nikon D750 which would produce much, much better low-light images. So if you’re a night or low-light shooter, I’d lean towards no. If you shoot mostly in the daylight or at well-lit events, then go for it.
I definitely recommend the D700 for people like me, who fall into the “always wanted one” category and are willing to put up with — or just don’t care about — the limitations of using an older camera. If you just want one, I feel like that alone is a perfectly fine reason to get one.
“Renuncia Ricky” protest in Union Square. Nikon D700 and 35mm 1.8G DX (yes, I said DX!) in FX mode, ISO 200.
What are your thoughts on the Nikon D700? Leave a comment below if you are still using this camera in the year 2019 (or now, 2020) and tell me what you think about it. And consider following me on Instagram.
Photographing a political rally or political march can be both exciting and exhausting. In order to properly capture the event, you’ll essentially have to be a participant: you’ll assemble where the protestors assemble, listen to the speakers of the event, and go where the march goes. Here are some of my tips for covering a political march.
Get to the Staging Area Early
Try to show up about an hour before the event begins. There won’t be many people around aside from the organizers and the police setting up barricades. Introduce yourself and talk to the event organizers or event marshals if you can. They are usually helpful and can give you specific information about what is planned, the route, how many people they expect, what happens after the event is over and any last-minute changes to any of the above. They may even offer you a temporary press pass or “behind the scenes” access, depending on how large and serious the event is.
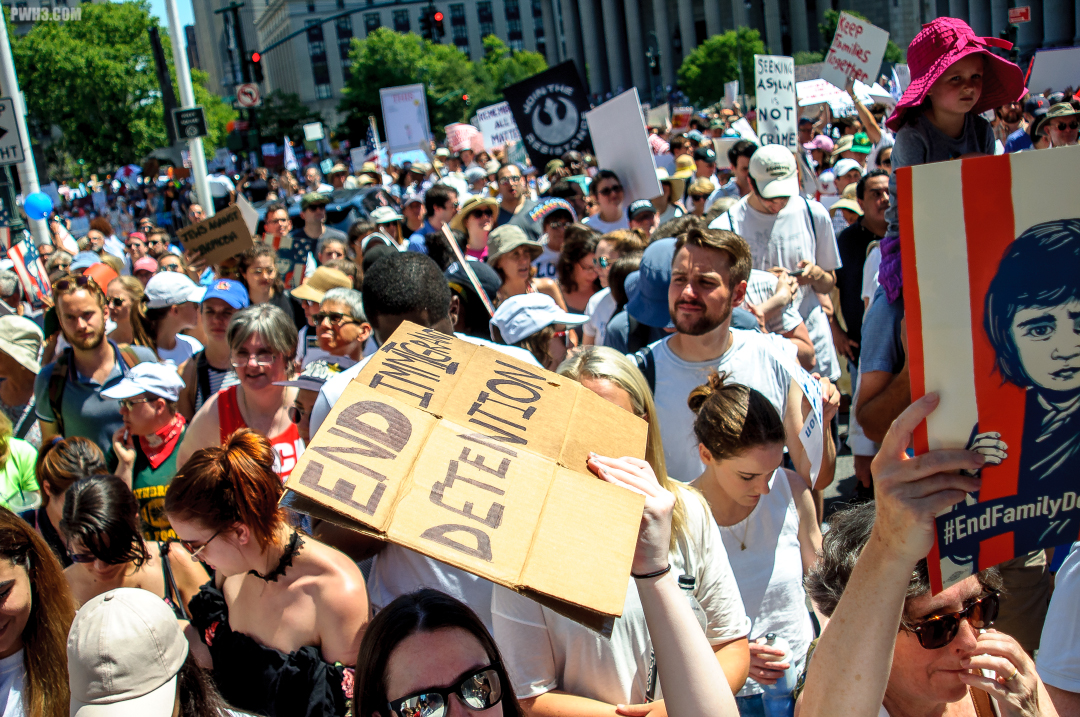
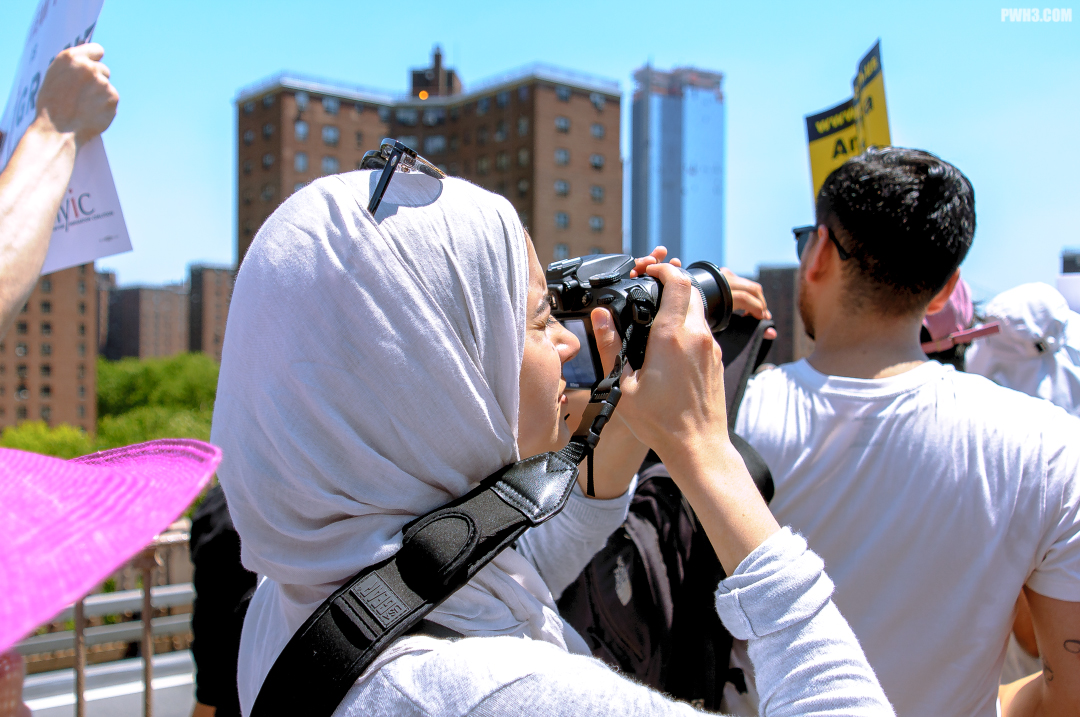
Families Belong Together March in NYC, June 30th, 2018
Wear Comfortable Shoes
You will be on your feet all day long. If it’s a march, you’ll have to walk with the protestors in order to capture everything. In almost every case, you’ll be walking on the streets, on concrete and pavement, and you’ll be moving around a lot in order to get the shots you need. Comfortable shoes will keep your feet from getting sore. I actually bought a pair of sneakers just for these types of events.
Families Belong Together March in NYC, June 30th, 2018
Be Prepared to Deal With the Weather
If it’s going to be a hot summer day, don’t forget to apply lots of sunblock, wear loose & lightweight clothing, and wear a hat. You will be out in the hot sun for several hours. If the event takes place in the winter, be sure to wear clothing that’s warm enough without being so bulky that you’re physically limited. No matter what the season, always bring water or a sports drink. You may not realize how dehydrated you can become while walking, moving around and shooting for hours, even in cold weather.
Families Belong Together March in NYC, June 30th, 2018
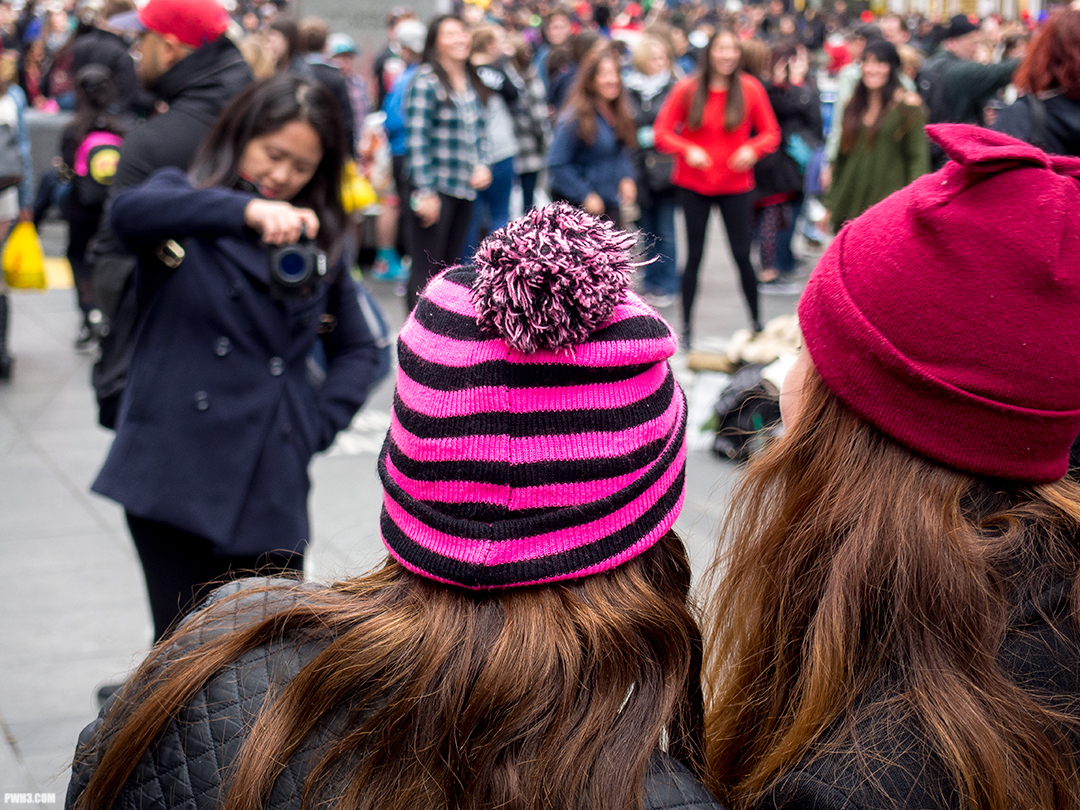
Ask People to Pose For You
The point of a political march or rally is to be seen and have one’s voice heard. People are usually more than happy to have their photo taken. While candid shots are great and should make up the bulk of your photos, a few posed shots can really help to capture the feel of the event and humanize it.
Lady Liberty at the Families Belong Together March in NYC, June 30th, 2018
Look Out For Any Trouble
A political issue that inspires people so much that they assemble to rally and march will probably bring out a lot of emotion in them while they’re on the streets. Sometimes these emotions can get out of control. As a photographer, you’re there to capture what happens, but be sure to keep yourself (and your gear) safe. If someone seems a bit too aggressive for your tastes, quietly move away from them. In addition, some marches tend to bring out opposition protestors, which can lead to open conflict. Be cautious of situations like this, since they can spiral out of control quickly. If anyone is causing real trouble (such as threatening violence or throwing objects) tell an event marshal or a police officer.
Donald Trump appears at the Families Belong Together March in NYC, June 30th, 2018
Be Prepared to Be Jostled Around
You’ll be among a large crowd with active and fired up people, so it can’t be helped if people accidentally bump into you, step on your feet, or knock into you from behind (and you might be guilty of accidentally doing it too!) It’s nothing personal and not a big deal. Just be mindful of your photography equipment so it doesn’t get damaged. Keep your camera close to your body and don’t let it swing around.
30,000 people attended the Families Belong Together March in NYC, June 30th, 2018
Use a Zoom Lens
This is one of the few times you’ll hear me say not to bother with prime lenses. Instead, use a zoom with a good range (24mm to 120mm is my favorite). You’ll often need to go from wide to close-up very quickly, and because of the crowd you may not always be in the position to get the shot you want. You will often be too far away, and the crowd will make it impossible to “zoom with your feet” with a prime lens. You also won’t need to worry about how bright the aperture is; these events always start in the morning and typically finish by late afternoon.
Families Belong Together March in NYC, June 30th, 2018
These are my tips for photographing a political march or a rally. If you have a question or any other tips, feel free to leave a comment below or contact me on Instagram.
All photos in this article were taken with a Nikon D90 and an old Nikkor 24-120mm f3.5-5.6D Streetsweeper lens from the year 1996 (my favorite Nikon lens of all time).
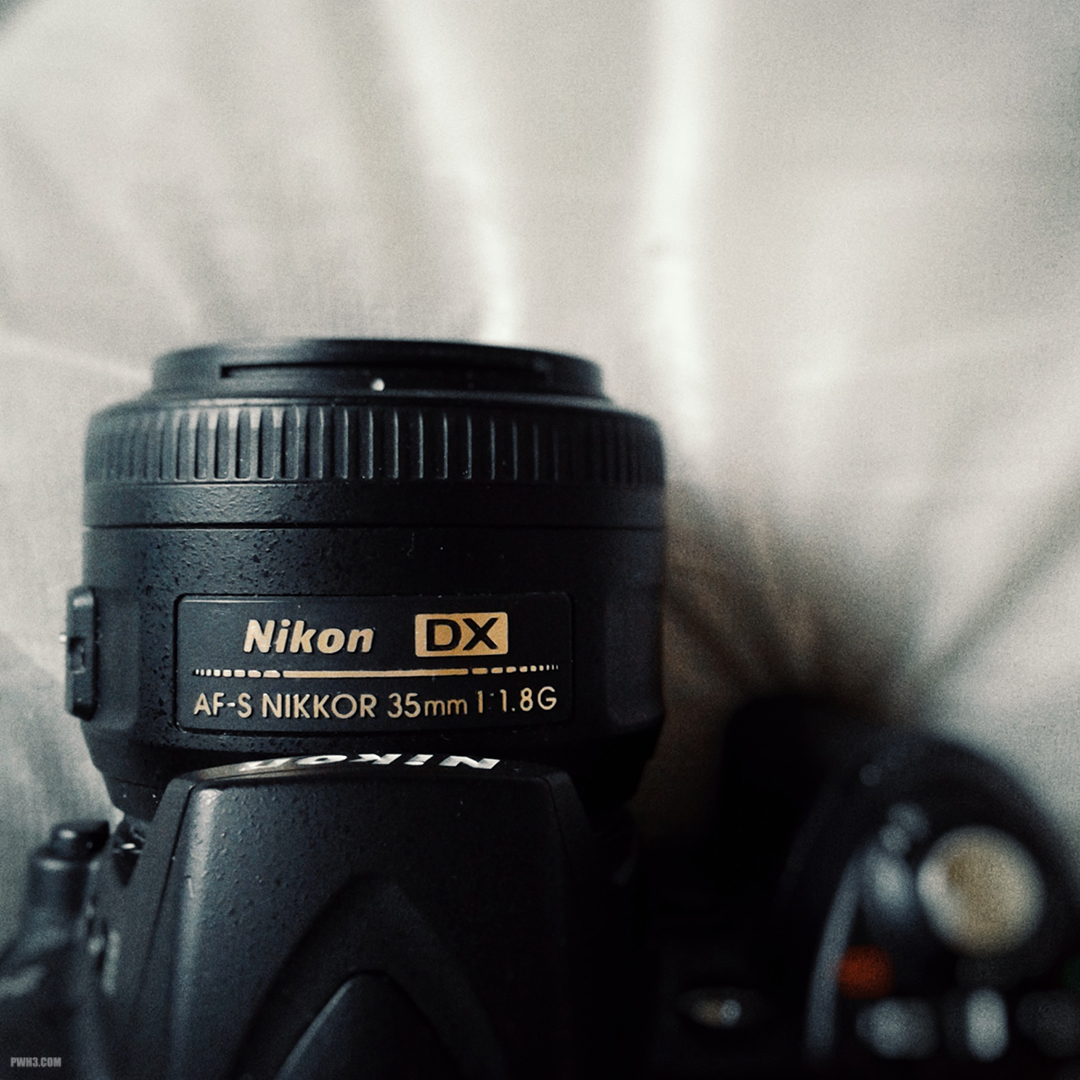
Most beginning photographers will have a crop-sensor camera, such as the Nikon D3300 that I recommended in the article. Without getting crazy technical here, using a crop-sensor camera always means that the millimeter number on the lens (in this case 35mm) is multiplied by 1.5. That means that this lens will give you the rough equivalent of a classic 50mm field of view.
The Nikon 35mm f1.8G DX lens looking all sexy on my bed. Photo taken with a Samsung Tablet.
Sharp, Light and Small
The Nikon 35mm is a lightweight lens. It’s perfect for carrying around all day long and using in a variety of situations. It’s useful for photos of people, close-up shots of objects, and even landscapes. The lens is very sharp and delivers images with quite a bit of detail.
Keep in mind that the lens is a prime lens with a fixed focal length – meaning that you can’t zoom with it. If you need to get closer to your subject, you’ll have to actually walk towards it!
Yes, you can fit everything in the shot even though it’s not a zoom lens!
Cheap and Popular
The lens is also inexpensive. Brand new, it shouldn’t cost you more than $200 from any major internet camera retailer.
Even better, this lens is so popular that one of your Nikon-shooting friends probably owns one, and may let you try it out – at least for a few shots.
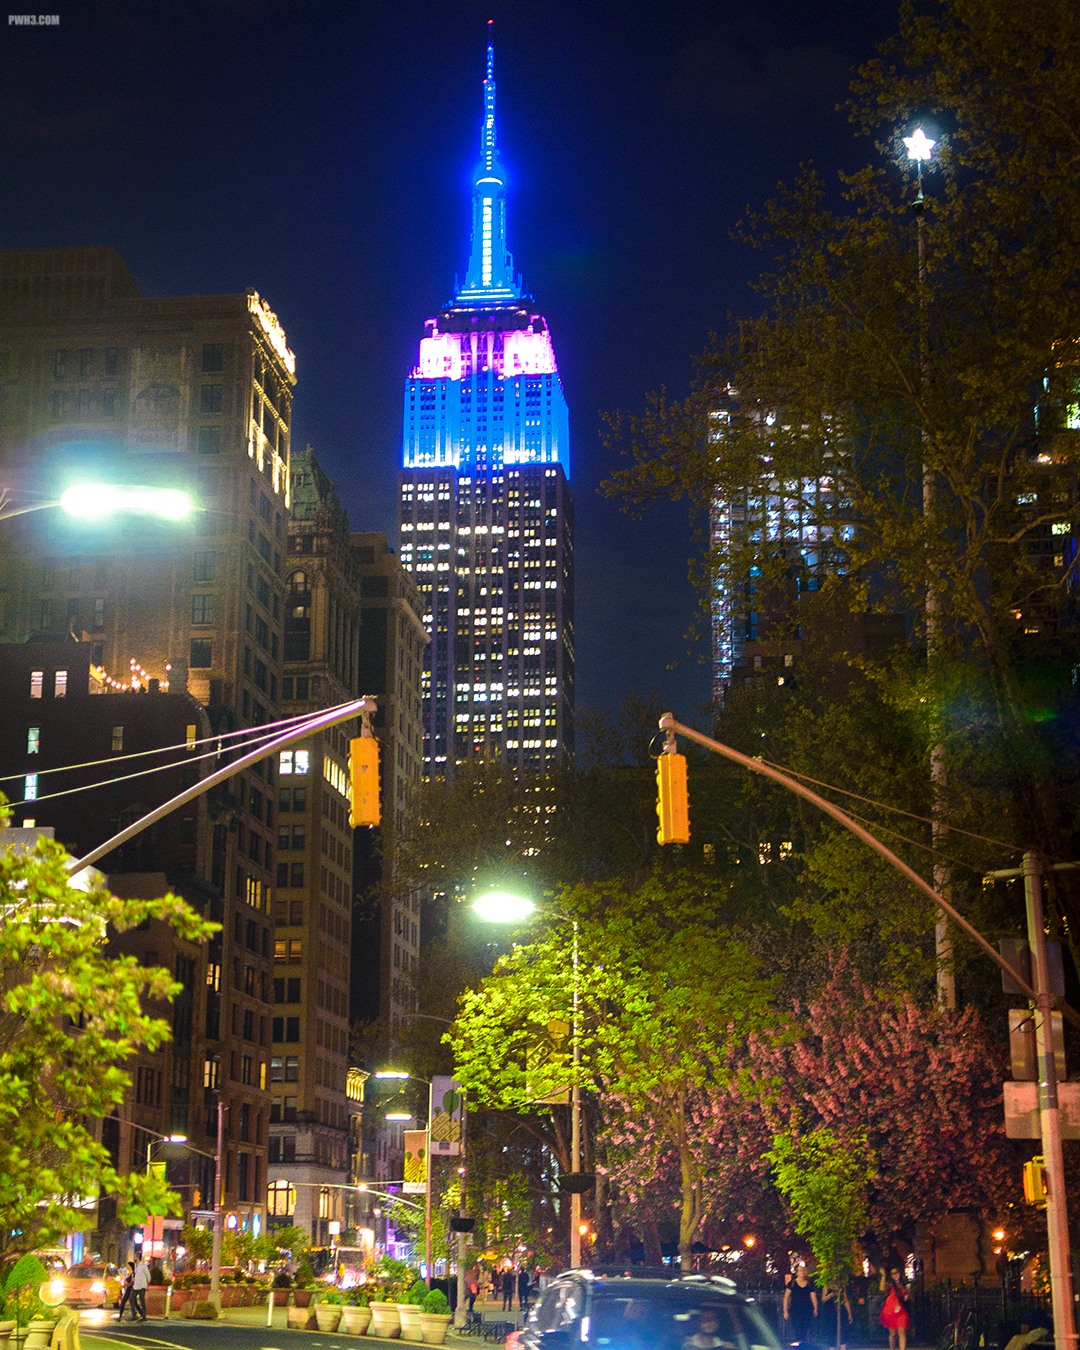
Good for Low Light and Night Shooting
The f-number of a lens tells you how much light the lens lets in, or how “bright” it is. Once again, I won’t get too technical here, but the lower the f-number, the better a lens will perform in low light situations or at night. This lens has an f-number of 1.8, which is a very low number (for comparison, a typical zoom lens has an f-number of 3.5, which is why most zoom lenses are not so good for low-light shooting).
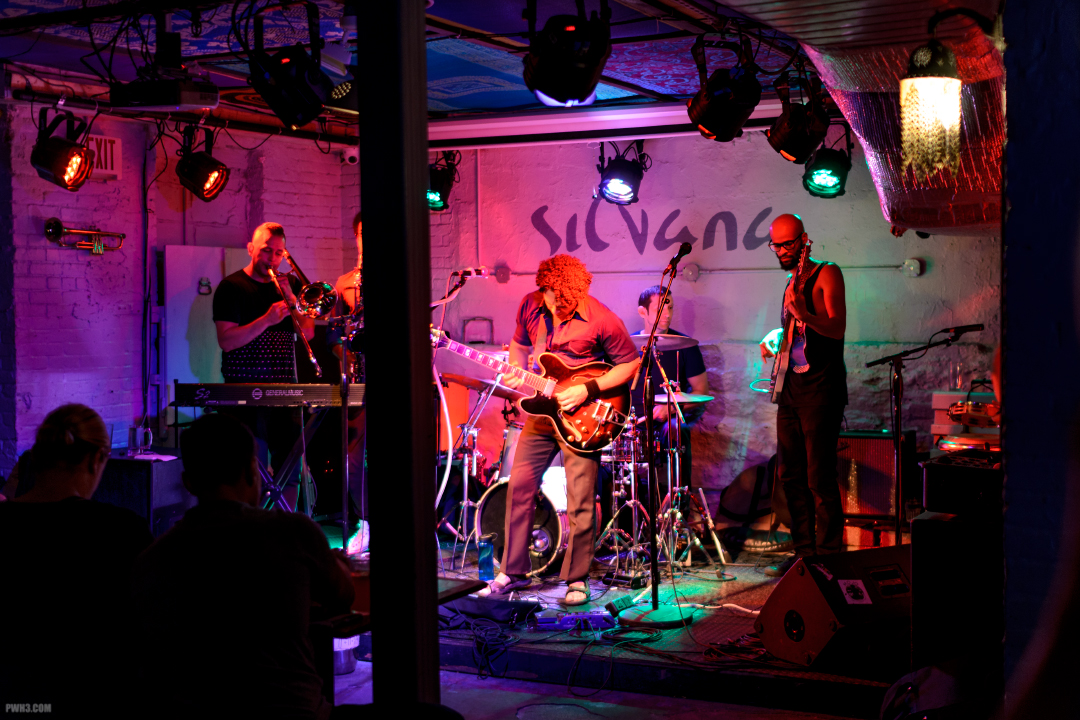
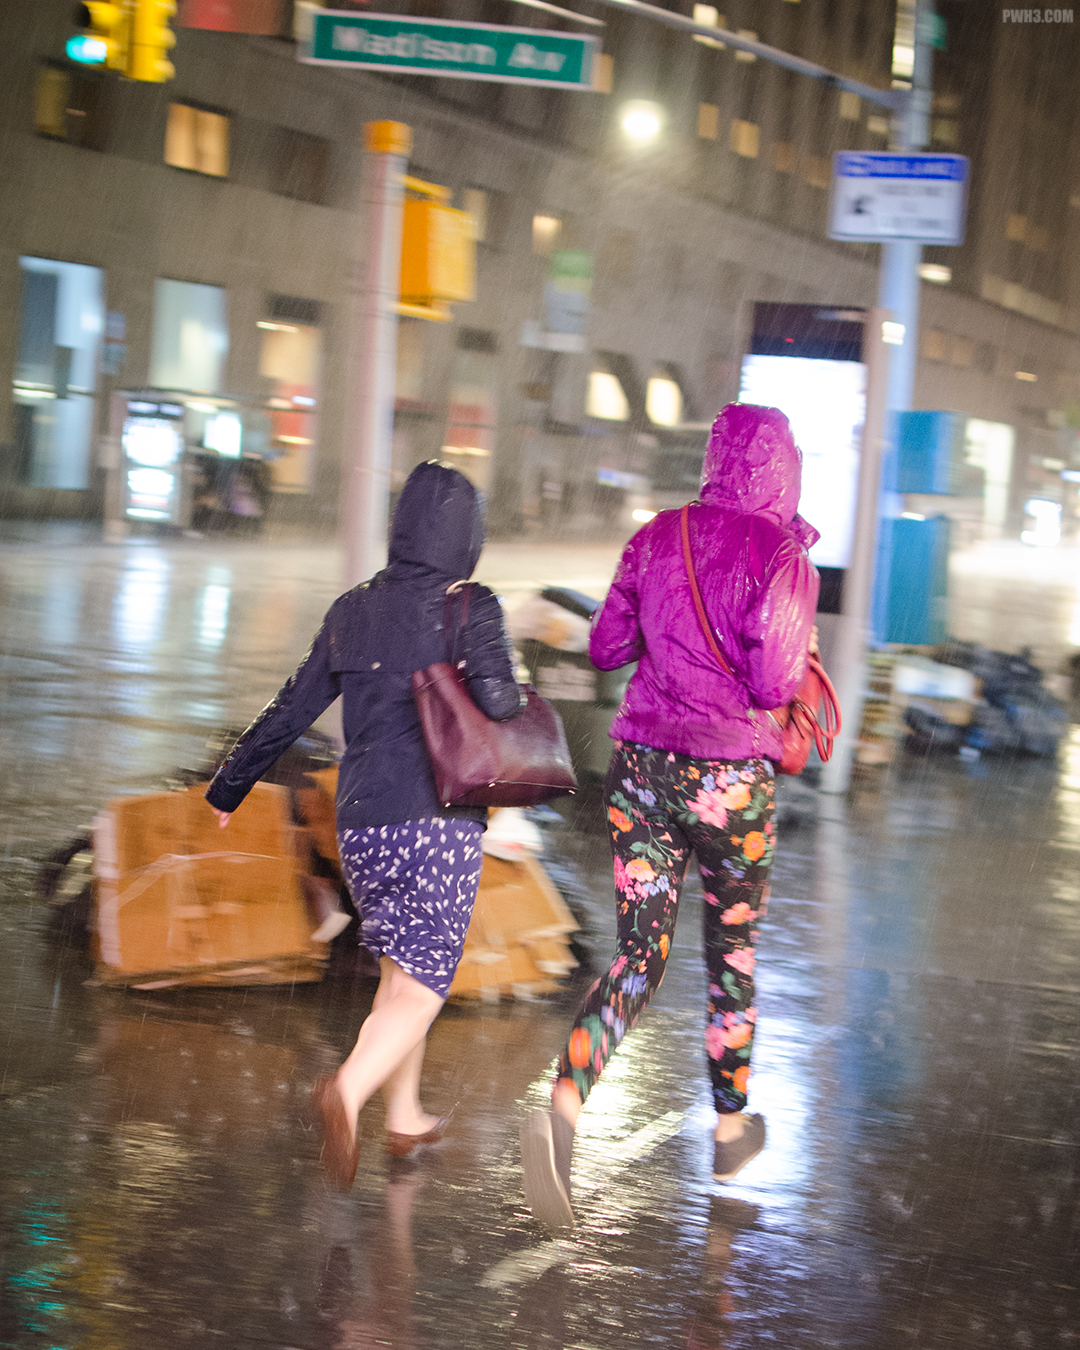
What this all means is you can finally shoot clear, detailed pictures of your friends drinking in dimly-lit bars, or capture scenes on the streets at night that don’t look dark and grainy.
Were they running from the rain – or from me & my camera?
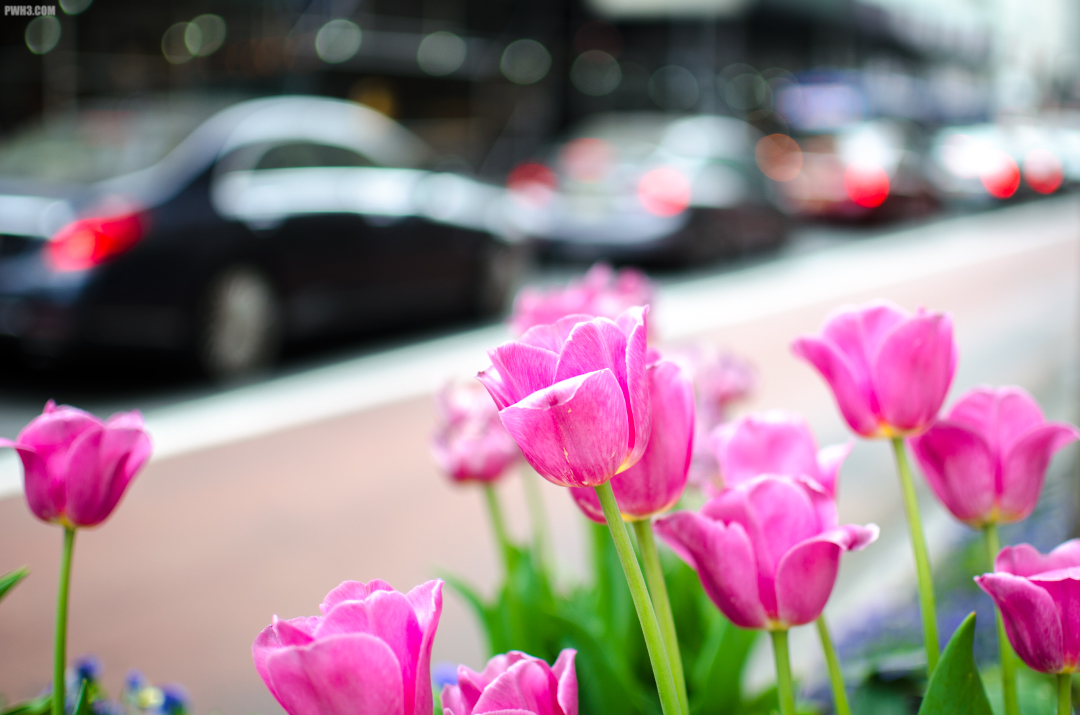
Blurred Background
Another great aspect of this lens is the ability to shoot photos with that “blurred background” look that everyone loves and craves. This makes the lens useful for casual portraits, or to isolate a subject that’s in front of a distracting background, such as a busy street.
A blurry bunch of flowers, just for you.
Nikon created a gem with this lens and even more amazing is how inexpensive it is to own. I highly recommend you go buy (or try) the Nikon 35mm f1.8G DX. Do you have this lens and enjoy shooting with it? Or are you a beginner that has more questions about it? Leave a comment below or feel free to message me on Instagram.
All photos in this article were taken with a Nikon D5100 and Nikon 35mm f1.8G DX lens. Except for the photo of the lens itself, which was taken with a Samsung Tablet & Snapseed.
I really like using older cameras and gear and trying to squeeze the best results I can out of them. A while ago I picked up a used Nikon D90 as a “backup” camera (as if I need any more cameras). What’s it like using a camera that came on to the market in 2008? Honestly, not that bad.
If you shoot RAW like I’ve suggested, you can get some pretty good results out of a camera that’s considered staggeringly obsolete in today’s fast-moving world of technology.
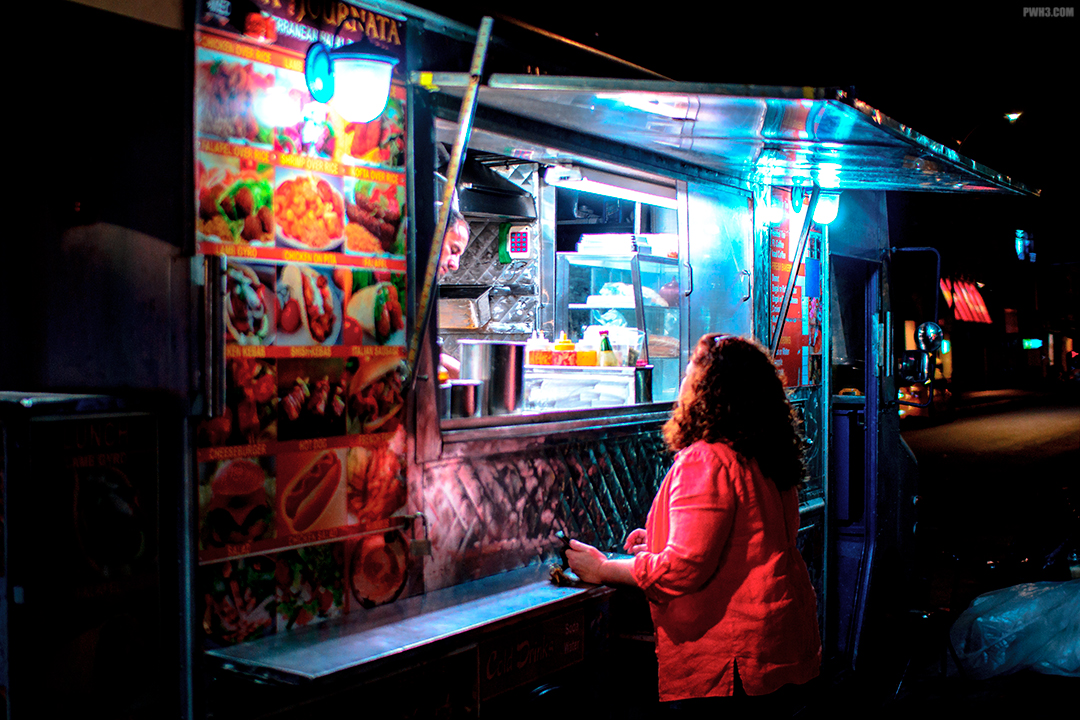
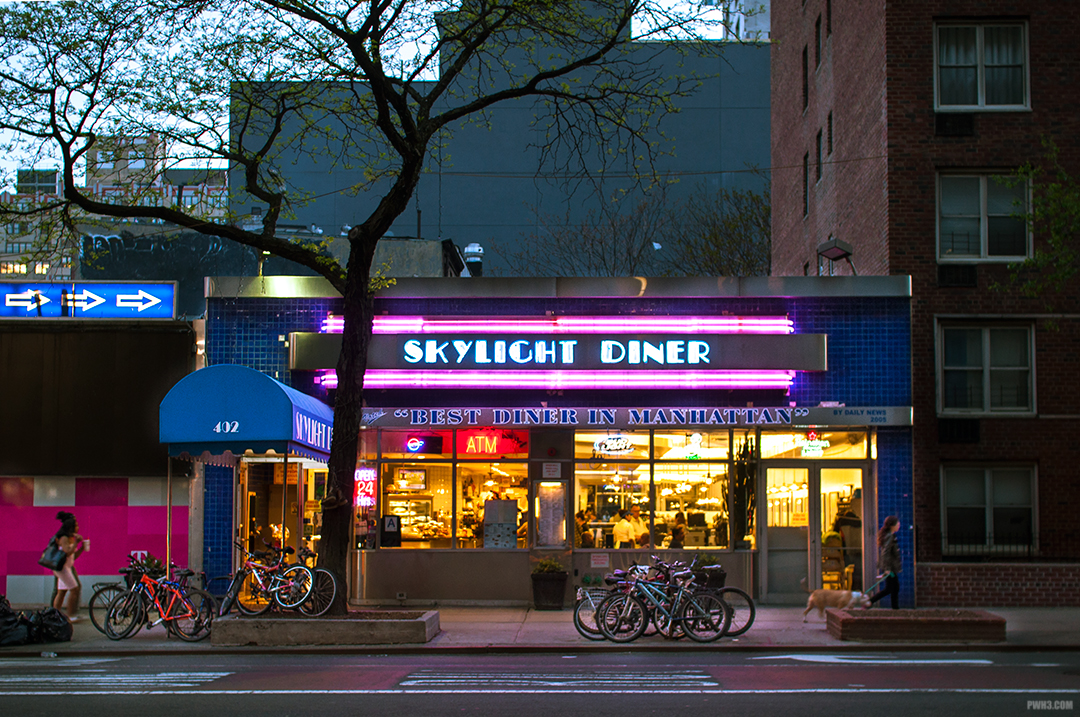
Food, glorious food.
The D90 has a built-in focus motor, which is great because you can use almost any Nikon or third-party lens on it. I typically pair it with an old Sigma 30mm f1.4 DC HSM, a quirky lens that sometimes doesn’t focus on anything at all, but renders beautifully when it does.
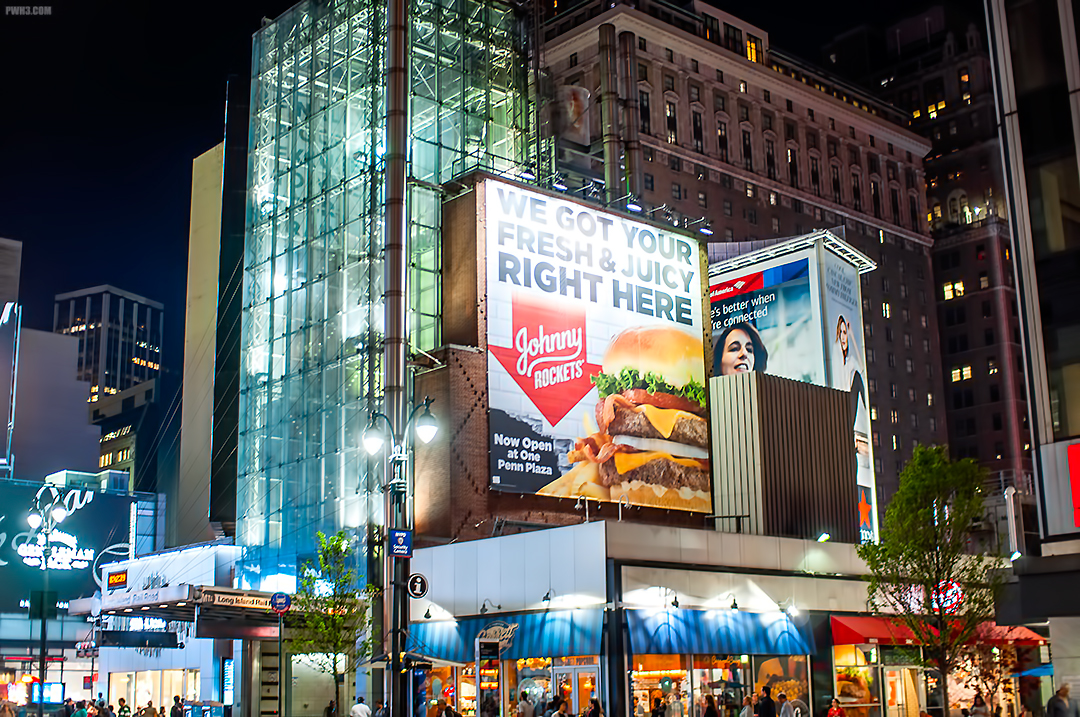
Oh, you got my fresh and juicy right here? Why I oughta…
Another great thing about the D90 is the controls and handling. It has dual-dials and many buttons, making using the camera in manual mode very easy. You’ll probably want to shoot in manual mode, pick the lowest shutter speed you find acceptable, and keep your ISO under 800 to get the best results.
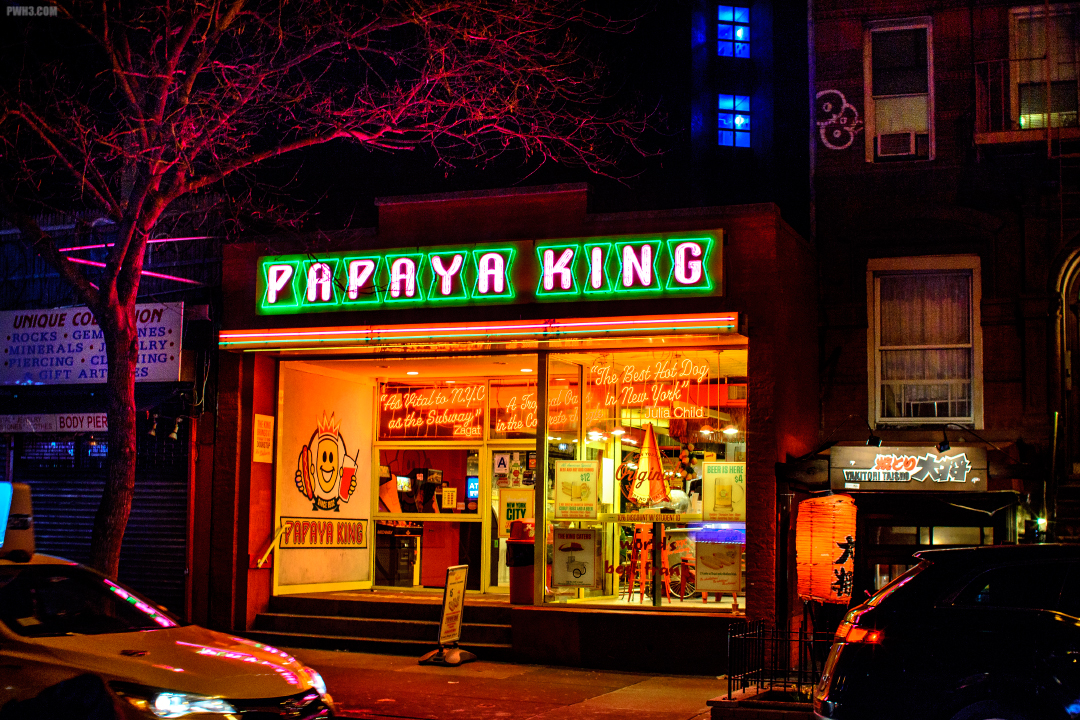
See a pattern to these photos? I guess I was hungry that night.
The 12.3 megapixel images definitely have a distinct “look” to them, and that’s due to a lack of dynamic range and what I find to be duller colors in general. With a good amount of post-processing effort on the RAW files, particularly in terms of color correction, you can bring them almost up to par with more modern cameras. On the other hand, it’s very easy to get a lo-fi “film look” out of the images if that’s what you’re aiming for.
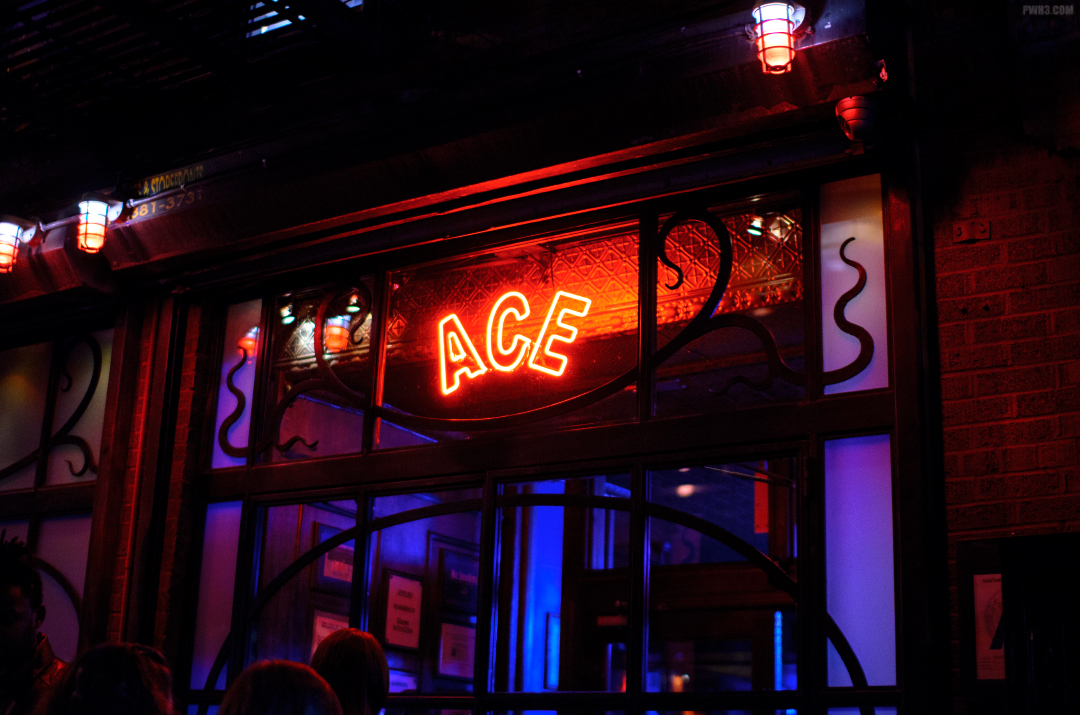
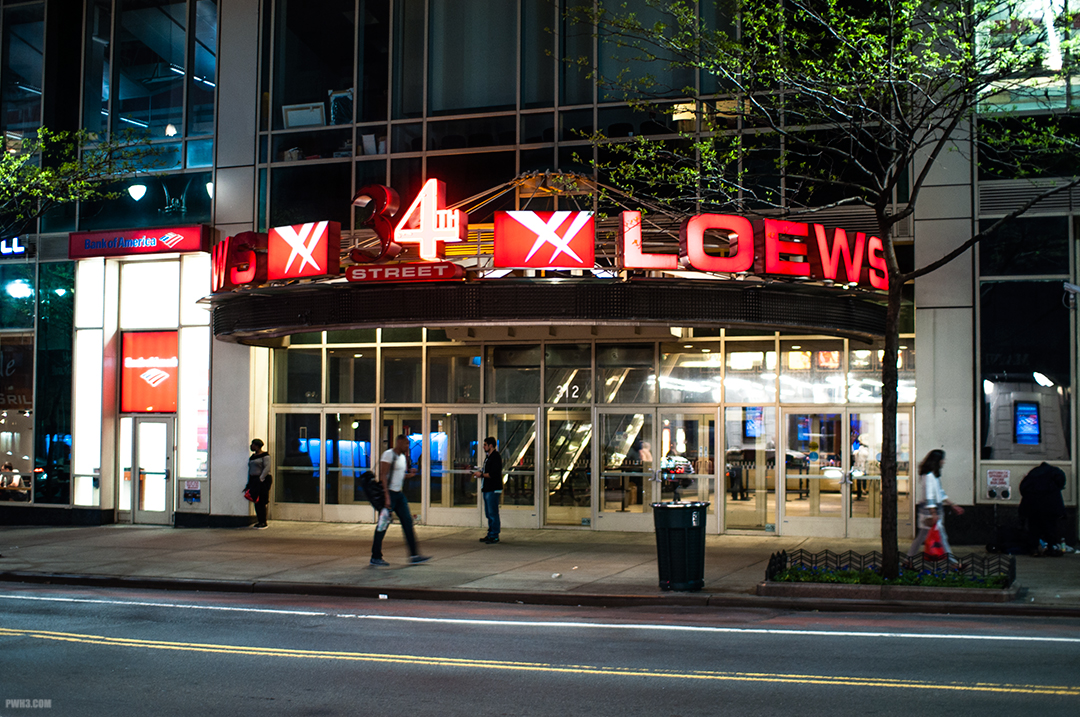
Okay, not food-related. Then again, there is popcorn in there…
One last interesting thing about the D90 is that it seems to currently be very popular in other countries. Perhaps this is due to a lack of availability of other models at reasonable prices. I’m just guessing, I don’t really know. But if you hop on the #nikond90 or #d90 tags on Instagram, you’ll likely be treated to some very cool photographic scenes from all over the world.
Would I recommend that you run out and buy a D90? Honestly, no. You’ll get way better images out of a used entry level DSLR like a Nikon D3300 for around the same amount of money. Even with a lot of post-processing, the D90 images still won’t look quite as good as those from a newer camera, particularly when it comes to high-ISO shots.
However, if you’re looking for a creative challenge, really are looking for a backup camera that you won’t mind ruining, or just want to mess around with old technology, by all means get a D90 and go out and shoot with it.
The photos in this story were taken with a Nikon D90 and Sigma 30mm f1.4 DC HSM lens.
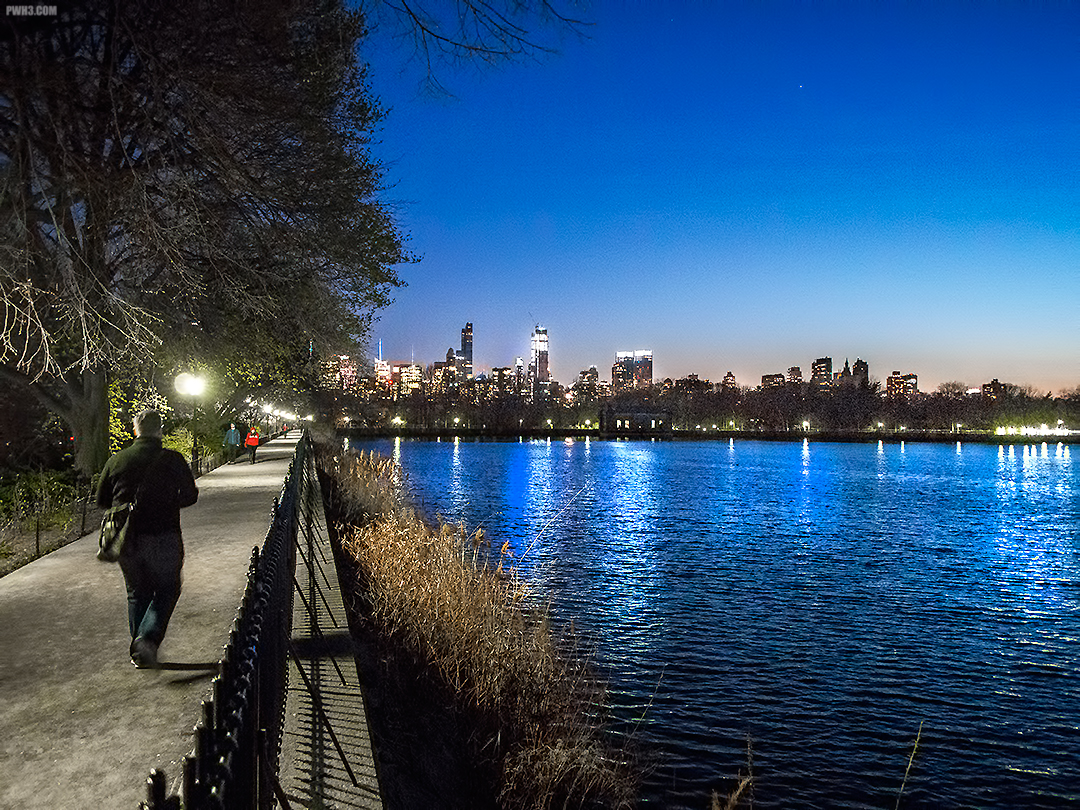
Real New Yorkers simply call it the Central Park Reservoir, but officially it’s called The Jacqueline Kennedy Onassis Reservoir. The Reservoir stretches from 86th to 96th street, and from 5th avenue to Central Park West.
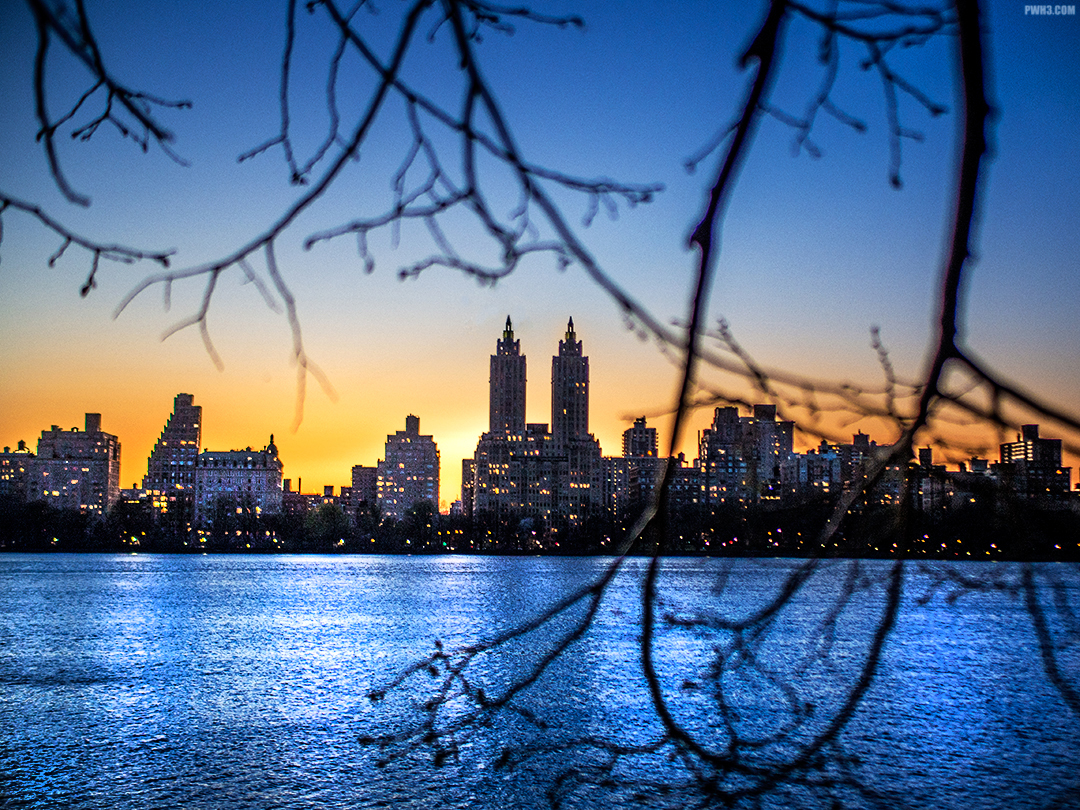
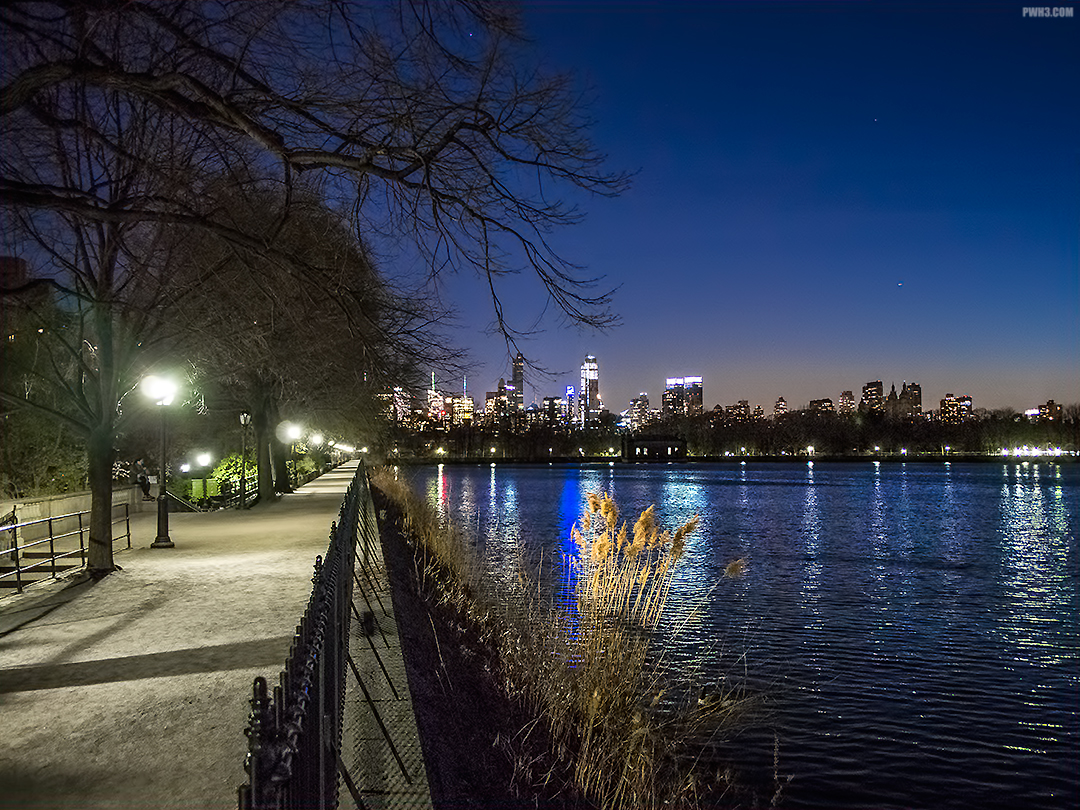
It’s going to be a long walk.
I wanted a specific shot of some particular Upper West Side buildings, so I entered Central Park at 90th street and 5th avenue and walked up a few steps to the gate surrounding the Reservoir.
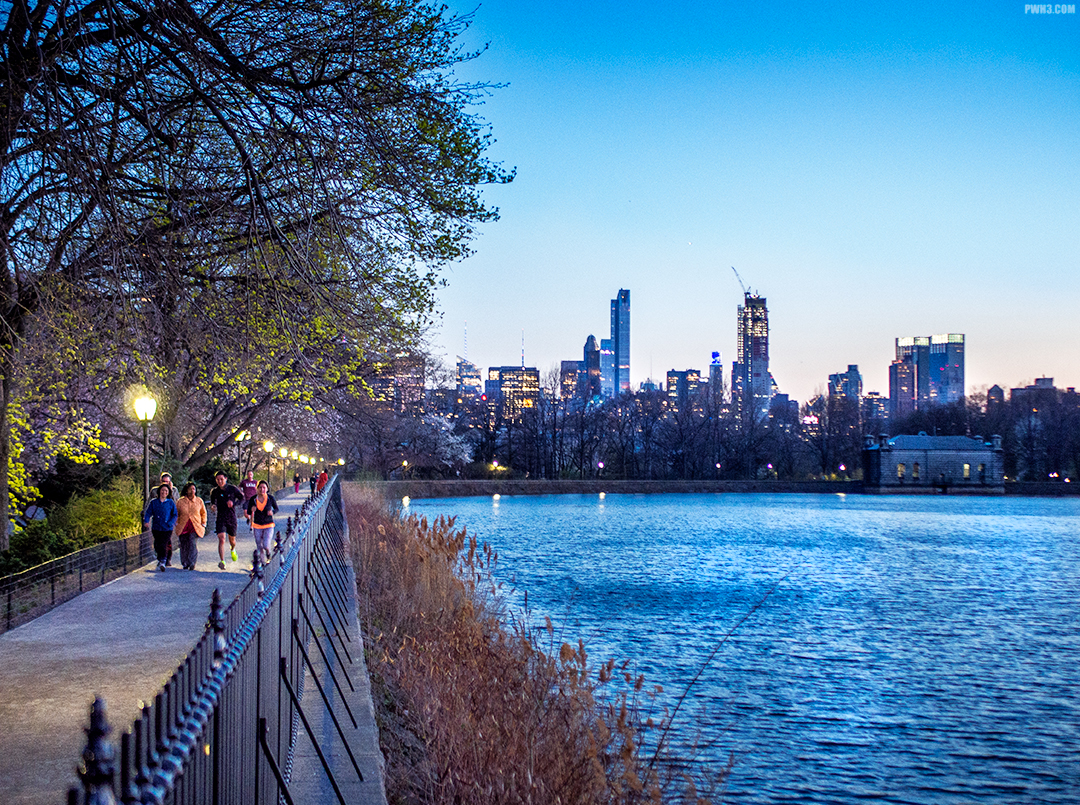
Whenever I think of the Reservoir, I’m reminded of the movie Marathon Man with Dustin Hoffman. To this day, there is a constant stream of joggers around the Reservoir, and the path around it is a sort of loose, sandy gravel to facilitate running. I wonder how many of those joggers have seen that movie.
Joggers — just like in the movies!
I didn’t know the Reservoir was decommissioned in 1993. That explains the lack of security around it and the low gate. I assume that if the Reservoir did supply New York City with water, no one would be allowed anywhere near it in this day & age.
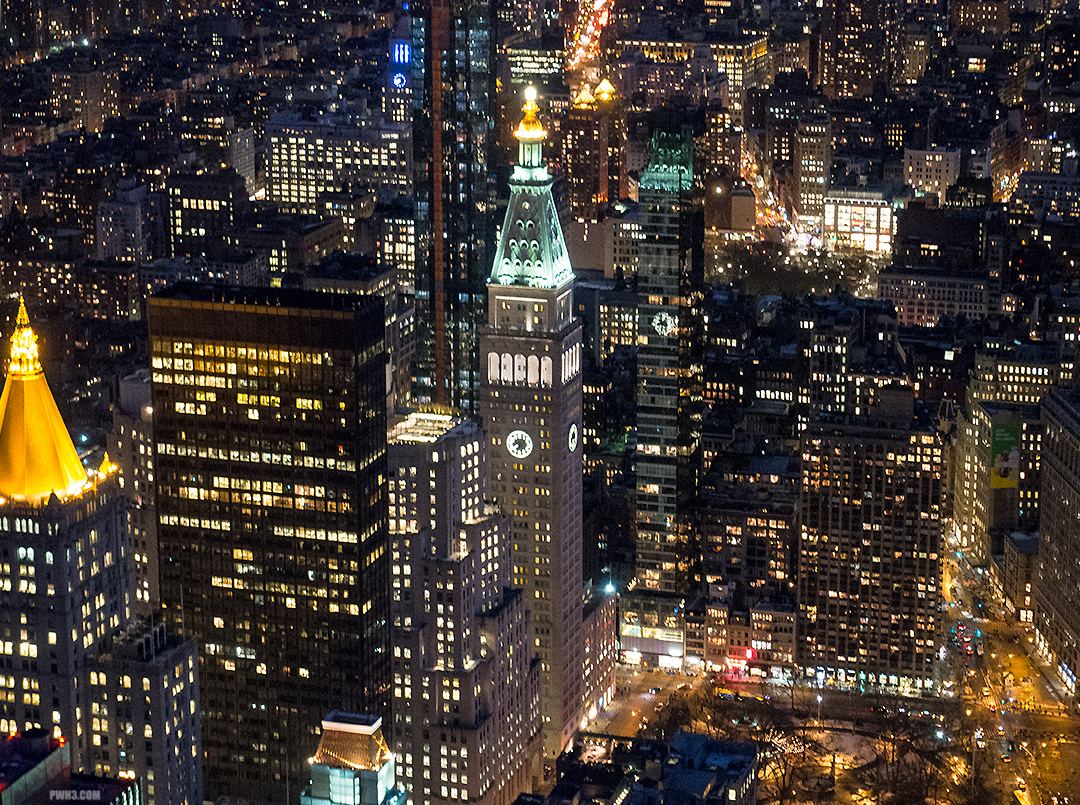
Times Square is waaay down there.
The Central Park Reservoir is great to visit and watch the sunset on a nice day, or to jog around it if that’s your thing. There are many great views of the city and photographic opportunities to be had there.
The photos in this story were taken with an Olympus EM-10 and Lumix 14mm f2.5 & Lumix 25mm f1.7 lenses.
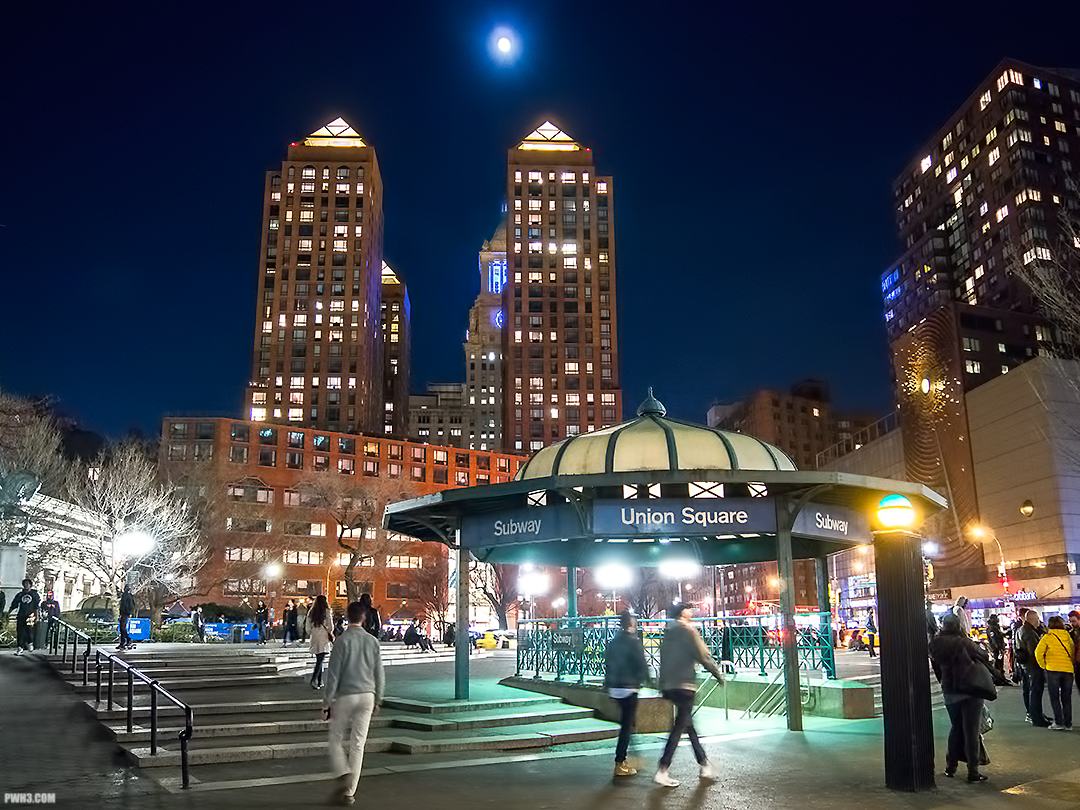
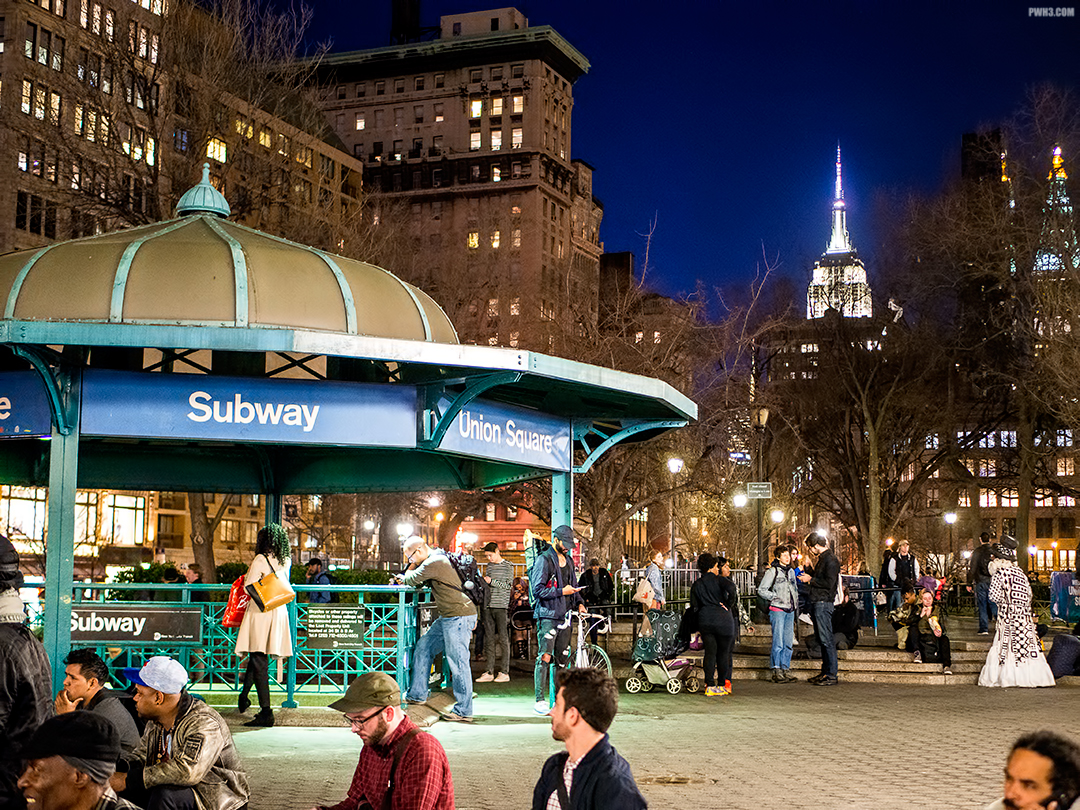
Union Square is one of my favorite places in New York City. It’s often the starting point for many interesting nights out. Union Square is also a great place to just sit down and relax — some nights, it’s the only destination.
A typical night in Union Square.
In the warmer weather you’ll find young people playing hacky sack or soccer. You’ll see skateboarders practicing kickflips and ollies, while street performers dance for dollars. There’s even a freestyle rap group that meets up there on Friday nights. And let’s not forget the chess players. Drop in a for a friendly game.
It’s all very friendly. Maybe.
In practical terms, Union Square is a major transportation hub. You can catch many subway trains here (4, 5, 6, L, Q, N, W and R). The L train can connect you to the 8th Avenue Line, so you’ll be able to catch the A, C, E after a quick ride.
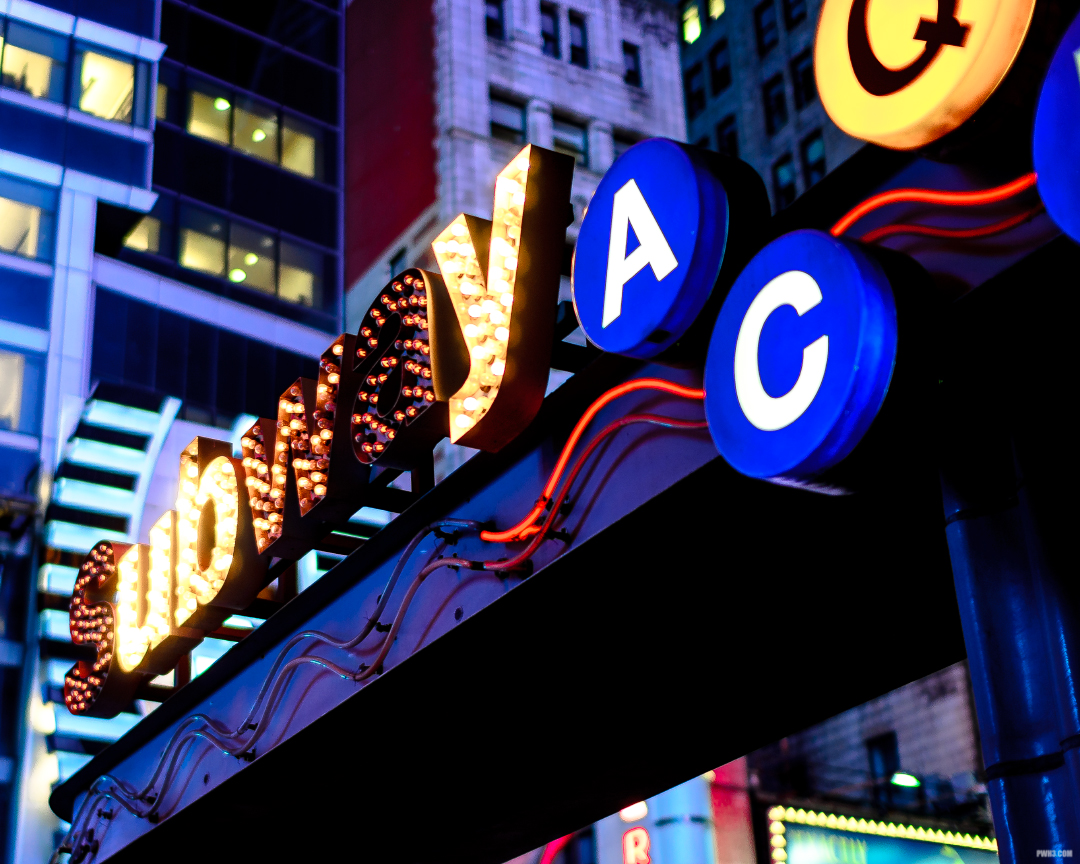
Enter the subway. Or just hang around it.
Union Square Park stretches from Broadway to 4 Ave and from East 14th street to East 17th street. You can access the subway from many entrances in the park.
The photos in this story were taken with an Olympus EM-10 and various lenses.
The kit lens is the inexpensive zoom lens that comes with a new DSLR or mirrorless camera. Usually it’s made of plastic with a plastic mount. Years ago, kit lenses used to be very badly built and of poor optical quality. I have one old kit lens that was difficult to zoom in and out (it would become hard to turn and even get stuck at certain points). Even worse, it had optical problems, leaving one area of the photo very blurry while the rest of the photo was perfectly sharp. Kit lenses today are both built better and much better optically. Here are more good points about kit lenses:
They Are Cheap
Usually when you buy a new camera, the kit lens is around $100. For that relatively low outlay of cash, you get a lens that probably has very fast autofocus and may even have image stabilization built into it, as is the case with Nikon kit lenses. Due to its low cost, it’s less of a worry bringing it to places where you may not want to risk a more expensive lens.
Kit lenses make me feel safer riding the NYC subway.
They Are Versatile
Because they cover such a big focal range — allowing you to zoom from a wide shot to a close up shot and anything in between — they’re great for a lot of photographic situations. They are especially useful while traveling or at an event.
Photobombing, kit lens style.
They Are Lightweight and Small
Since they are small and mostly made from plastic, they are very light compared to more expensive lenses, which will likely be larger and made with metal. Many of the newest kit lenses are also designed to basically retract into themselves, becoming more compact for storage or for stowing in a camera bag.
They Are Sharp & Can Focus Closely
Yes, it’s true. The newer kit lenses are surprisingly sharp with pretty good image quality. I have also found that many can focus very close to the subject, which is useful for photographing objects like toys or food.
Late night with the kit lens.
Downsides
Sounds great, right? So why would you need any other lens? Well, as good as the kit lens may be, more expensive lenses will still be better optically. There really is a difference there. If you’re a beginner you may not be able to tell, or it may not matter to you right now. Later on in your photographic journey, it might become important.
Another downside with kit lenses is that they aren’t the best choice for indoor photography or night photography. However, I have done both of those types of photography with a kit lens — all of the photos in this article were taken with a kit lens, including the night shots.
Finally, every new photographer wants to experiment with that creamy “blurred background” look. While you can achieve it somewhat with a kit lens under the right conditions, it’s not the ideal lens for it.
Don’t worry about any of that right now, though. Go out and shoot with your kit lens. It’s probably a lot better than you think and you will get some great images out of it.
All photos in this story were taken with an Olympus EM-10 and the Olympus 14-42 RII kit lens.